Yes, I want to know how to level my fridge. Don’t leave the house, friend, since this piece is for you. The efficiency of your refrigerator will improve dramatically if you level it, and your food and other items stored there will remain neatly organized. It is probable that mishaps may occur if you allow the machine to stand in an untidy posture. Those are the steps you’ll take, so here they are:
- How To Reset The Water Filter Light On Whirlpool Fridge? Easy Step-by-step Guide
- What Causes A Fridge To Leak Water? A Helpful Guide
- Where Can I Buy A Red Bull Mini Fridge? Best Guide
- How Wide Is A Side By Side Fridge? Advantages and Disadvantages Of A Side-By-Side Fridge
- How To Adjust Samsung Fridge Door? Step-by-Step Tutorial
It begins by dismantling the grille and then locating and using the level tool to confirm the fridge’s balance before reinstalling it.
Bạn đang xem: How To Level Fridge Balancing? Step by Step Instructions
However, this is impossible without the aid of a few tools, which we’ll go over in more detail in the next sections. Regardless, always remember to take everything out of the fridge before we start so that we can work quickly. With that out of the way, let’s explore how to level a refrigerator.
Why is it important to level your refrigerator?
Some of the following concerns may arise if a refrigerator is not leveled properly and/or if the doors are not properly aligned:
- Doors that won’t close or seal all the way
- A buildup of frost or issues with moisture
- Fluctuations in air temperature
- The doors were unable to be correctly aligned
- An incorrectly functioning door switch.
- Noise or Vibration?
Leveling My Fridge With 4 Easy Steps
We know you’re already intrigued about how to level a fridge after reading this introduction. However, you’ll need a few things to get you started before we get started. The following is a list of them:
- Screwdriver,
- Wrench,
- An Instructional Manual
- The leveling tool
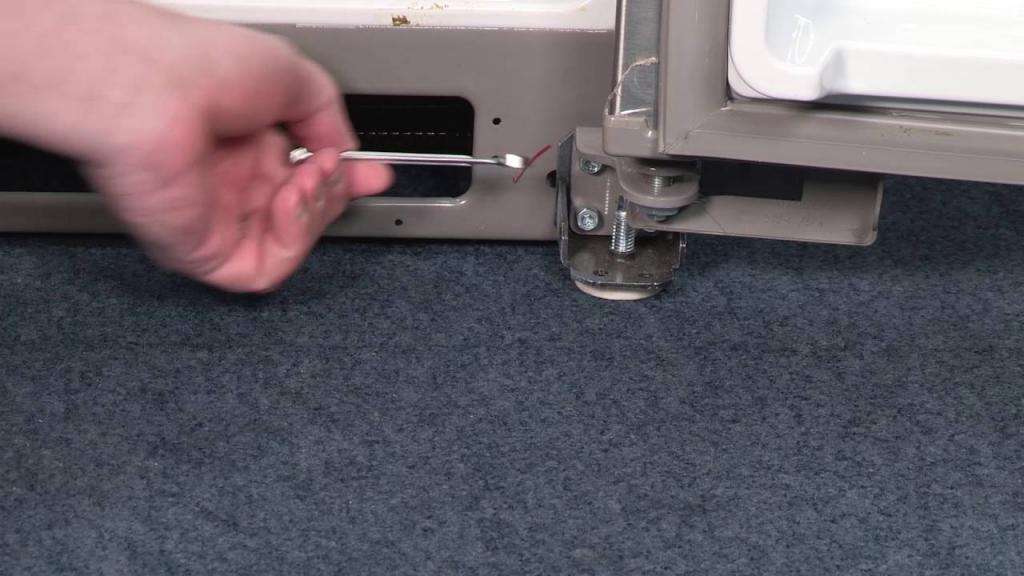
Step #1. Remove the grille
Some versions have a grill or kick plate that must be removed in order to level the fridge. With this, locate the screws and remove them with a screwdriver. On the kick plate’s front, there are a few screws for you to find. In some cases, you might have to open the doors of your fridge to remove the screws. Remove the grille or kick plate by carefully moving it away from you afterward.
If you’re unsure about how to remove the grille from your refrigerator, consult the instructions that came with the appliance. The grille can be put away once it has been removed.
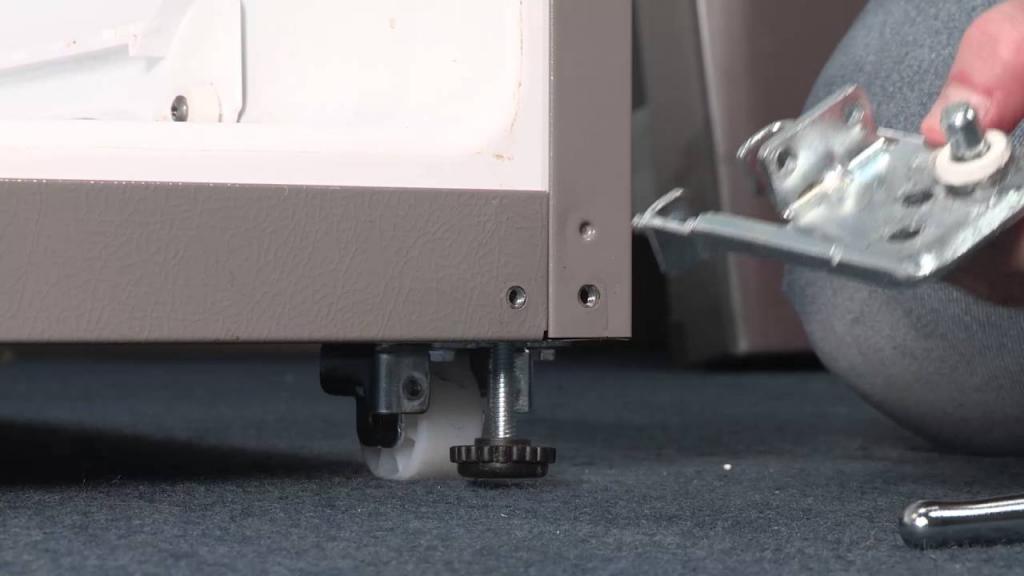
Step #2. Locate the leveling features
The leveling features of your refrigerator can be found after you’ve removed the grille or kick plate.
Legs or rollers may be used to help level some refrigerators.
The grille’s leveling features can now be found on the grille’s rear, front, or side. If you’re looking for further specifics, consult the owner’s manual for your refrigerator. Once you’ve located the fridge’s leveling features, proceed to the next step to make the necessary adjustments.
Step #3. Using the level tool
You’ll be altering the height and location of your fridge by using the leveling features that are located beneath the refrigerator. Using the level tool that I requested you to obtain will also be necessary. In order to determine if a side of your fridge is tilted, you can lay the level tool on top of it.
You can use the wrench to adjust the height of the part of your refrigerator that doesn’t follow the balance of the rest of the unit using the leveling functions. Also, make sure your fridge’s leveling features are the right size. It would also be helpful if you had a wrench that could be used on any type of material.
For refrigerators with height-adjustable rollers, a screwdriver can be used to make the necessary adjustments. Right-handed people can crank the wrench to reduce the height of the fridge’s leveling legs. If you prefer, you can turn it to the left to enlarge it.
After adjusting your fridge, be sure to secure all of the leveling elements that you had touched. This is a precaution to make sure your fridge is stable and won’t fall over.
Step #4. Check the fridge if it is balanced well
Xem thêm : How To Clean Fridge Filter? Step-by-Step Tutorial
Once you’ve completed adjusting the height of your refrigerator’s leveling features, double-check to make sure everything is in its proper place. You can notice the bubble if the refrigerator tilts to the right or left with your level tool on top of it.
Your fridge is now back to normal if you’ve noticed that the bubble is in the middle. Otherwise, utilize the leveling options on your level tool to adjust the tilt. Once again, adjust them, and then check the bubble’s level to see if it’s balanced.
You should also check to see if your doors are balanced.
How Often Should I Clean My Fridge?
Always keep an eye on the condition of your fridge. To maintain your refrigerator smelling and looking its best, follow our recommended cleaning regimen.
Immediately
It is imperative that you wash the exterior of your condiment containers, such as jam or salsa jars, as well as condiment bottles like ketchup. Because of this, your refrigerator stays clean. Preventing sticky patches by wiping up spills immediately is another good idea.
Once a Week
Remove any food that is close to decaying from the fridge and store it in a cool, dry place. Is the milk about to expire? Is there a stash of stale yogurt containers in the back? Before they start to stink up your fridge, throw them out.
Every 2 Months
Baking soda is a cheap and effective way to get rid of scents in the refrigerator. Keep track of the date by scribbling it on the box. Baking soda’s odor-absorbing qualities decline after about two months, so it’s important to refresh it on a regular basis.
Every 3 to 4 Months
Make sure you don’t miss anything vital when it comes to deep-cleaning the fridge:
- Empty the fridge and get rid of anything that you won’t use.
- The meat and vegetable drawers should be removed from the fridge.
- Warm soapy water can be used to clean your refrigerator’s shelves and internal walls.
- Dish soap and warm water are all you need to clean the drawers in the sink.
- To eliminate any soap residue, use a clean, damp rag to wipe off all surfaces.
- Put everything back in the fridge when it has been cleaned and dried with a clean cloth.
- A freshly opened box of baking soda is a great way to keep odors at bay in the kitchen.
- Wipe off the exterior of your refrigerator with a soapy cloth after you’ve closed the door. The best way to get rid of fingerprints and grime is by using a stainless steel spray.
Every 6 Months
The grille at the bottom of the fridge should be cleaned twice a year with a vacuum cleaner and brush attachment. The condenser’s efficiency is boosted by around 3% to 5% as a result of this.
How To Maintain A Refrigerator: Top 10 Tips
1. Don’t Forget To Close The Refrigerator’s Door Quickly
This may seem like a no-brainer, but it cannot be overstated. Refrigerators work harder to chill items down when the door is open for a lengthy period of time. This results in higher energy consumption and higher utility costs.
Before opening the fridge, think about what you need and then open the door to get things done swiftly and close it as soon as feasible. Close the refrigerator door correctly once you’ve finished putting or taking things out of it. As a result, the refrigerator doesn’t have to work as hard to keep its temperature stable.
2. Check The Refrigerator’s Door Seal (Gasket)
Even if you close the door, the gasket on the door can degrade (crack, harden, or warp) and leak cold air, increasing your energy usage. Over a period of time or due to poor maintenance, this type of wear and tear can occur. Because of this, you should inspect the door’s gasket on a regular basis to ensure it is in good shape.
In order to see if the gasket seals the door correctly, place a coin in between it and the compartment. If you want to see both halves of the coin, you’ll need to close the door half way. It’s a good idea to have a professional service engineer look at the gasket if the coin falls out easily.
3. Always Set The Correct Temperature For Efficient Cooling
For efficient cooling, it’s important to keep the temperature at the proper level in most refrigerators.
Xem thêm : How To Make Fridge Magnets With Photos? Step by Step Instructions
The best temperature for storing food in the refrigerator is 4°C, and the ideal temperature for storing food in the freezer is below 0°C.
Unless your fridge has a correct number-based temperature setting, it most likely uses a scale-based method. If this is the case, it’s best to keep the scale at a medium or normal value. Follow the refrigerator’s instruction manual for more information and temperature recommendations.
4. Arrange & Cover Items In The Refrigerator Properly
Refrigerator items should be protected and arranged in a logical manner. Plastic containers with tight-fitting lids are ideal for storing food and other items. You may prevent smells from transferring from one compartment to another by using an airtight container to keep moisture levels low in your refrigerator. When you organize your refrigerator properly, you can store and remove products more quickly, which reduces the amount of time you have to leave the door open.
5. Don’t Block The Vents Inside The Refrigerator
The refrigerator’s vents should be far enough away from the contents of the fridge to prevent them from overheating. This makes it easier for cool air to flow through. When something gets in the way of the vents, the refrigerator has to work harder to maintain a cool environment.
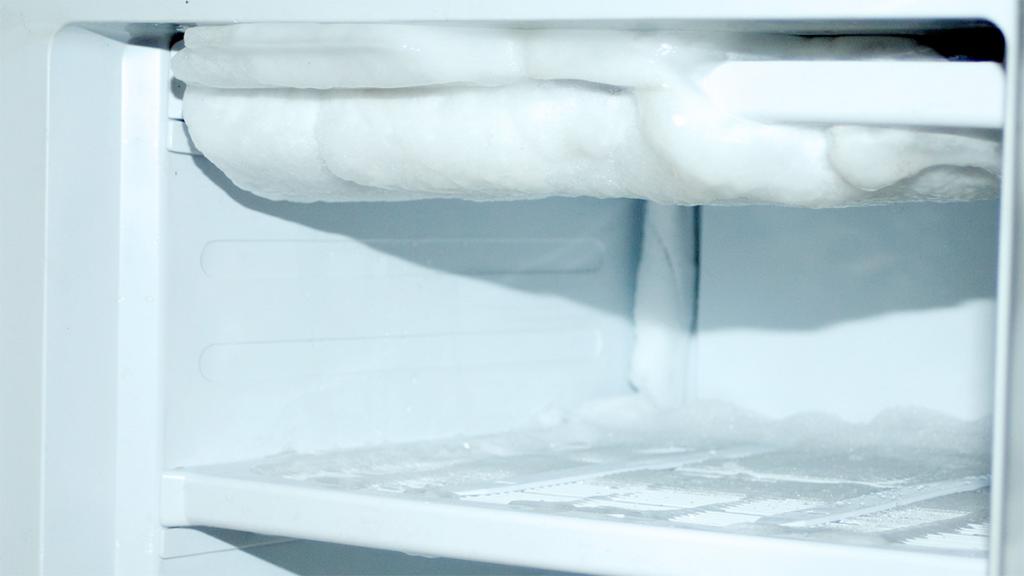
6. Empty The Ice Accumulation, Defrost The Freezer
Every now and again, ice may accumulate in the freezer compartment of a single-door refrigerator. You should defrost it on a regular basis to avoid energy waste. One-door refrigerator defrosting can take up to an hour, so do it on the weekends or when you have plenty of spare time.
7. Avoid Placing The Refrigerator Too Close To The Walls
Refrigerators should not be placed too close to the inside walls. There should be at least one inch of space between your refrigerator and the wall, no matter where you’ve positioned it. This gap helps the refrigerator dissipate heat generated during the refrigeration process and maintains the appliance working at its peak efficiency.
8. Clean The Refrigerator Once Every Few Days
The cleanliness and orderliness of the refrigerator are also important considerations during its upkeep. A soiled and musty refrigerator is an eyesore to everyone who enters. You should use a soft, wet cloth and a light cleaning product to wipe both the exterior and interior of the refrigerator (or vinegar). Keep the door’s gasket in good condition by cleaning it. You’ll save yourself (and others) a lot of grief by keeping your refrigerator clean on a regular basis.
9. Follow Refrigerator Placement Guidelines
The doors of a refrigerator must be able to close and seal properly because they must remain level from all sides. Refrigerator items in open cups or glasses, such as water, may flow over if it’s not leveled properly. Make use of a level instrument and set it on one of the shelves inside the fridge to see if it is level on all sides.
10. Clean The Refrigerator’s Condenser Coils
The most difficult component of refrigerator maintenance is this. The condenser, which dissipates heat during the refrigeration process, is often found in the back bottom corner of a refrigerator. Dirt and hair accumulate on the coils over time, reducing their efficiency in dissipating heat and decreasing cooling. Refrigerators use more electricity when their condensers are dirty, which increases their power costs.
Consult your refrigerator’s owner’s manual for specific cleaning instructions. Condenser cleaning often entails shutting down the refrigerator, disconnecting the power cord, rolling or pushing it away from the wall, and loosening a few screws on the backside. Use a vacuum cleaner or a condenser cleaner tool to clean the condenser pipes of dirt and hair.
Protect Your Refrigerator Using An Extended Warranty Plan
Even with routine care, a refrigerator’s components can fail, necessitating the use of an extended warranty. As a preventative measure, we recommend purchasing an Onsitego Extended Warranty Plan for your refrigerator. The following is included in our extended warranty plan for refrigerators:
- Allows you to extend the warranty on your refrigerator by a year.
- Covers failures and malfunctions
- Service at your door for no charge
- A promise to fix or replace.
- A free replacement refrigerator is offered to you if we are unable to service your refrigerator in time.
You may extend the manufacturer’s warranty on your refrigerator for an extra four years by purchasing our extended warranty plan.
![How to Level Samsung Refrigerator [2022]? (Answered)](https://spasifikmag.com/wp-content/uploads/2022/07/how-to-level-fridge-balancing-step-by-step-instructions-img_62ce69b68adba.)
Conclusion!
Great! If you’ve read this far, you know how to level a refrigerator. There are simply four simple steps to the process, and anyone can complete them. You’ll need a screwdriver, a wrench, your fridge’s instruction manual, and a level tool to complete this task. To begin the leveling process, remove the grille, locate the leveling features, and then use the level tool to see if the refrigerator is balanced properly.
First things first, make sure your refrigerator is completely emptied before you begin the process.
That is all there is to it! You might want to read this informative article first before continuing. Perhaps you’re curious about the weight of air conditioners, for example. If you have a few minutes, check out the article.
Nguồn: https://spasifikmag.com
Danh mục: Fridge