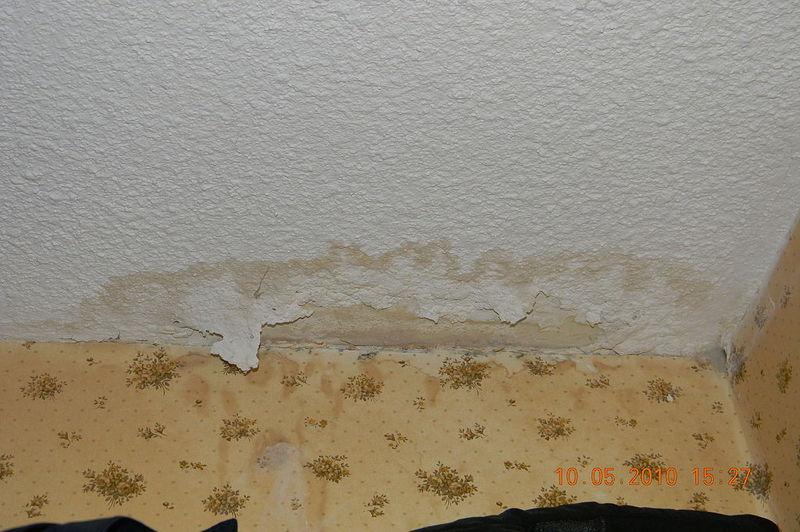
In this post, we’ll demonstrate how to fix plaster that has been damaged by water. Plaster is a versatile material that may be used to finish, decorate, and even protect your home’s walls and ceilings. Plaster walls will always be vulnerable to water damage.
- How Much To Replace A Water Damaged Drywall? A Detailed Guide
- How To Fix Water Damaged Lion Claw Table Feet? Complete Step-by-Step Guide
- How To Repair Water Damaged Door Jambs? Troubleshooting and Repair Guide
- How To Protect Cabinet Doors In Water Damaged Kitchen? Ultimate Guide
- How To Repair Water Damaged Linoleum Floors? Comprehensive Guide
It is crucial to learn how to reinforce water-damaged plaster walls to prevent further damage. Now that you know it, check out these great suggestions for bolstering their stability.
Bạn đang xem: How To Stabilize Water Damaged Plaster Walls? A Few Tips to Remember
Plaster Wall Advantages & Disadvantages
Advantage: Durability
When plaster coatings are properly mixed and placed, they create a wall finish that is both tougher and longer-lasting than drywall. Strong bonding in the mixture is formed by a chemical reaction that takes place as water evaporates from the plaster mixture. Plaster, in most cases, can withstand higher pressure before cracking or denting. The lath, or backing, used with plaster also contributes to the material’s durability. Metal or composite lath or board can be used to replace the weaker hardwood lath strips seen in older homes.
Disadvantage: Installation
There is a lot of dust created when working with drywall, especially when cutting and sanding. Due to the drying time required for the joint compound used to seal the joints between boards, finishing drywall might take several days. The initial addition of water to plaster powder produces minimal dust. In addition, it can be applied in multiple layers before the first layer has fully set, and sanding is not required. Plastering a wall requires a substrate of wood lath or steel mesh, as well as ability and practice, but it is faster and leaves less of a mess than other methods.
Disadvantage: Difficult to Repair
Plaster damage caused by shifting foundations or a forceful hit to the wall is tough to repair. The damaged plaster must be cut and scraped away carefully so as not to damage the rest of the wall. If the damage is extensive, the lath or other backing may also need to be replaced. New patches of plaster will stand out more if you don’t repaint the entire wall following repairs.
Disadvantage: Cost
Plastering is often more expensive than drywall installation and finishing because of the extra time and labor involved. Specialists in applying plaster will, of course, demand a higher rate for their services. Since veneer plaster only requires a single coat of plaster to be applied over a backing board, it is more cost-effective than the more common two- or three-coat finishes. Veneer is less durable than drywall but costs far less to install.
Stabilizing Your Water Damaged Plaster Wall
There are only five easy procedures involved in completing this plaster wall stabilization method. Some drying time, perhaps a few days, may be necessary. However, do not be discouraged by the passage of time!
You can fix your problem by following these steps.
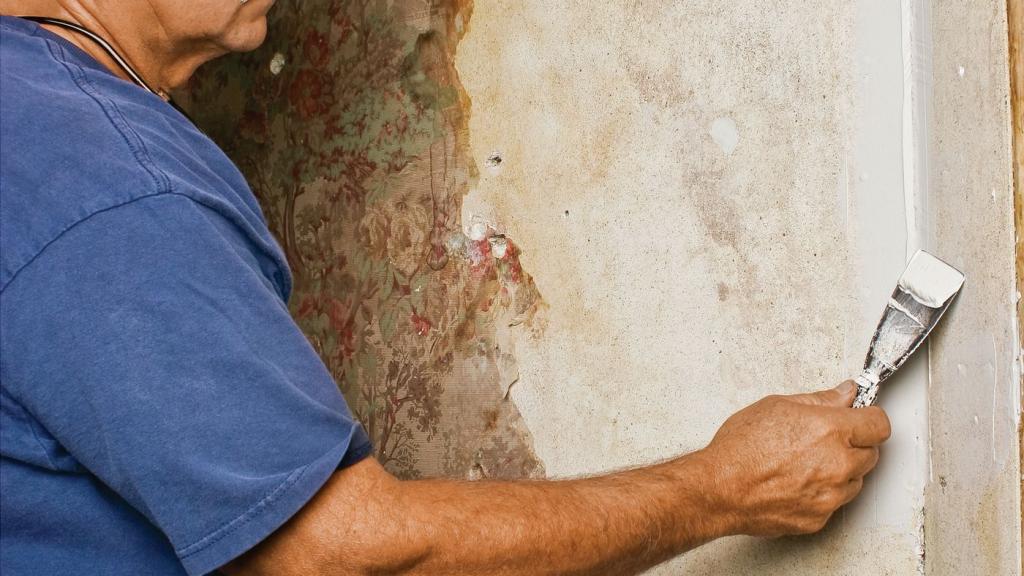
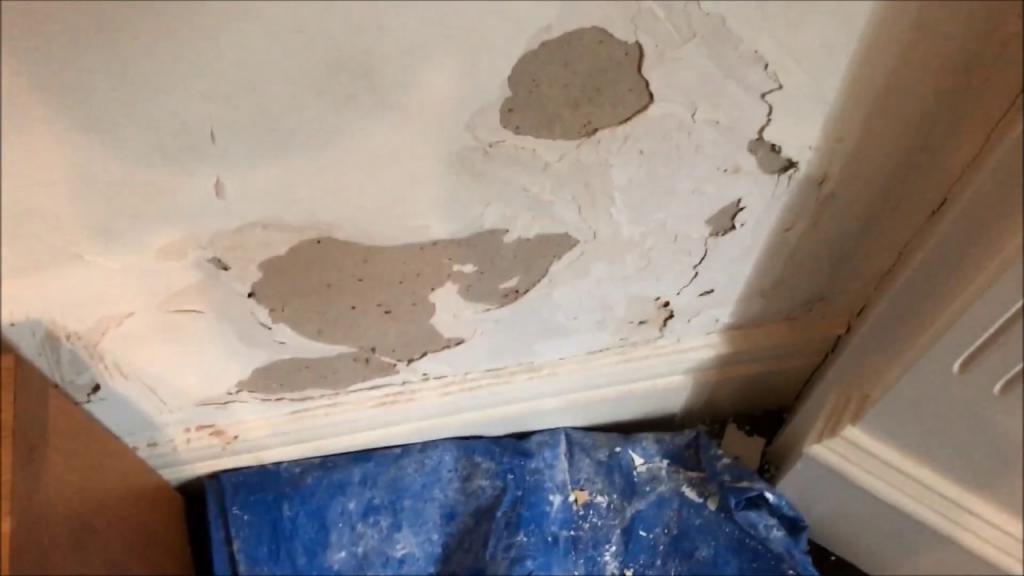
Step #1. Assessing and removing damages
Xem thêm : How Much To Replace Water Damaged Wood Under Sink Easily? Perfect Information For You!
The plaster wall needs to be fixed initially. If there are any water leaks, they should be fixed immediately to prevent any additional damage. Also, make sure everything is dry before starting the process.
Before you can begin stabilizing, the damage must be eliminated. Scratch off flaking paint or damaged, mushy paint with a putty knife. Start by cutting away all of the bubbling plaster and rotting laths from the plaster wall.
Step #2. Sealing the water damage
When you’re done fixing the holes in the plaster, give it a good scrub and rinse. If there are any lingering lime deposits, you can scrub them away with a sponge and some dish soap. Thereafter, give the wall a few days to dry off.
Primers based on oil or those that dry quickly can be used on plaster. The use of a primer helps reduce the spread of stains and residues. Primers made with quick-drying technology can be applied in as little as an hour, while those made using oil can take up to 24 hours to dry.
Step #3. Repairing the plaster wall
You can fill in the holes in the wall by applying a thin coat of joint compound. Smooth out the first coat with a level for the best results. Then, you just need to wait for it to harden.
If there are any bumps or rough patches on the wall, sand them down with medium grit sandpaper. However, at this time you won’t need to smooth out the plaster wall entirely. Just smooth over the rough parts.
Sweep up the dust and wipe clean the surface. Just wait till it’s entirely dry to touch.
Step #4. Applying the second coat
To finish the plaster wall, a thicker coat of joint compound must be applied. If you lay the thin coat flat, spread the thick coat vertically. When applying a second coat, it’s important to do it in the opposite direction of the first.
You should keep going by repeating Step 4 until you get there. Sanding the surface to get rid of the dust.
Step #5. Sanding and painting
Sand the area down with 120 grit sandpaper until it is entirely flat and smooth. Once the dust has been wiped away, apply a new coat of primer. The same primer should be used each time.
Xem thêm : How To Repair Water Damaged Door Jambs? Troubleshooting and Repair Guide
As soon as the primer has dry, the artwork is ready for its finishing touches or painting. Cover the patch with paint of the same color as the wall and it will vanish. If you want to double-check your work on the plaster wall, a professional handyman can help.
Why Is It Necessary To Stabilize Water Damaged Plaster Walls?
The plaster, frame, and lath are all affected by water. Your plaster walls are less likely to sustain additional water damage if you take preventative measures immediately.
Some do-it-yourself stabilization of water-damaged plaster walls can cause additional damage after a few months or years. Be sure you’re happy with the results before moving forward on your own.
If you have any doubts, you can always seek the advice of experts to help you out. However, before hiring a handyman, it’s important to make sure they’re properly licensed and insured. The fact that they are licensed and insured bodes well for their reliability in a crisis.
How Much Will It Cost You To Stabilize A Water Damaged Plaster Wall?
When stabilizing a plaster wall that has been damaged by water, the cost of materials could be as high as $60 if you decide to do it yourself. By completing tasks on your own time, you save money that might have otherwise gone toward hiring a professional.
However, a professional handyman is required to repair water damage to plaster walls in some cases. If you need to hire a handyman, expect to pay between $70 and $100 per square foot. The price to fix it, though, depends on how bad it is.
If your plaster wall has been damaged by water and has not yet dried, you will have to wait for it to do so. When a leak occurs in a wall, it may be necessary to call a plumber or a restoration company to help dry the wall’s plaster. The cost of drying and restoring your property after water damage might range from $2,000 to $5,000.
9 tips for maintaining a plaster wall
1. Use the cracks to diagnose the problem
- Repairing little diagonal fractures in the wall just above a window or door is a quick and easy fix. Diagonal fissures caused by settlement are easily repaired.
- If the fractures are deep, uneven, or large, it’s better to have an expert look at it.
2. Patch small holes as they occur
- Loose plaster puts pressure on the remainder of the wall, which causes cracks. Don’t ignore pinpricks of damage and watch as they balloon into gaping maws.
3. Install doorstops
- When a doorknob hits a wall, it often cracks the plaster around it as well as where it hits. All doors need to have door stops installed.
4. Keep your tools clean
- To start a new batch of patching plaster, wash all of your equipment thoroughly. Without applying new plaster, the drying chemicals in the old plaster will harden and prevent you from finishing the job.
5. Spatula tip
- If you need to do some minor plaster repair, you can do so with more ease using a rubber kitchen spatula instead of a stiff putty knife. Using a spatula to spread plaster in tight spaces where a putty knife won’t fit is a common technique.
6. Keep it dry
- When plaster comes into contact with water, it becomes discolored and finally ruined. After the leaks have been remedied, you can patch the plaster or repaint it.
- Use a stain killer before painting over a stain to prevent seepage.
7. Patching with the right materials
- Plaster surface repairs are simple if you have the correct patching material.
- Filling small holes in plaster with spackling compound is a common DIY project.
- If you apply three coats of quick-setting joint compound over self-sticking fiberglass tape, you can repair even the most difficult fracture.
- Patching plaster is a special blend that is more durable than regular plaster and typically only needs one coat to be effective.
8. Match the surface
- If the wall has a textured finish, you can make the rough surface smooth by using a combed newspaper or sponge.
- Before priming a sand-covered wall, make sure the spot has fully dried. Applying a coat of latex paint that has been sanded will complete the transformation.
- Keep the blade sharp by scraping it frequently against a clean piece of wood to remove hardened bits of dried plaster.
9. Four steps to repair a hole
- Taps on the surrounding plaster are in order. If the plaster has a hollow sound, it is coming loose from the lath. Apply a putty knife to loose plaster and remove it.
- To remove the excess plaster from surrounding the opening, run a V-shaped beverage opener along its perimeter. Internally sloping edges help secure the patch to the ground.
- Follow the directions for making the patching plaster. Using water to spritz the hole before applying the plaster will help it adhere better.
- It is recommended that you apply the plaster with a drywall knife or a putty knife. Sand the patch smooth with a putty knife. When the area is dry, you can smooth it down with a sponge or sandpaper.
Conclusion
We have already answered your question about stabilizing plaster walls that have been damaged by water. By sticking to the steps as outlined, you will ensure optimal stability. Damage could worsen if the stabilization procedure fails.
Nguồn: https://spasifikmag.com
Danh mục: Damaged


