Despite the cumulative impact of countless mundane experiences, there are only a handful of profoundly transformative moments in anyone’s lifetime. One of them is getting married. Getting a mortgage is a further option. Being a parent is a life-altering experience for many.
- When To Buy Maternity Pants? Complete Guide for New Mom’s
- What Size Maternity Clothes Do I Buy? Picking the Right Size
- How Long Is Maternity Leave In Illinois? The Best Guide!
- When to Buy a Maternity Bra? Here are the Problems Maternity Bras Solve
- What to Wear For Maternity Pics? Everything You Need To Know
Yes, I’m sure you’ve taken many pictures of babies, but have you ever taken any of pregnant women? They’re crucial, too, and mastering them requires specific training. If you want to know more, keep reading.
Bạn đang xem: How To Shoot Maternity Photos? 18 Maternity Photography Tips
Taking pictures of a newborn is almost expected. Babies change quickly in the first few weeks of life, and missing this window to capture these fleeting moments is a missed opportunity that cannot be repeated. But what about the time leading up to the birth of the baby? Pregnancy, like the neonatal phase, is a brief but unforgettable portion of becoming a parent from which there is no turning back.
Pregnancy was an experience I felt mixed emotions about. Some expectant mothers like their pregnancies and want to document the time, while others dread being pregnant and try to avoid being photographed at all costs. I fell somewhere in the middle between the two extremes, but as a photographer, I also recognize the value of documenting this period of my life through photographs. Sadly, I was also really dissatisfied with the majority of the photographs my loved ones had taken of me (can you say “cow?”), so I ended up consulting an expert. That is, one who specializes in photographing pregnant women.
Pregnancy is a fleeting and incredible period in a woman’s life, and photos are a wonderful way to capture and remember it. However, taking maternity images requires a more thoughtful and experienced approach. My pregnancy photographer was wonderful because she had an innate sense of which camera angles and postures would highlight my growing baby bump. Not only did I feel like a movie star while pregnant, but my pregnancy photos turned out beautifully.
Make her feel beautiful
Many women have conflicting feelings about their appearance during pregnancy. Sure, there are ladies who relish in their own attractiveness, and those are the ones who make the best models. Some ladies, like I once was, don’t think they’re attractive in the slightest, thus working with such topics presents unique difficulties. Regardless of how a given lady currently feels about her appearance, it is your responsibility to make her feel like the most stunning woman alive.
Remember this: even if they don’t believe it, every pregnant woman is stunning. Therefore, the first step is to make your subject emotionally invested. You should try to put yourself in her shoes, as it’s likely that you’ll be taking her pictures late in her pregnancy, when she’s dealing with less than desirable symptoms like morning sickness, bloating, and acid reflux. Tell her she looks great, and you’ll make her feel even better about herself. After every few shots, you should give her a compliment. Let her know how beautiful she looks when pregnant. To be completely forthright, I will state that this is typically less of a challenge for female photographers than it is for male photographers. If you fall into the latter category, proceed with caution and tact. Stay away from words that could get you in hot water. You should be sincere and pick your words wisely.
Make her look beautiful
The preceding paragraph is very different from this one. Making a lady feel gorgeous during a photo shoot involves putting her at ease, giving her lots of positive feedback, and keeping her entertained. But it will be for naught if you don’t also take pictures of her in the most flattering poses. It’s normal for women to gain weight in areas of their bodies they would rather not, such as their faces, hips, and thighs, when they’re pregnant. One tactic is to silently take note of the features of your subject’s body that should be played down.
Pregnant ladies can be photographed using many of the same methods as curvaceous models, with one important exception: the pregnant woman’s belly is the focal point of the image and should not be obscured in the same way that a middle-aged man’s beer belly would be. How to get the perfect shot of your pregnant subject, including some helpful hints:
1. Don’t shoot from below. Higher camera angles, in reality, can be incredibly appealing, because the higher angle will have a slimming effect on the face. Use a 50mm to 100mm lens and experiment with different shooting angles to increase your chances of getting the shot you want. High-angle shots might cause distortion, so avoid them if you can.
2. When shooting full body images, think in 45 degrees. Shooting a pregnant woman from straight on is counter productive anyhow, because a pregnant belly doesn’t start to take on that distinctive baby bump form until you shot it from an angle. The 45-degree tilt has the added benefit of making other areas of the body appear smaller.
3. Downplaying a double chin. In spite of the fact that a double chin is a common characteristic of the look achieved in the later stages of pregnancy, no one enjoys looking at photos of themselves in which they appear to have one. If she has a double chin, you can easily get rid of it by asking her to stick out her neck and then pointing her chin downwards. Even though lifting her chin will make her look less pretentious, she shouldn’t be allowed to do so. Generally, a small forward tilt of the head combined with a chin-down posture should do the trick.
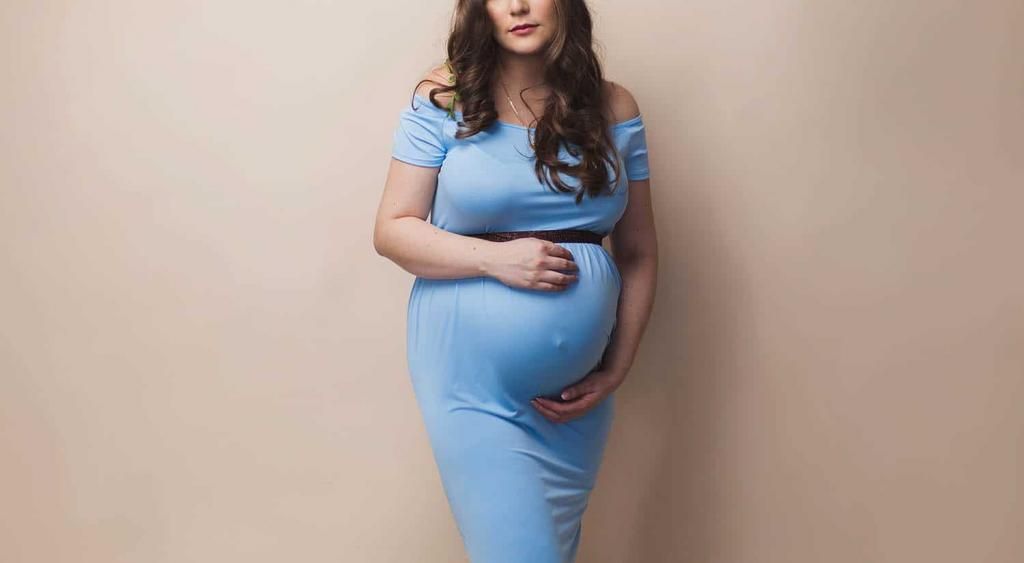
4. Use arms and legs well. A woman’s arm placement can either accentuate her curves or make them more apparent. Watch what your subject is doing with her arms at all times. For instance, if you have her place a hand on her waist, she’ll look curvier and her physique will appear to be less voluptuous. Keep in mind that while you want her pregnant tummy to be realistic, the rest of her body should be made to look as slender as possible for the photo. The classic one-hand-on-top-of-belly, one-hand-below pose is always a good choice for a few photographs, but don’t be afraid to experiment with other arm placements to find the most attractive one.
Focus on the belly
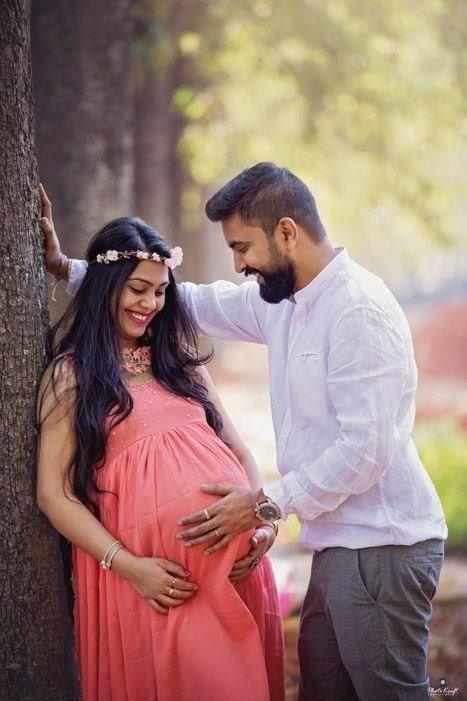
When it comes down to it, the belly is the main focus of any pregnancy shot. Take some pictures of the hero. I suggest getting close to the pregnant belly so that it becomes the focus of the shot. Include hands if you can. Although a picture of dad holding his pregnant wife’s stomach is a timeless classic, it’s important not to overuse the pose for fear of becoming cliche. Alternately, you may show Mom’s hands or those of an unborn sibling. It doesn’t matter if you photograph a pregnant woman’s naked or clothed tummy, as long as you show off that distinctive baby bulge.
Setting
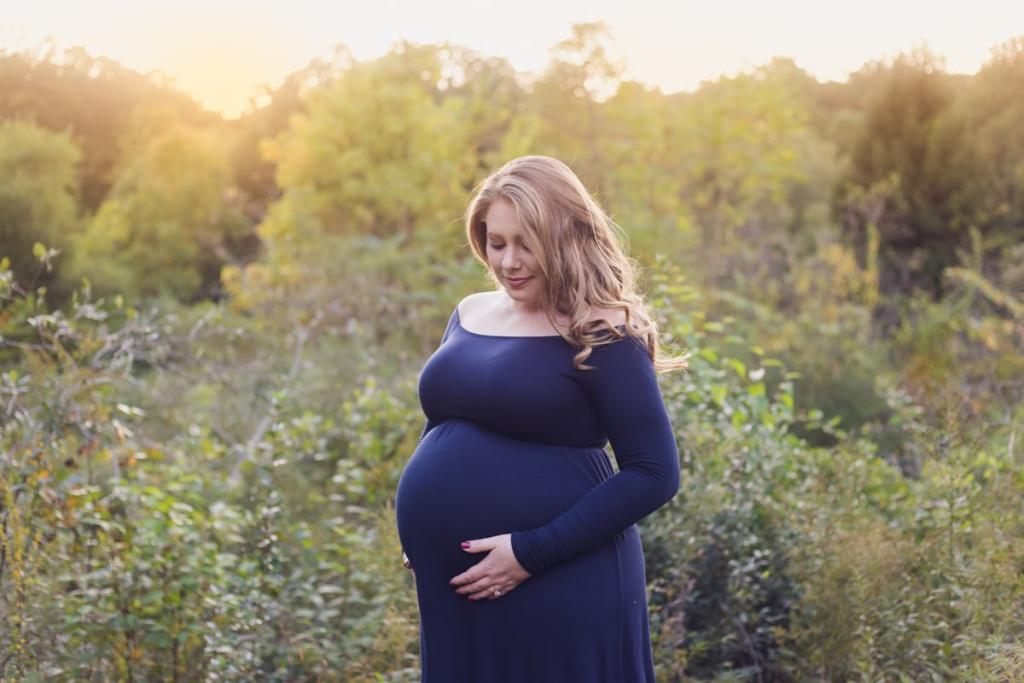
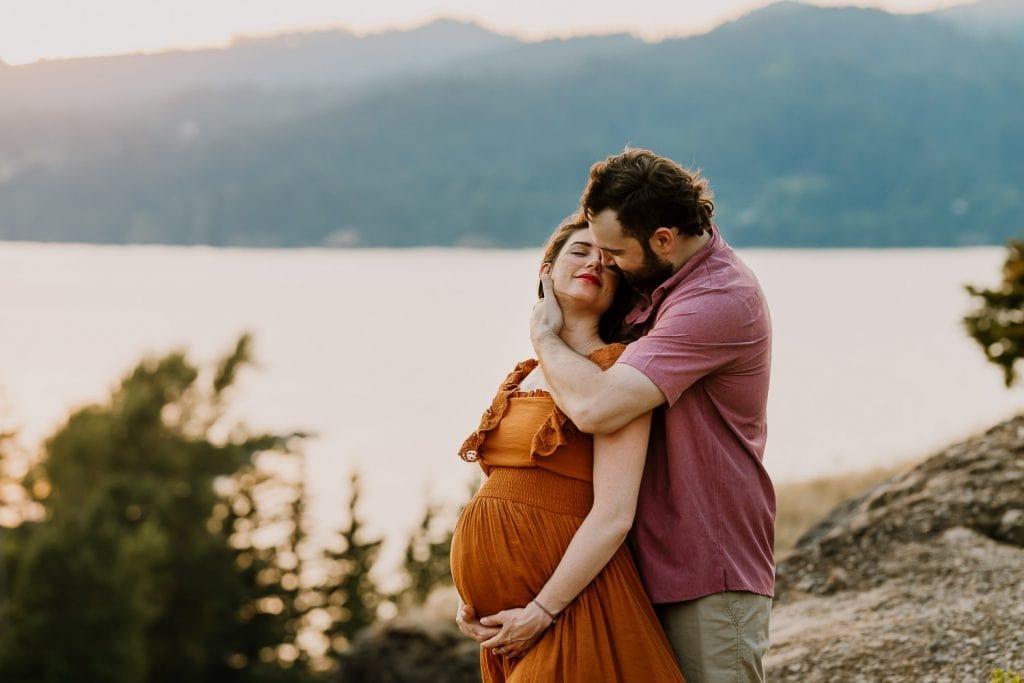
When taking pregnancy pictures, location is crucial. You’ve definitely seen many professional pregnancy photos; they can be stunning, but I find that they lack authenticity. As an alternative, you may try spending time outside with your topic, her spouse, and/or their kids. As you likely already know, the sunlight during the golden hour has a universally enhancing effect. Even if she’s still feeling a little green from all the morning sickness, the evening light will give her a pleasant glow, which many people equate with pregnancy regardless. Golden hour’s progressive shadows are ideal for giving the illusion of depth, so your perfectly round tummy will look even more lovely in these shots.
Pregnancy just seems to fit in better with nature. A pregnant mother and her family are complemented by scenic environments such as oceans and forests. Find a location that holds special significance for her, and work to incorporate some of the surrounding landscape into your portrait. Just make sure the setting enhances your subject rather than taking away from her. Keep the focus where it should be and only hint at the beach or water.
Keep it simple
When trying to portray a story, it’s very vital to keep your photographs as uncluttered as possible by eliminating any superfluous elements. Your story’s focus is on the pregnancy, yet your subject is a real person. If there are any potential distractions in the area, you should move, tilt, or blur them. The question of whether or not your piece can be simpler should always be on your mind. If you’ve come to the conclusion that “yes,” then you should do whatever it takes to make it a reality.
Include loved ones
To put it simply, that unborn infant will soon be welcomed into a loving household. Involve loved ones in the plot whenever possible; they play a significant role. If they are significant in your subject’s life, include family members such as siblings, spouses, and even pets wherever possible. Photographs of little children kissing the pregnant mother’s belly are endearing, as are those of the father speaking softly to his unborn kid. Let the family enjoy themselves and act spontaneously; there’s no need to force a staged moment for every photo. The pregnancy will be plain to see, and the very presence of the family will serve to spread the news of the impending birth.
18 Maternity Photography Tips for Impressing the Mom-to-Be
1. Be on Time!
There is a sweet spot between 33 and 36 weeks of pregnancy for a maternity photo shoot. ALthough, make sure to ask your client if there are any unique considerations she needs to make for the time of her appointment.
To avoid disappointment, clients who are expecting multiples, who are experiencing problems, or who may be facing an early delivery are welcome to book their consultation in advance. Respond flexibly to the needs of your pregnant clients.
2. Prepare Lenses for Maternity Photo Session
The 50mm lens is my go-to for maternity shoots because it allows me to get beautiful images in a wide variety of settings, including a wide range of poses, compositions, and lighting options.
Many different lenses are suitable for maternity shoots; long lenses work well and produce beautiful compression, while wide-angle lenses allow you to take in the entire scene. Avoid excessive distortion when using wider-angle lenses, as doing so could make expectant moms appear abnormally huge in the photograph.
Examples of great pregnancy photography lenses are:
35mm
This lens is ideal for photography since its focal length falls between between being too long and being too wide. In practice, it provides an accurate viewpoint, with the mother’s body distorted as little as possible.
50mm
With a 50mm lens, you may achieve a shallow depth of field, perfect for artistic maternity photographs if the couple so desires. By doing so, you can concentrate on the expecting mother and her growing belly without having to worry about the rest of the scene being in focus as well.
85mm
Since you probably won’t want every single portrait to be a tight close-up, you should reserve this lens length for use in addition to your 35mm or 50mm. Even so, an 85mm lens is helpful for catching more of the body in the shot.
24-70mm or 70-200mm
Excellent for low-light outdoor maternity shoots.
3. Practice Different Camera Settings for Maternity Shoots
You can get some terrific experience with wide-open shooting during these sessions. There’s nothing quite like some lovely bokeh to draw attention to the pregnant woman’s glowing belly.
To begin, make sure your camera is in manual mode so you have complete command over all of the dials and settings. Your camera’s settings should ideally fall within these parameters:
- Aperture: For family photographs, use an aperture of f/5.6 to f/8, and for maternity photos, use an aperture of f/2.8 to f/4.
- Shutter speed: There are a variety of factors to consider, including the setting, the maternity postures, and the final result. 1/1000 is recommended for faster action, while 1/50 to 1/60 is adequate for any static pregnancy posture.
- ISO: Use a somewhat narrow focal length setting, such as 100–400, on your camera. If you require a quicker shutter speed, you should ascend.
When taking pictures, make sure the father-to-be and any other siblings are clearly visible by zooming in as much as you need to. If you’re looking for further advice on how to properly adjust your camera’s settings, click on this fantastic page!
4. Use Props Appropriate for a Maternity Photo Shoot
During pre-session communication, suggest to the parents that they bring along some important events from their pregnancy, such as an ultrasound photo or an object with the child’s name on it.
Xem thêm : How Long After Maternity Leave Can You Be Fired? A Comprehensive Guide
These can be used to give the portraits an individual flair. Asking this question upon initial contact or in a follow-up survey really helps to set the tone for your business.
In case they can’t think of anything else they’d like to include, you can even bring a few extra to the session! Use your imagination and make it unique for each client.
5. Prepare Comfortable Clothes
When taking pregnancy photographs, it’s important to dress the subject comfortably, just as you would for any other type of photography. Whether or if the couple shares a sense of style and choose to dress similarly can affect how they shop for clothes.
Some expectant mothers, for instance, could want a more laid-back environment, while others would prefer something more akin to a high-fashion look. No of the event’s theme, it’s important to advise expecting mothers to dress comfortably and stylishly to show off their growing bellies.
6. Plan Your Compositions
Composition plays a huge role in portrait and maternity photography since it draws focus to the subject (the mother and her growing baby bulge). A strong layout can alter the feel of the maternity photos even if the mom only wants black and white shots or casual positions.
You may take striking maternity photos by experimenting with these and other compositional changes.
- Up high: Encourage the person you’re photographing to lie down on the ground or a blanket. Elevating the mom’s stature by standing on a stool will draw attention to her pregnant belly while also improving her overall appearance.
- Straight on: Perfect for highlighting the pregnant woman’s curves, especially if she already has a large stomach.
- Side: If the pregnant woman’s tummy isn’t showing yet, have her twist to the side or even to a 45-degree angle.
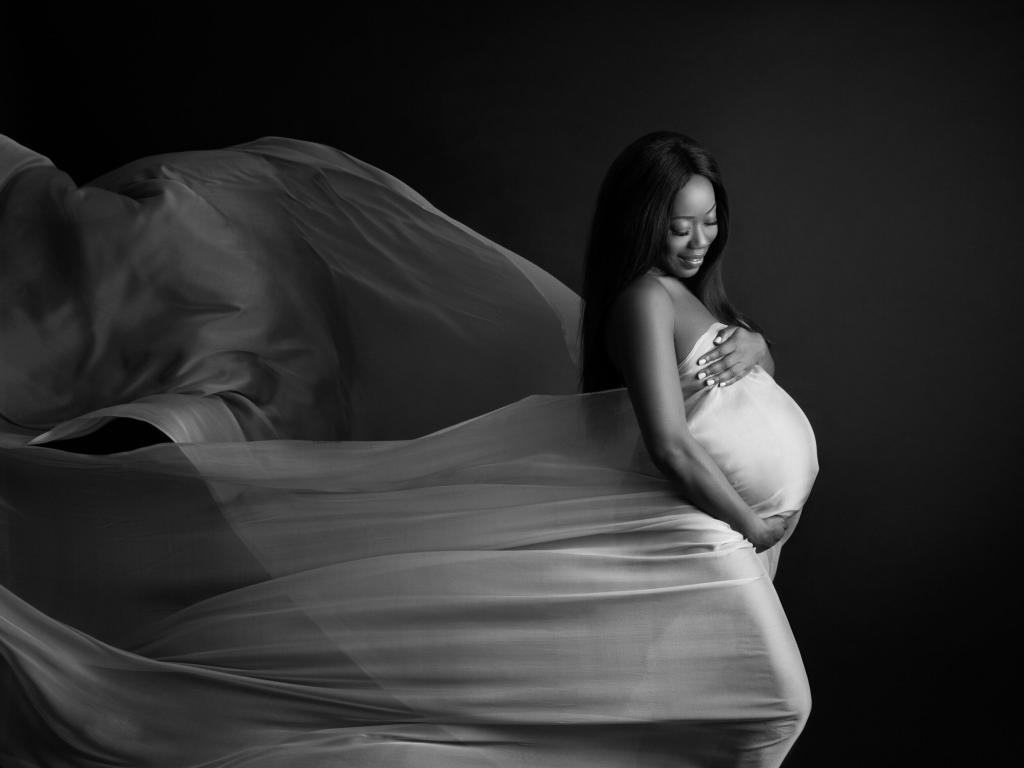
- Silhouette: If the client is uncomfortable being photographed, silhouette maternity images are a great option. Make sure to photograph the mother’s body at an angle that shows her profile and makes her pregnant tummy stand out.
7. Determine the Right Lighting
Any interior setting, including a photography studio, is ideal for shooting pregnancy photos since a large soft light may be used to fill the scene with a heavenly glow.
When shooting a maternity session outside, natural light is your greatest bet, especially if you can time it for either sunrise or sunset.
An effective photographer will also routinely bring a flash or reflector to manage fill light and highlight the bump.
8. Include the Siblings
Having the kids in the photos together is a wonderful idea, but it can be difficult to coordinate, especially if the kids are very small. Advise the parents to bring an iPad or a coloring book and crayons so that their children can occupy themselves while the mom receives her shots alone.
Ask a friend or family member, like Grandma, to come along to help if the sibling(s) are little. Children who are able to follow instructions well can achieve a priceless expression of maternal love by hugging or kissing her pregnant abdomen.
It may be more difficult to guide the affection of smaller children, but simply positioning them close to the expecting mother and her growing belly can result in some adorable cuddle images.
9. Learn Several Maternity Poses
It’s normal for a pregnant woman to want to feel her tummy, so let her! All you have to do is give her some pointers and show her how to switch up her hand placement and pregnant poses as you snap away. There are many acceptable positions for the hands: on top of the belly, on the bottom, one on top and one on the bottom of the belly (I like the left hand on top to show off the bling!), in a pocket if she has one, or even in her hair.
When she is standing, you can assist her look thinner by bending one knee; when she is seated, you can make her look more proportionate by shifting her weight to one hip and pointing one toe.
Incorporate some straight on angles, some profile pictures, and don’t forget the close-ups of her belly, which I always find endearing. You should put an emphasis on getting to know your Dad and your siblings. Get everyone to touch, and don’t pass up the shots where everyone has their hand on their stomach.
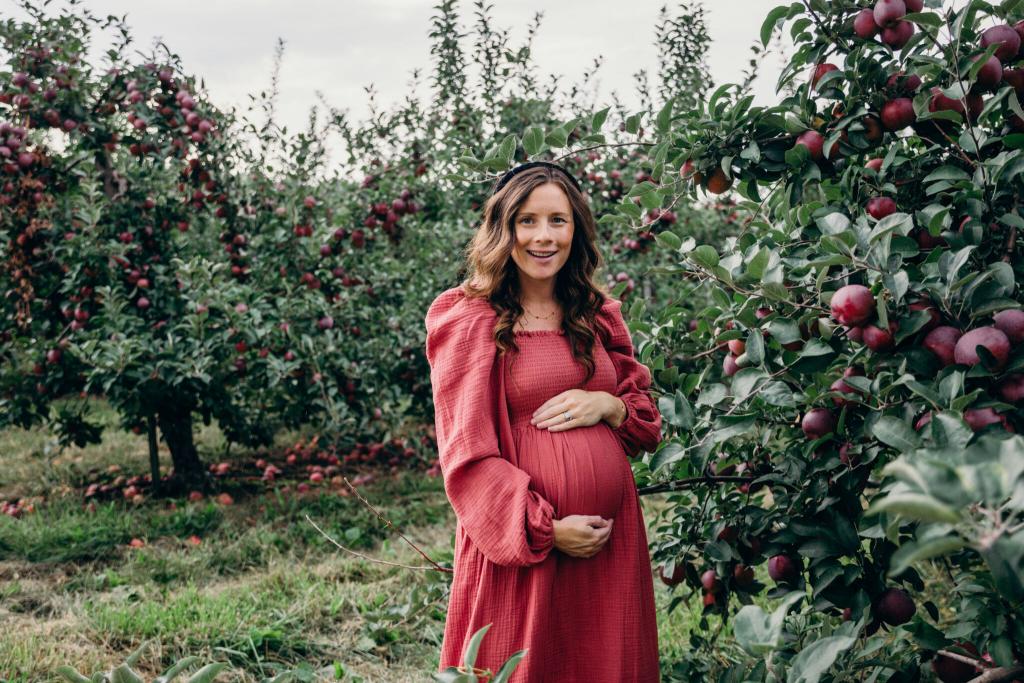
10. It’s All About that Bump
In this case, the FIT is more important than whether or not you wear a long, dramatic dress. Tell the expectant mother in advance of the shoot that more figure-hugging clothes look great on her and will help highlight her amazing baby bump (which is the whole point of the photo shoot).
My studio wardrobe includes a selection of maternity dresses in a range of materials and colors (try plum purple—gah, gorgeousness! ), and I am happy to let clients try them on at no extra cost. You can always clamp in the back, but it’s much difficult to loosen, so if you’re going to stock up, buy a big in most dresses.
Instruct your clientele on how to avoid matching clothing by providing suggestions for dressing Dad and siblings in complementary but distinct styles. If you want to make your client look their best from the very beginning of your session, it’s a good idea to provide them a client style guide with pictures and advice on what to do and what not to do.
11. Bring Out Emotions
Provide the expecting couple with advice that will help them relax and enjoy the experience of having maternity photographs taken. See if there are any uncomfortable maternity poses they’d prefer to avoid.
Assuage their nerves so they’ll feel safe allowing you to take their picture. As a result, they’ll feel more at ease expressing genuine feelings.
Make them feel comfortable being goofy in front of the camera. You can also encourage them to picture how they will feel when they first hold their child. This would allow you to observe their expressions and body language in order to gauge their levels of enthusiasm, eagerness, and love.
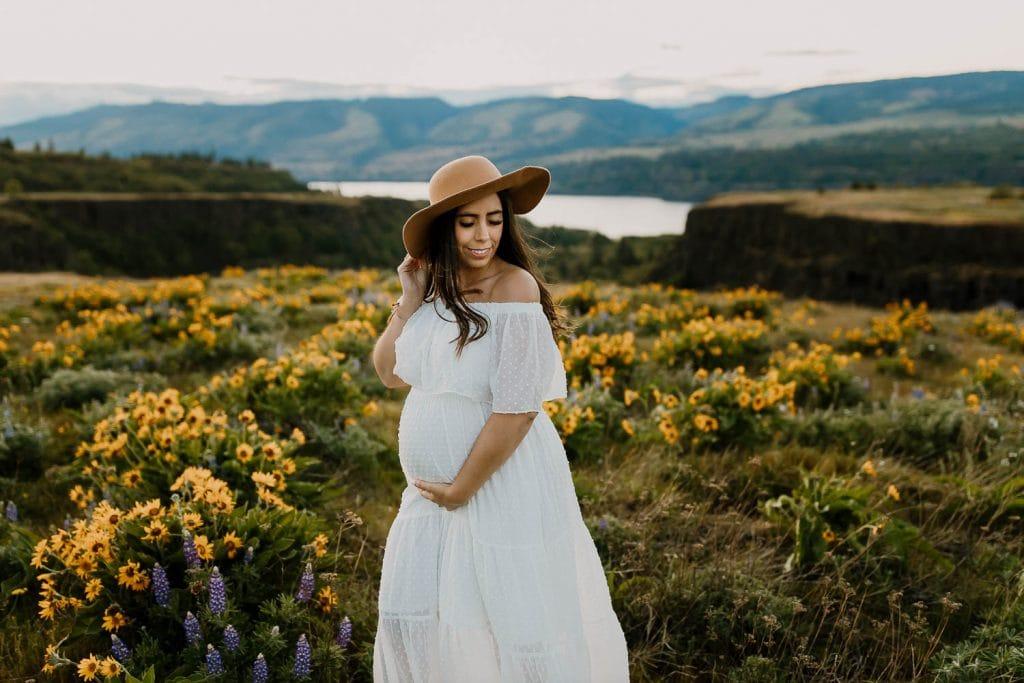
12. Choose a Location for a Maternity Session
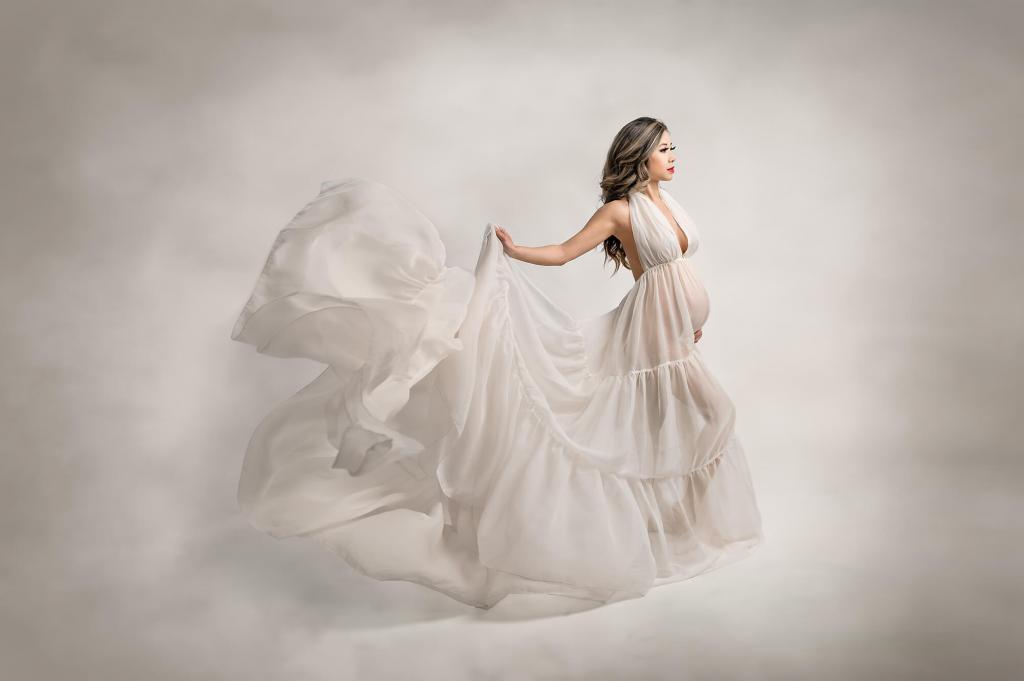
Maternity sessions can be held anywhere, but some of the most popular times and places are on beaches and in open fields during golden hour (the hour just before sunset or right after sunrise). spectacular gowns and seamless paper (we recommend Savage Seamless) indoors to create beautiful works of art. There is no way that you could go wrong with this choice.
Don’t be afraid to get in the water or lay low on the ground to obtain the shot of the stunning natural landmarks around where you live.
You should never encourage clients to do anything that makes them uncomfortable or puts them in any risk, so keep the expecting mother and her baby bump in mind. Long hikes uphill or over rough terrain may be out of her comfort zone at this stage in her pregnancy.
13. Set a Maternity Shoot Price
Unless they are being added to a Newborn session or 1st-year bundle (hello, discount! ), I charge the same amount for maternity shoots as I do for all other portrait shoots using my same three-package portrait sheet. in which case there is a slight price change.
To guarantee yourself a larger sum of money up front and to combine two life milestones that fit so smoothly together, try incentivizing your clients to combine prenatal and newborn shoots. So, to illustrate:
Regular $200 for 30 minute session
Regular price for a 60-minute session is $275.
Mini Maternity (30 minutes) included with Newborn Session: $650 (25% discount).
14. Manage Your Time During a Maternity Session
I provide 30- and 60-minute maternity sessions; however, if the client chooses the former, I cannot accommodate any additional family members except the parents-to-be, including any older children, dogs, or other relatives.
If this comes up, simply outline for your customers why you think a longer session is warranted when dealing with these extra factors.
Remember that if you invite the whole family, it will quickly become a family session, but the expectant woman will also want some pictures of herself taken. Don’t forget to factor that into your calculations!
15. Take Short Breaks
Keep in mind that a pregnant woman may tire just by maintaining an upright position, let alone striking a variety of positions and moving about. Schedule brief pauses in between takes, and make sure there’s enough of water on set. This free time is ideal for touching up makeup or switching outfits.
16. Show Same Day Sneak Peek Photos
Xem thêm : When To Start Wearing Maternity Clothes Second Pregnancy? Tips for Buying Maternity Clothes
This is something I do with every shoot, but it’s extra enjoyable if the parents-to-be are saving their announcement of the pregnancy, the gender, or the name for the maternity images itself.
You may show your clients how dedicated you are to their experience and how happy you are to share their images by giving them a sneak peek the same day. They’ll be excited to check out the remainder of the exhibit after this! If you want to impress your customers even more, you can write up a blog post and send it to them four or five days later along with your best work.
17. Use an Image-Sharing Phone App
Pixieset and Shootproof both now have a free option that lets you send clients a branded app for their mobile devices. That’s a wonderful opportunity for the parents-to-be to share their pregnancy pictures with friends and family who are also waiting for the new addition to their family.
The convenience of not requiring a desktop login makes seeing and sharing images with loved ones much easier. Score! In just three minutes, you may greatly improve the quality of your service by doing this. Keep in mind that PRICE is NOT everything.
18. Give Free Prints
Similarly to Betsy’s suggestion in #17, you might send the new parents a couple free 4x6s or 5x7s to help them show off your work during their baby shower and thereafter.
FAQs
In general, how would someone do their own photo shoot if they’re by themselves?
Purchasing a compact cell phone tripod is one of the best investments you can make for taking images on the cheap. They cost about $20-$30 on Amazon, and the majority of them have a wireless remote so you can take the picture from a long distance. Wrapping the legs of a flexible tripod around objects like tree limbs or fence posts can be really helpful when taking pictures outside.
Using a tripod, you only need to set up the camera at a single angle and then shift your body to achieve a variety of different perspectives. Set up your tripod so you can easily change your position (near, far away) to capture different perspectives. It will take a long time and likely be frustrating to have to constantly reposition the tripod.
Using the timer function on your phone and the remote shutter release can yield the most candid shots. That way, you’ll have time to get into place after pressing the shutter button but before the shutter really fires.
Is an assistant (like a partner or a friend) really necessary for a DIY photo shoot?
Having someone else take the images makes DIY photography a breeze by a factor of a thousand. Your best bet is to enlist the aid of the friend who is the most addicted to Instagram. Find the person who can best fill the role of “Instagram Husband” in your life.
To create the impression of a comprehensive maternity shoot with a helper, have them take numerous shots from various perspectives of the same situation. From a great distance, up close and personal (on your tummy), overhead, and from the side, etc. It will appear as though you exerted much effort, while in fact all you did was direct the footwork of a helper.
How do you DIY an outdoor shoot?
Lighting and location are the two most crucial aspects of any photograph. When taking pictures outside, open shade is ideal because the sun is still out but not directly in your eyes. It’s common knowledge that the best places to relax in the open shade are under a tree or in front of a shady wall.
However, if you’re hoping to capture a wide-open scene in nature, try taking your pictures during the “golden hour” (the hour immediately following dawn or the hour immediately preceding sunset). The golden light will make your photographs look expertly taken no matter where you happen to be when the sun isn’t directly overhead.
If shooting during the golden hour isn’t possible, or if the light is too harsh, one trick is to position yourself so that you’re facing the sun. Aside from shielding you from the sun’s rays, it will also give you a warm glow.
So location is super important. But how do you decide on the best location?
When in doubt, keep it simple! Though impressive in the hands of a trained specialist, cool lighting and magnificent backdrops can be a pain to work with when you’re not. The finest images of you and your bump will likely be taken against a plain background (such a colored wall in your neighborhood or maybe just your bed).
How does lighting come into play with taking photos, and how can you make sure you’re getting the best lighting?
A good photograph’s lighting is more crucial than its setting. Indoors, choose a space with plenty of window light and turn off any additional lights, including any overhead lights or floor lamps. Photos taken under overhead illumination tend to have an orange tint due to the light’s warmth. After that, experiment until you locate a location with sufficient illumination. Your images can either be light and airy or dark and melancholy, depending on how close you are to the window and how much light is coming in.
Numerous stunning pregnant pictures, both indoors and out, are backlit (when the light is behind the subject). DIY images can still be used for this purpose, but cameras and smartphones in automatic mode may have trouble determining the best lighting. If you’re having trouble with overly-dark photos, consider raising the brightness of your environment before you snap the shot or choosing a different angle.
What poses do photographers usually rely on for natural-looking photos that parents can easily replicate at home?
If you want your baby bump to really pop in a simple stand-and-pose photo, put your hands on top and bottom of it and turn your body slightly to the side. You can also make the stance look more natural by bending a knee or moving a hip. (There’s a phrase photographers live by: “If you have a body part, bend it!”)
Other than that, if you want your images to look more candid, try taking them while moving about. If you need assistance taking photos, stroll gently towards the person taking them while making eye contact with the camera and then looking away. Try to ignore the camera and concentrate on your loved one(s) or children(s) when taking pictures together. And explore new ways of moving your body. If you feel awkward standing and posing, try photographing while sitting or lying on your bed.
And be realistic about how long they’ll stay involved. It’s best to wait until you’re ready to take the picture to ask the kid to participate in. Then you can assume their interest will wane after the first minute. Use the burst mode on your phone or camera if it has one. Take fifty shots in rapid succession, and you might just get one good one.
If there is something exciting happening on and your kids or pets aren’t a part of it, they will probably want to be included. If you’d rather not have to play toddler wrangler and model during your photo shoot, consider making other arrangements for your child. If you have a three-year-old with a wiffle bat, half your pics might feature that (just me?).
What are your favorite photo editing phone apps or computer software that are fairly easy to use (i.e. parents won’t have to spend a ton of time working with)?
In this day and age, editing images on a mobile device is a breeze. (The output is of remarkably excellent quality.) Quick and easy editing can be done on the go with VSCO, A Color Story, and Lightroom Mobile, all of which are compatible with Android and iOS. You can’t go wrong with VSCO if you’re looking for natural or film-like presets, A Color Story if you want vivid, eye-catching colors, and Lightroom Mobile for a wide range of options for editing in a more organic style.
Expert advice: natural presets are more user-friendly, but it may take a few trials before you find the one that best complements your shot. When in doubt, boost the brightness and contrast of your photographs (just a touch).
Overall, what are your top tips for DIY-ing a maternity photo shoot?
- Keep it simple. Good lighting and a simple background are two things you’ll notice in all the greatest pregnancy images.
- Move your body if you can.
- Remember you don’t have to look at the camera! Avert your gaze downward, to the side, to your companion, or far away with longing.
Let’s Recap: 11 Tips for a DIY Maternity Photo Shoot
- To get a variety of shots, have a friend or partner help you move the camera about.
- The camera should follow your body’s movements, not the other way around.
- Buy a little tripod for your phone.
- Utilize a wireless remote in conjunction with the timer mode.
- The best lighting is essential. When within, let in plenty of light from windows, and when outdoors, throw open the shades.
- Maintain a minimalist and tidy backdrop.
- The most successful positions are those that feel natural and effortless. Doing some physical activity can assist.
- If you’re uncomfortable posing by yourself, feel free to use props.
- You’re free to wear whatever you like, but remember that photos may turn out blurrier if you choose to wear all white, all black, or a lot of patterns.
- Prepare the photo ahead of time to reduce waiting around when involving children and/or animals.
- Using a photo editing program is a breeze and can make your work look more polished.
What is the total cost and what does it include?
The prices charged by photographers can vary quite a little. Some charge session costs, some charge for pictures, and some even provide packages with digital images included.
Before you book your maternity photographer, make sure you know what the pricing will be and what it entails. Leigh Ann Pincus Photography offers several different packages for expectant mothers who schedule a maternity session with them. Find out more about the packages here.
Do you offer any props or wardrobe options?
You may be able to borrow apparel and props from your photographer if they offer those services. The availability of accessories and alternate attire varies widely between venues. It’s not the most significant factor in choosing a maternity photographer, but it’s still good to know.
If your photographer doesn’t provide props or clothing, they should still be able to provide you suggestions. Your pregnancy photographer can help you pick out the perfect backdrop, accessories, and outfits for your shoot.
Will there be revisions and polishing done for me?
Photographers typically provide post-shoot photo editing and retouching services. Asking this question will help you obtain exactly what you want out of your Bay Area pregnancy photography.
Do you offer discounts for multiple photoshoots?
If you book multiple sessions with the same photographer at once, they may reduce their rates. Book with us and get discounts on multiple sessions, such maternity and newborn. To make sure you have all the maternity and newborn images you’ll need, we offer a discount if you purchase them together.
How will I view my images after the photoshoot?
After a photo session, most photographers will provide you access to a private web gallery to view your final images. You may quickly and easily browse through your photos, pick out the ones you like, then place an order for prints or digital downloads.
This isn’t necessarily a deal-breaker, but it’s important to know how you’ll be able to view your maternity photos following the shoot. If you want to know what to expect, you need to ask questions and gather information.
Make sure you ask the correct questions to your prospective maternity photographers before making your final decision. Before getting your photo taken, you should know what you’re getting into. Having your pregnancy documented is a once-in-a-lifetime opportunity, therefore it’s important that you work with the best maternity photographer the Bay Area has to offer.
Conclusion
It’s important to keep in mind that a request for pregnancy images is akin to asking you to photograph a wedding or a house being purchased. These are the watershed moments of a lifetime. Do your best, and keep in mind that the way you record those events will have a profound impact on that family. Photos of your pregnancy will be as treasured as those of your wedding or new house.
Nguồn: https://spasifikmag.com
Danh mục: Maternity