How to build a camp stove from scratch? There are a variety of ways to build a camp stove, but I’ll show you the simplest and one that makes good use of the tin cans and other items you probably already have around the house.
There’s nothing wrong with stocking up on hobo stoves in case of an impending zombie invasion. The device can be used either with or without electricity, not that it requires it.
Bạn đang xem: What Is A Camp Stove? How To Make A Camp Stove?
Having a camp stove that you can use to cook your food while you’re away from home is an added benefit of being a girl or boy scout, who is prepared for everything.
Don’t worry if you don’t know how to make one; you’ve come to the correct place. This article teaches you how to build a camp stove using just things you’ll likely find scattered around.
What Is A Camp Stove?
Camp stoves can be manufactured from a variety of materials and come in a variety of designs and sizes. Camp stoves can be created from tin cans or alcohol burner stoves depending on the materials you have on hand.
These camp stoves are a lifeline when traveling and when there is a power outage. When you’re going to be spending a lot of time in the woods, they’re going to be a lifesaver. You’ll be able to cook and remain warm in the wilderness if you know how to create a camp stove.
To create a camp stove out of things you may find on the street or in your house is a simple and effective way. I found this method to be the quickest and easiest to build a camp stove out of all the others. Find out which camping stoves are the finest in 2021.
Reasons for Using a Camping Stove
Cooking over an open flame is a common image that comes to mind when considering a camping trip. Many campgrounds feature fire pits with grates that you can use to cook your food, and all you have to do is provide your own wood. What other options are accessible to those who prefer to camp in the wilderness? Camping in an undesignated area isn’t for everyone. It is common for backpackers to seek out off-the-beaten-path locations, and this implies that there will be no fire pits or grills to use.
Because of dry weather conditions or because of a common policy, open campfires are not permitted at some campgrounds. For these campers, a homemade camping stove is the ideal choice because the cooking flame is contained, lowering the chance of a fire hazard.
Homemade camp stoves are an easy way to prepare food quickly and easily when camping. Paint can stove, soda can stove, rocket stove, and tuna can stove instructions are among the many that may be found online. Fuel dispensers, pot supports, simmer containers, and even windscreens are all possible add-ons. Check out this DIY camping stove website for more information on how to create this and other things.
Homemade Camping Stove Directions
You can make a stove out of soda cans in just a few minutes by following the instructions below. A “hobo stove” is a cheap and portable stove that can be set together on the fly with a minimal amount of supplies.
Be aware that many handmade camping stoves are small and only carry limited amounts of fuel, as this one does. If you plan to prepare a lot of food, you may want to make two or three of these camping stoves to save money.
Supplies Needed
In order to make a single handmade camp stove, you’ll need the following materials, most of which can be bought at your local home and garden store.
- Two cans of aluminum soda
- Hanger made with wire
- (1) Perlite (available in the gardening area of your local home improvement store, about a quarter-cup)
- Alcohol that has been tampered with (typically found in the paint section of a home improvement store)
- snippers for cutting wire
- Scissors
- Plunge (a 1/16-inch drill bit works well)
How to Build a Camping Stove
The following instructions will guide you through the process of building a handmade stove that is ideal for use while traveling or camping in remote areas.
- Using a can that has been cut from the bottom, make the stove’s top.
- Cut 1 12 inches from the bottom of the other container to make the stove’s base.
- Drill holes all the way around the stovetop with a 1/16-inch drill bit. Hole spacing should be between 1/4 and 12 inches apart and cover the entire top.
- Drill four or five small holes in the center of the top in a cluster formation.
- Small holes in a cluster arrangement in the top center can be drilled by drilling four or five small holes there.
- Make sure the outer rim of the bottom of the stove is visible, but the outer rim of the top of the stove is not.
- Approximately half of the stove should be filled with booze at this point.
- To light the stove, slowly move a match or lighter over the burner’s edge.
Points to Remember
Stoves can be tricky to ignite on occasion. As a result, you may need to angle the burner a little to ensure more fuel gets into each section. Attempt to relight the stove after this. You’ll need a pot stand now that you’ve built your own camp stove, so you can cook over it. A coat hanger can be used to create a simple pot stand.
- Straighten the hanger by removing any bent or twisted sections.
- Use sandpaper to remove any paint or rubber coating.
- Assemble a pair of “legs” from the coat hanger by bending each end 90 degrees.
- Hanger sections can be divided into equal length sections by creating perpendicular ledges along the length of the rest of the hanger.
- To complete your stand, bend the hanger’s connected end to form two additional “legs.”
- Using parallel bars, you may adjust the height of your stand to suit your needs.
Finally, even though this is a reasonably simple camp stove to build, as with any combustible materials, you should always take caution and keep it out of the reach of minors.
A Camp Stove You Can Use Anywhere
Xem thêm : How To Clean A Cast Iron Stove? Step-by-Step Tutorial
Knowing how to build one of these DIY camp stoves is a valuable skill for any camper or backpacker, regardless of whether they’re in a popular spot or off the main road. It’s important to keep safety in mind when building and using your camp stove.
Steps To Make A Camp Stove
With this simple candle burner camp stove, I’d want to introduce myself to you. It’s simple to put together because it only requires a few minutes of your time, and you can do it right where you need it. Making a candle burner camp stove is easier and less time-consuming than using a gas stove or other ways.
Step #1. Prepare the materials
In order to do this project, all you’ll need is a pair of scissors; some corrugated cardboard; old candles in the form of wax; and a knife. These supplies can be transported on-site and put to good use in the building process. You’ll need a large and a little tin can.
Step #2. Making the burner
Take a small tuna can and outline the edges where the can will stand. You can use the bottom of the larger can as a guide to determine the height of the opening. Finally, you’ll need to acquire some cardboard and cut it into strips that are about an inch longer than the tin can. Thickness the cardboard to that of the tin can’s girth when rolling it out. The longer you use the burner, the more congested the space will be. Use the tuna cans to store it. Melt the candles in a container to get the wax out if you’re confident they’re packed tightly enough.
A can filled with cardboard should be used to collect any melted wax. Afterwards, wait a few minutes before adding more wax so that the cardboard can absorb it. It’s possible that you’ll have to keep pouring until the cardboard is thoroughly submerged. Finally, allow it to cool completely before repurposing it in the kitchen. Glass top stove burners and switches can also be troubleshooted.
Step #3. Making the stove
The stove can be built after the burner has been constructed. While you’re waiting for the cardboard to absorb the wax pour, you may make this. There is a big can of tin that we will be putting to use. Make that the can is empty; after all, we don’t want any of the contents to leak out. Make sure the covered side is on top. You can use a knife or any other tool you have to make holes towards the top of the can.
Step #4. Assemble
Prepare your food on it now, having built a top stove and candle burner. It works by putting a fire inside a huge can and putting a pot or pan on top of the can. Cooking is made possible by the internal heat of the can, which raises the temperature of the can and transfers the heat to the pan. It will be much more convenient to use this cooking station rather than relying just on firewood for heat.
How to Make a DIY Alcohol Stove from Soda Cans
It’s no secret that ultralight trekkers have long relied on alcohol stoves for their cooking needs. Using aluminum cans for the stove and alcohol for fuel, they’re cheap to make, easy to operate and weigh less than 2 ounces. This step-by-step guide explains how to make a penny alcohol stove, which uses the copper coin to create pressure for more efficient cooking. Alcohol stoves can burn denatured alcohol, ethanol and HEET, which are all fairly cheap and easy to find.
Ultralight trekkers have long relied on alcohol stoves. With aluminum cans as stoves and alcohol as fuel, they are inexpensive to construct and weigh less than 2 ounces. For more efficient cooking, you may build a penny alcohol stove by following this step-by-step tutorial. Alcohol stoves can run on denatured alcohol, ethanol, and HEET, all of which are readily available and inexpensive.
Materials:
- Two aluminum beverage cans of 12 or 16 ounces
- 1.5-inch thick wood block can be used as an optional accessory.
- if desired, three wood screws
- Larger 24-ounce beverage can is one option (to make a snuffer)
- A piece of card stock or paper
- Penny
- High-heat epoxy (we used JB Weld)
- Insulation for pipes made of fiberglass
- Mesh made of steel and aluminum
- A can or jar’s top
- Dried-up booze
Tools:
- Either sandpaper or steel wool
- Ruler
- Clamp
- Utility knife or razor blade?
- Scissors
- Colored pencil
- Drilling with 1/16′′ and 3/16′′ drill bits is recommended.
- Pliers
- snippers for cutting wire
Directions
The design of this alcohol stove consists of only two parts: a burner and a heat shield. The stove’s top and bottom are made from the bottoms of two cans. There are burner holes on the top, and a base is provided by the bottom. Epoxy is used to secure the top to the base.
Step 1: Prep the cans.
If you want a clean metal look for your stove, sand off the finish on the bottom 2 inches of both the smaller cans. When the cans are full and intact, it is easier to do this. Once you’re done sanding, empty the cans in whatever manner you see fit and rinse with water.
Step 2: Piece #1—Cut the stove top to size.
Sand the bottom 2 inches of both the smaller cans to reveal bare metal for a more modern look on your stove. When the cans are full and intact, this is the most efficient method for removing the lids. Drain the sanding cans and rinse them with water once you’ve finished sanding.
Step 3: Make the burner holes.
Place a piece of paper on top of a can that has been turned upside down. Using the can’s bottom as a reference, make a circle on the paper and color in around the outline. Fold the circle in half four times before cutting it out. Place the folded paper in the can’s bottom. Using a marker, make 16 evenly spaced dots on the can at each fold. Each dot should be drilled using a 1/16′′ drill bit.
Step 4: Make the fuel port.
Use the marker to outline a penny that’s been placed in the bottom of a can. Make a mark in the center of the circle with a penny that has been removed. The middle dot should have four more holes drilled surrounding it. Use a 3/16′′ bit to drill the central hole, then a 1/16′′ bit for the four other holes around the center.
Step 5: Piece #2—Make the stove base.
You’ll need a second can to complete the stove’s base, so follow Step 2 again.
Make a stove snuffer by repeating the process with the larger, 24 oz. can. This step is optional. We opted for a 2-inch height so that it would fit over the burner with ease.
Step 6: Prep the two stove pieces for assembly.
Preparing the stoves to fit together will make it easier. You can use pliers to crimp the opening of the top piece to a snug fit. When working with the foundation piece, use a different, full beverage can or similar object to work around the inside edge.
Step 7: Insert the wick.
Xem thêm : What Is A Franklin Stove? Everything You Need To Know
Cut a square of fiberglass insulation and insert it into the stove’s bottom section of the insulation square. The alcohol fuel is wicked through this.
Step 8: Assemble the stove.
Apply the high heat epoxy to the top of the crimped edge of the top piece once it has been prepared according to the instructions. Push firmly and evenly as you insert the top into the base. Allow the epoxy to harden according to the instructions on the package. Remove any dry epoxy that remains by sanding it.
Step 9: Make the pot stand.
Cut a piece of metal mesh to a height of 2.5 inches and a length of 17 inches with wire cutters. Remove all but two of the metal threads from one short side. The final two can be made into hooks by bending them inward. Remove any unnecessary threads. Secure the hooks by forming the mesh into a circle. Adjust the stand size if necessary, then place the cooking pot on top.
Step 10: Get Cooking!
Place the stove on a rimmed piece of metal, such as a jar lid. Using the fuel port, add denatured alcohol to the stove’s interior (1 ounce generally burns for 10-12 minutes, depending on conditions like temperature and wind). Using a dime, place a few milliliters of alcohol on top of the fuel port and shake. In order to get the stove up and running, fill the rim of the metal lid with some fuel.
Place the pot stand carefully around the burner and light the fuel inside the lid and on the penny. Place the pot on the stand after the flames are coming out of the burner holes. You can extinguish your stove by removing the pot and placing the snuffer can on top of it, if you like. Hot food is delicious, so take advantage of it!
Using a rubber band, snuffer can and jar lid make a fantastic container for the stove and pennies after you’re done packing it all away.
FAQs
What fuel do you use in a penny stove?
Using the fuel port, add denatured alcohol to the stove’s interior (1 ounce generally burns for 10-12 minutes, depending on conditions like temperature and wind). Using a dime, place a few milliliters of alcohol on top of the fuel port and shake.
How tall should a penny stove be?
Even whether the dimensions are increased or decreased, the total height is less than two inches (50 mm).
How much alcohol is in a penny stove?
Fill the burner top by sliding a dime over the hole. In total, this will yield 1.5 to 2 ounces of alcohol. As it heats the stove, this amount of fuel will take a long time to prime.
What are alcohol burners used for?
One way to create an open flame in the lab is to use an alcohol burner or spirit lamp. Brass, glass, stainless steel, and aluminum are all acceptable materials for this item.
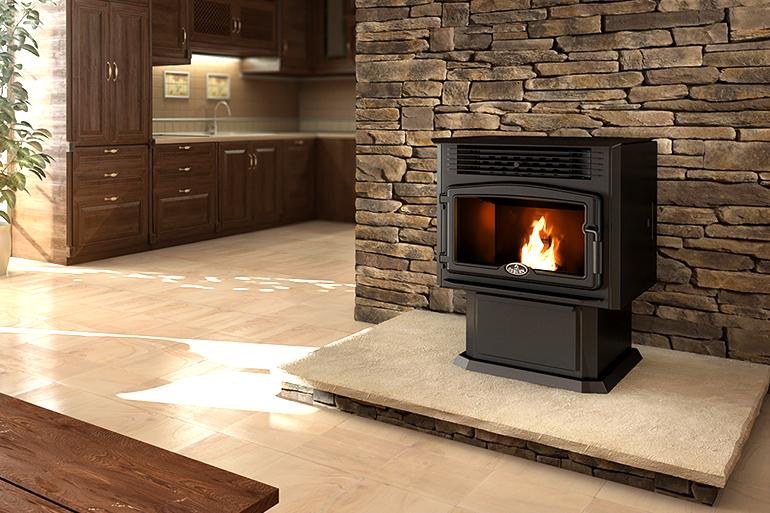
How do you vent a wood burning stove?
Wood-burning stoves must always be vented through the roof of your home, whereas pellet-burning stoves can be vented either vertically through the roof or horizontally through the wall to the outdoors. Both vertical and horizontal venting options are available on gas stoves.
Why does Solo Stove not smoke?
Some circumstances, such as damp wood, ash buildup, and excessive firewood use, can impede Solo Stove fire pits from accomplishing their duty of removing smoke from the atmosphere.
Are solo stoves worth the money?
Despite the Solo Stove Bonfire’s price tag of $300, it isn’t as expensive as some of the more attractive propane-fueled pits on the market. A lifetime warranty plus the ability to store or use as a portable pit make the Bonfire well worth the extra cost.
What kind of fuel does an alcohol stove use?
Ethanol and methanol are the two primary forms of alcohol stove fuel.
Can you use rubbing alcohol in a camp stove?
These stoves are capable of burning isopropyl alcohol. It’ll burn just fine. However, you’ll have to deal with a great amount of soot that is difficult to clean and keep away from other equipment. This is due to the fact that the alcohol hasn’t completely burned out.
How does wood gasifier work?
Boiler that uses wood as fuel. Burning wood takes place in the top chamber (the firebox), while fumes move down the chimney and are extinguished at 1,800 to 2,000 degrees Fahrenheit. Heat is transferred from the hot gases to a big tank of stored water via a heat exchanger with a fire-tube.
It’s A Wrap!
Even the simplest method of making a camp stove can make a great difference. With no one to turn to, imagine yourself stuck in a remote location. If you don’t know anything, you have an advantage. Learn how to clean a wood burning stove and how to install a wood stove in a garage by checking out linked articles.
Nguồn: https://spasifikmag.com
Danh mục: Stoves