It’s time to learn how to mend stovetop burners if your stovetop burners are broken. You’re in luck, because this article is exactly what you need right now!
- How To Clean Griddle On Stove Top? Complete Step-by-Step Guide
- How To Use A Wood Stove Damper? A Step-by Step Learning Guide
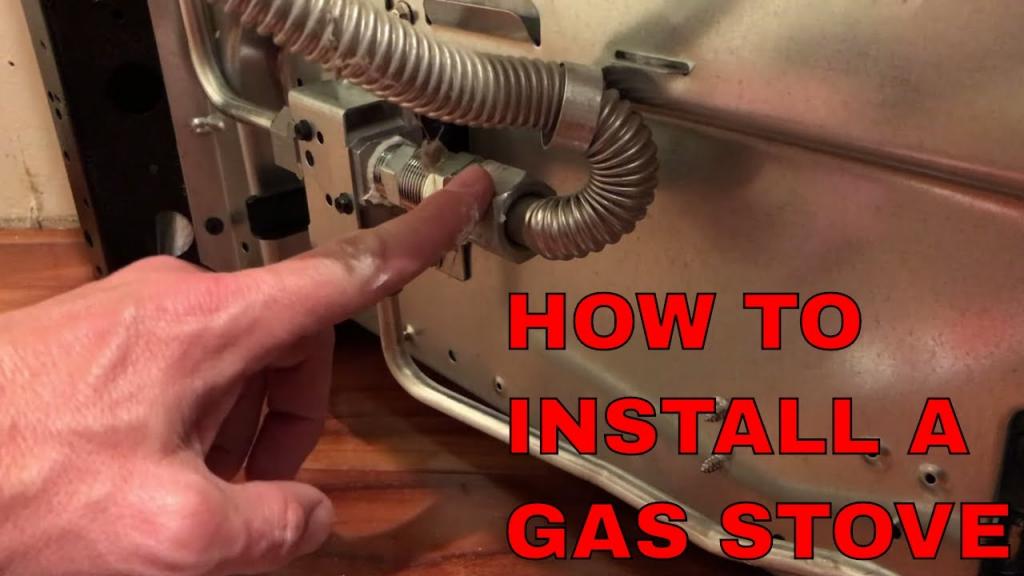
- How To Install A Propane Line For A Stove? Comprehensive Guide
- How To Clean Frigidaire Stove Top? Comprehensive Guide
- How To Clean A Cast Iron Stove? Complete Step-by-Step Guide
It’s hard not to panic when your stovetop breaks down, whether you use a range or a built-in cooktop, and it’s one of the most vital equipment you own. Without a stove, how do you make your mother’s chili? In the event that you get home late, how would you prepare your favorite pancakes or grilled cheese sandwiches?
Bạn đang xem: How To Fix Stove Top Burners?
Cooktop damage can be terrifying, but don’t worry; we’re here to reassure you. Your stovetop and late-night snacks will be ready in no time with a little TLC on your part. Five frequent faults with stovetop burners will be discussed in this post, as well as the steps you may take to solve them.
5 Different Problems And How You Can Fix Stove Top Burners
The following are five common issues with stovetop burners, as well as the most common solutions and steps to solve them:
Problem #1. The gas burner isn’t working
A malfunctioning stove burner can make it difficult to cook anything, from a fancy dinner party to a basic workday meal. If your gas stove won’t light, there are a few possibilities. To begin, take note of what happens the first time you try to light the burner. In typical circumstances, you should be able to hear a clicking noise and smell gas coming out of the valves.
A issue with the stove’s gas flow might be detected by hearing a click but not smelling anything. A malfunctioning ignition switch may be to blame if you can smell gas but don’t hear any clicking noises.
After shutting off and unplugging the appliance, remove the grill and burner cap. Get rid of any crumbs and reattach any disconnected cables. A new igniter or a repair to your gas line may be required if it doesn’t operate. Find out how to fix a stove’s igniter.
Problem #2. The gas burner is slow when heating up
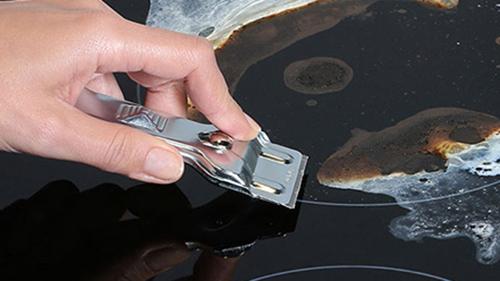
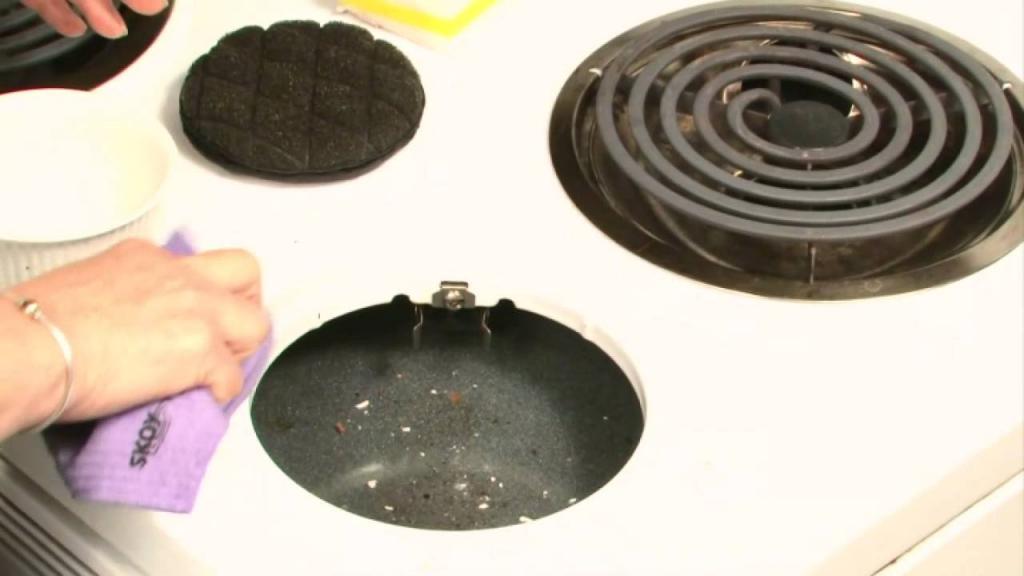
A slow-heating cooktop can be a major issue, regardless of the type of stovetop you have. When using a gas stove, you may have to clean out the burner apertures to get rid of any material that has built up. Cleaning your stovetop is a simple solution to this problem.
Remove the grates and burner caps from your stove and soak them in warm water and soap in the sink. Scrub the surfaces with a stiff brush.
Use a moist sponge to clean the cooktop’s surface and a toothpick to remove any food or debris from the gas valves. The cleaning power of baking soda and vinegar can also be increased by incorporating them into daily routine. Glass top stove burner and switch troubleshooting may be useful.
Problem #3. The electric burner does not heat up.
If one of your electric burners isn’t heating up properly, make sure you check them all. This is an electrical problem, and you will need to call a professional or get a new stove if this is the case. If only one coil is heating incorrectly, check the connection and ensure that the coil is firmly plugged into the cooktop. Try another cooktop coil to see if it works in the same spot as the broken one. If it does, it’s time to get a new one.
Problem #4. The induction element does not heat up.
Make sure the pan you’re using is induction suitable if your induction stovetop will not heat up. For an induction cooktop to operate, you’ll need ferromagnetic pans that are specifically designed for this purpose.
Problem #5. The gas stovetop continues clicking
It’s normal to hear a clicking sound when you turn on your gas stove, but if it continues for a long time or even blocks the burner from lighting, it can be a genuine nuisance. This problem happens when the burner is obstructed by something.
There may be obstructions in the burner apertures, such as a knocked-off burner cap. If you don’t have a sealed-burner cooktop, food can quickly become trapped in the gas grates. You’ll have to use a paperclip or some other thin metal object to get it off. Avoid using breakable or flammable items, such as toothpicks or plastic forks.
If the clicking persists, the stovetop may have become overly damp. To remove any remaining water or oil from the stovetop, you can use a towel or even a fan pointed towards the surface.
5 Common Stove Top Problems and How to Fix Them
There is no doubt that the stovetop is one of the most critical equipment in your kitchen, and once it begins to malfunction, it’s impossible not to panic. So how do you cook your mother’s amazing chili without a stovetop? How do you make pancakes in the morning or a grilled cheese sandwich when you come home late?
Even though the thought of a damaged stovetop can make you nervous, we’re here to reassure you. The majority of common cooktop issues may be remedied with a little tender loving care, so you can get back to enjoying those late-night nibbles. Listed here are five of the most prevalent cooktop issues and their most popular fixes.
There’s a problem with the gas burner.
The Fix: If your gas stove won’t light, there are a few possible causes. Try lighting the burner first and record your findings. You should be able to hear a clicking noise and smell gas pouring out of the valves when the system is working properly. An issue with gas flow is most likely to blame if you hear a click but don’t smell anything. There may be a problem with the ignition switch if you can smell gas but not hear any clicking.
Remove the grate and burner cap from the device and turn it off if you can. Reconnect any loose wires and remove any loose food particles. It’s possible you’ll need a new igniter or some work done to your gas line if that doesn’t work. You can count on us to assist you in locating replacement parts and scheduling any necessary cooktop repairs.
Slow heating of the gas burner is the problem.
It doesn’t matter what type of stove you have, a slow-heating cooktop can be a huge problem. A gas stove could be to blame if the burners are blocked with dirt, making the flames small and weak. This can be readily remedied by thoroughly cleaning your stove top.
Disconnect and turn off your cooktop, then wash the grates and burner caps in hot soapy water in the sink. Use a firm brush to clean the surfaces. In addition to wiping down the stove with a moist sponge, you can use a toothpick to clean the gas valves of any food or other debris. The cleaning power of bicarbonate of soda and vinegar can be amplified by including them into daily routine.
Troubleshooting: Electric stove won’t get hot enough!
Your electric burners may not be heating properly, so if one of them does, you should check the others. Your cooktop may have an electrical problem if all the burners won’t heat, and you may need to call in a specialist or replace the stove. Verify the connection and the coil itself is firmly connected to the cooktop if only one coil is heating incorrectly. Your cooktop may need to be replaced if you find that if you replace the broken coil with another one, it works perfectly fine in the same position.
There’s a problem with the induction element.
If your induction cooktop won’t heat up, check to see if the pan you’re using is induction-compatible. You’ll need ferromagnetic pans to use an induction cooktop because it heats the pan directly, not the burner below. Here’s a list of cookware that will and won’t function on your stove, broken down by kind.
Constant clicking noises are coming from the gas burner.
When you turn on your gas stove, you may hear a clicking sound, but if it persists after the burner has been lit or even stops the burner from lighting, it may be a real nuisance. When something is obstructing the burner, this problem occurs. Make sure the burner cap hasn’t been knocked out of position and that the holes aren’t blocked by debris. A paperclip or other metal object can be used to remove food off the gas grates if you don’t have a sealed burner cooktop (don’t use anything that is easily breakable or combustible, like toothpicks and plastic forks). If the cooktop continues to make a clicking sound, it may be due to a buildup of moisture. Make sure to wipe down the stovetop or position a fan at the cooking surface to get rid of any excess water or grease.
If you follow the advice in this article, you should be able to get your stove working again in no time. To ensure you get the greatest repair service, replacement parts, and new appliances, call our store if your cooktop ends up needing a major repairs or if it’s time for an upgrade.
Gas stove won’t light? Here’s how to fix it
Xem thêm : How Much Space Between Stove And Cabinet? Perfect Information For You!
Having a gas stove is incredibly convenient, as anyone who owns one will attest to. Gas ranges have a number of advantages, including the ability to continue cooking even if the power goes out, near-instant heat, and long-term cost savings.
However, unlike electric or coil-element stoves, you must light the burners on a gas stove before you can cook anything. And occasionally, no matter how many times you turn the knobs, they just won’t ignite.
Most of the time, you can fix the issue on your own. Find out why your gas stove won’t light and what you can do to repair the problem.
Problem: It’s clogged with food debris
Debris obstructing gas flow to the igniter is one of the most common causes of a gas burner that fails to ignite.
Begin by removing the grate on top of the faulty burner, then replace it. After that, unscrew the burner cap with ease. You may either remove the sealed burner base by lifting it off, or you may need to remove a few screws first. Use a warm, soapy washcloth to wipe down the surrounding area. Use a stiff brush to scrub the base of the sealed burner with vinegar or warm water. Finally, use a toothpick, sewing needle, or compressed air to remove any leftover debris from the burner holes. It’s time to reinstall the burner, cover, and grill and relight the burner.
The gas supply line may be kinked or there may be a greater issue if this doesn’t work. In such case, you should seek the advice of an expert.
Problem: There’s a loose connection
Connections can come loose on a stovetop even if there aren’t many moving parts. This is more likely to happen during cleaning or installation. The spark required to ignite the burner will not be generated if the wires connecting the igniter to the control module do not make a firm connection.
This can be fixed by unplugging or resetting the breaker that supplies electricity to the appliance in question. Burner Cap and Grate Remove the grate from the ailment burner Look for disconnected wires or loose connections after removing the sealed burner base. The burner base, cap, and grate must be reinstalled, as well as any loose or disconnected wiring. Restore the stove’s electricity and run a quick test to ensure the connection is working properly.
Problem: It’s a faulty igniter
Identifying a defective igniter may be as simple as cleaning the burner base and tightening any exposed connections. You can detect if the igniter needs replacing by twisting the control knob to the “ignite” position when the lights are turned off. A yellow or orange glow from the ignition is a sign that the igniter needs to be replaced.
To repair the problem, turn off the stove’s gas and electricity, remove the burner cap, and then disconnect the burner base with a screwdriver or hex driver. Turn off your ignition by unplugging the cables that lead to the igniter. To avoid having to cut or splice any wires, most igniters have an easy-to-use disconnect system. Install the new igniter and replace the burner base, cap, and grate using the model number on your stove to establish which igniter has to be replaced. The burner should be tested after the gas and power are restored.
You may need to replace the igniter switch, the igniter control module, or call an expert for a more thorough diagnosis if none of these simple fixes work for your recalcitrant burner.
How to Replace a Glass-Top Stove Burner
The experience of using an electric (or gas) stove with a glass top is unlike any other. A whole stove is available for you to use, and you don’t have to soak or scrub any iron. Cleaner in many aspects. However, repairs are more difficult. Traditional electric stoves are easy to troubleshoot or even repair a defective burner by simply swapping out burners in the sockets. With a simple plug-and-play procedure, a damaged burner can be replaced with a working one. However, fixing a broken burner on a glass-top stove is far more difficult.
This is due to the fact that the burner, or heating element, is located beneath the glass rather than on top of the stove surface. In repair manuals, it’s referred to as a radiant surface element rather than a burner. For troubleshooting or replacing an attached component, you’ll need to go behind the glass and remove it. Using this article, you’ll learn how to replace a radiant surface element (burner) on a conventional glass top stove.
Cut the Power
A burner replacement on an electric stove is an electrical repair by definition. This necessitates shutting down the power. Any electrical repair must begin by shutting off the appliance’s supply of power, preventing electrocution or shock injury, and preventing damage to the equipment itself.
If you can, unplug your stove’s power cable. If you can’t get to it, turn off the power to your stove with the breaker that’s already there.
Open the Glass Cooktop
Getting the glass cooktop raised so you can work underneath it is the next step to take.
Open the Door
Begin by removing the oven door if it is closed. As a result, you will see a lip on the stove. You’ll discover two screws attaching the cooktop to the oven just behind that lip. These items will most likely necessitate that you open the oven door entirely.
Remove the Fastening Screws
Grab your screwdriver and remove the screws as soon as you see them. Only these two screws need to be removed in order to open the glass cooktop. They should be kept in a safe place.
Pull, Lift, and Pull Cooktop to Release Brackets
The stovetop is held in place by a combination of three mounting brackets on most stoves. To remove the top of your stove, you must follow a certain procedure. The first step is to take the stovetop out of the cabinet’s support brackets.
Lift the front of the cooktop slightly to free the frame sides of the front support bracket, and then remove the support bracket from the stove. Pull the cooktop forward once more to free the hinge tabs from the backguard’s slots.
Lift Cooktop Front Edge and Prop Open
Once you’ve reached this point, you’re free to open your cooktop completely. While working on your stove, use a little wooden prop to keep it open. To keep your cooktop at the proper height, you can use a board or even cut something from scratch. To avoid damaging the oven’s insulation, place your prop in the area directly beneath the front-center of the space where it will be placed.
Remove the Surface Element Bracket (Front or Back)
You’ll note that the surface elements are held in place by two or three brackets. To remove the appropriate element bracket, you must first determine which burner you wish to replace.
Careful of the Prop
Keep an eye on your prop when removing the brackets for the surface elements you’ll be removing. It’s astonishing how simple it is to fall into this trap.
Remove Screws from Broken Element’s Support Bracket
Look at how the bracket is attached to the wall. You’ll need to remove and set aside anywhere from two to six of the device’s mounting screws.
Lower the Element Bracket
Slowly lower the mounting bracket onto the insulation (or a towel placed out for this purpose) underneath the supported cooktop once the screws in the bracket have been removed.
Uninstall the Broken Surface Element
Removing and replacing the damaged component is now possible due to access to the bracket.
Mark the Mounting Holes
Take a look at the burner’s mounting holes before doing anything else. A permanent marker can help you remember where you drilled the bracket holes so you can use the same ones when you reinstall your burners.
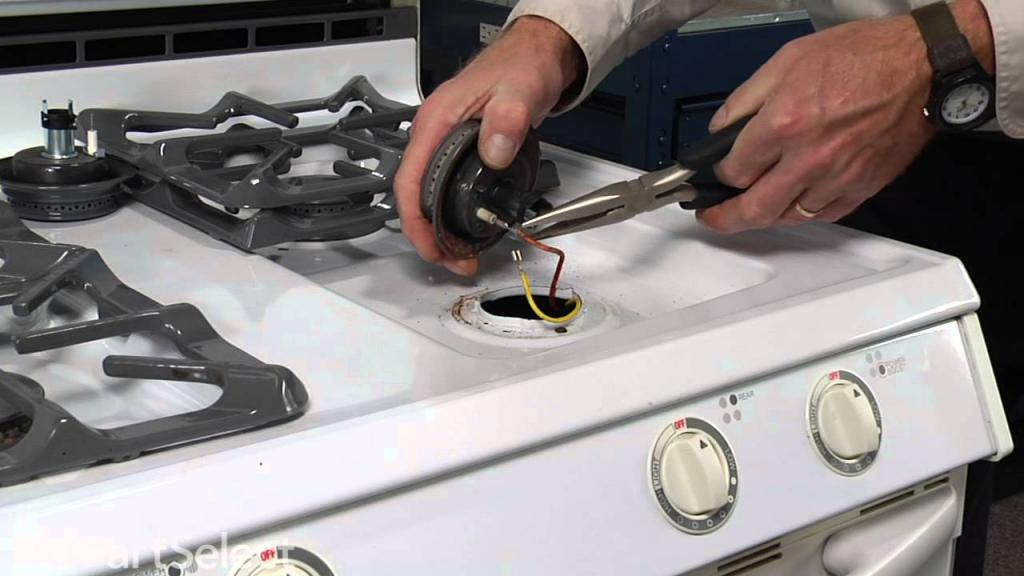
Release Mounting Clips with Pliers
Metal clips are used to secure the burner in place. Release the mounting clips with pliers and the burner will come loose. Remove the clips from the bracket by forcefully pinching them from beneath the bracket.
Begin Wire Transfer
It is recommended that you transfer each wire one by one to the new burner when changing this type of burner. Start the wire transfer as soon as you get your new burner.
Install the New Surface Element
The new burner or surface element has already begun to be installed. You’ve got the new burner in your hands, and you’re putting it through its paces, wire by wire.
Continue Wire Transfer
Xem thêm : How To Install A Wood Stove In A Garage? Step by Step Instructions
Take care when moving the old uninstalled burner’s wires to the new burner. Make certain that every wire is clipped in place and in the exact same spot as it was on the old burner.
Transfer Mounting Clips
There is likely one screw each on the mounting clips attached to the old burner. Remove the screws, transfer the clips to the new burner, and return the screws for secure mounting preparation.
Press In New Mounting Clips
It’s possible that each of the old burner’s mounting clamps has a single screw. It’s time to upgrade your burner, so it’s time to get a new set of mounting screws.
Reassemble the Stove
Put your stove back together and see whether you’ve done it right.
Reattach the Element Mounting Bracket
Reinstall the mounting bracket on the underside of the glass and tighten it down using the included screws.
Remove the Prop
To remove the support that was keeping the stove open, gently lift the appliance.
Set the Cooktop Down Flat
Take care to lower your cooktop to the point where it is no longer being kept aloft.
Align the Brackets and Push
Make sure each bracket (cabinet, front, hinge) is aligned appropriately before attaching it to the wall. To reinstall the stovetop, tilt it back into position, secure it to the front brackets, and then push the entire stove backward until it rests on top of the cabinet in the cabinet bracket.
Restore the Power
Reconnect the electricity when you’ve finished reassembling your stove. Make sure your stove is getting power by plugging it back in or turning the breaker to the ‘on’ position.
Test Your Success
Finally, test the burner by lighting it up and seeing if it works. Congratulations if it does; now it’s time to prepare for your next appliance repair challenge.
Electric Stove Burner Repair Tips
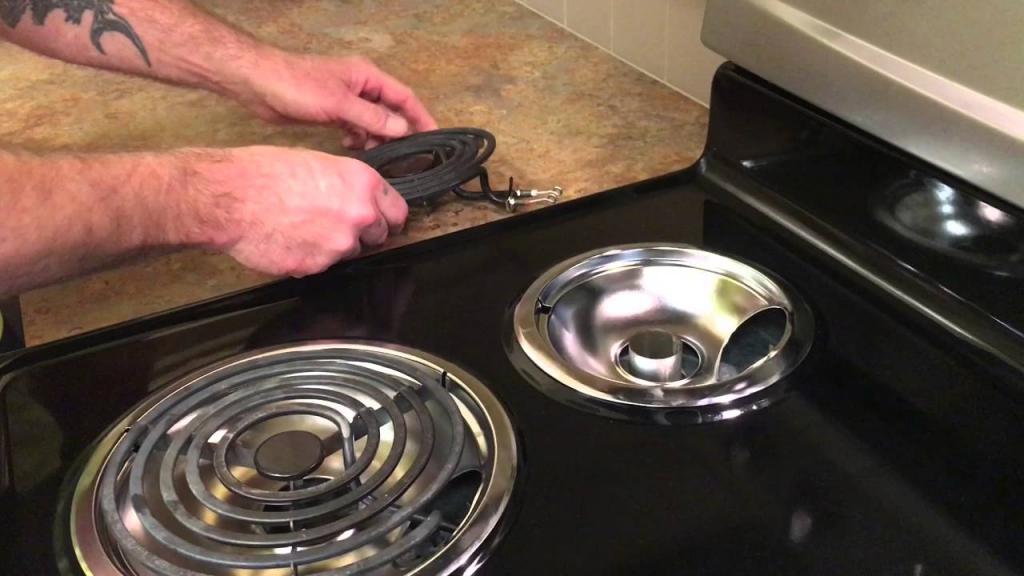
Step 1: Replace bad electric stove top burners or sockets
A defective switch, a faulty burner, or a bad connection in the burner socket could be to blame for a non-heating electric stove top burner.
Switch out the burner with one that you know works to see if the problem is with the burner (Photo 1). Either the burner socket or the endless switch is faulty if the burner won’t heat. Using the burner socket, you can plug in each of the burner prongs. Burner socket connections can be damaged and fail to supply power. Examine the socket if the prongs appear to be scorched. Replace the socket if it appears to be scorched or burned. The burner socket can be replaced as shown in the second photo.
Step 2: Replace the switch
On the infinite switch, you spin a knob to adjust the burner temperature. Your burner won’t get power if the switch goes out. If you know the burner and burner socket are working but the burner still won’t heat, check the infinite switch. In order to gain access to the infinite switch, we had to remove the back panel. Please note that this is just a guideline. Using a multimeter set to RX-1, check the switch while the range is unplugged (Photo 3). If the reading on the meter does not change, then the endless switch has to be replaced (Photos 3 and 4).
Required Tools for this Stove Burner Replacement Project
You’ll save time and aggravation if you have all of the necessary supplies ready before you begin.
- It’s a 4-in-1 tool
Also, a multimeter is required.
FAQs
Can you fix stove burners?
To fix a malfunctioning burner on a typical electric stove, all you have to do is replace out the burners in the sockets. With a simple plug-and-play procedure, a damaged burner can be replaced with a working one. However, fixing a broken burner on a glass-top stove is far more difficult.
Why do stove burners stop working?
Debris obstructing gas flow to the igniter is one of the most common causes of a gas burner that fails to ignite. The remedy: Remove the grate that covers the faulty burner. It’s time to reinstall the burner, cover, and grill and relight the burner.
Do electric stove burners wear out?
Cooktop surface coil elements, or burners, on electric stovetops will eventually wear out. In order to bring water to a boil or cook food in a frying pan, the element must heat up.
What causes a stove element to burn out?
oven cleaner residue or grease may be to blame for a short in an oven’s heating element. If the oven is not used for a long period, this residue can contribute to the element failure. A degradation of the element will develop over time when it is subjected to these deposits.
How do you clean stove top burners?
To make a thick paste, combine a few tablespoons of baking soda with a small amount of water. Using a pastry brush, apply the paste to the burners and let it sit for about 20 minutes. It should be possible to remove stubborn residue with a sponge once that period of time has passed.
When should I replace my stove burners?
The circuit has been disrupted, and the element must be replaced if visible fractures or bubbling are present. The coils that sit beneath ceramic tops should be examined for any broken or burned locations. The coil must be replaced if there is any discrepancy in appearance.
Can you manually light a gas stove with electric ignition?
Even if the igniter on your gas stove is damaged, you can use a match or lighter to manually light it. Compared to standard cigarette lighters, matches are more reliable and safer.
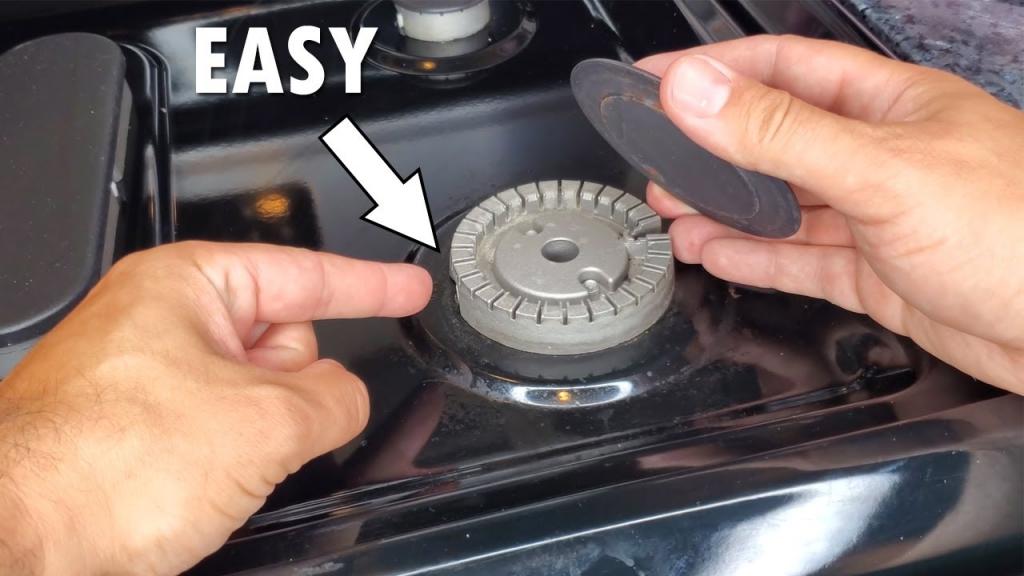
Why is my gas stove clicking but not lighting?
A misaligned burner cap is one of the most common causes of a gas stove that continues to click even after it has been ignited. Afterwards, remove the burner grate so that you can access the cap beneath it. To re-center the base, remove the cap and reinstall it. Re-light the burner if it hasn’t already been lit.
How do I know if my stove burner is bad?
Test the burner by connecting it to a working block and turning on the switch, then unplugging the defective block and plugging in the working block again. You need to change a burner if the new burner gets too hot. In order to execute this test, you don’t need to turn off the stove.
How long do stove top burners last?
According to Sears (OTCMKTS: SHLDQ) Home Services, stovetops typically last 15 to 18 years.
How much does it cost to fix an electric stove burner?
Repairing your oven range might cost anywhere from $50 to $200 on average, according to HomeAdvisor.
How long do stove burners last?
The average lifespan of a gas stove is 2-5 years longer than that of an electric stove. Taking care of the stove on a regular basis, such as cleaning it after each use and inspecting the burners, will help it last longer.
Do stoves have a reset button?
The range can only be reset by disconnecting the device for 2-5 minutes and plugging it back in.
Conclusion
There you have it, a step-by-step guide on fixing stove top burners. It will be a matter of minutes before your stove is up and running again if you follow these tips. Whether it’s time to replace your cooktop or make major repairs, you can get the best repair services, replacement parts, and new appliances at your local hardware shop or service provider.
I appreciate you taking the time to read this, and I hope you found it useful. We hope this tutorial has helped you restore your stovetops to their former glory. Find out how to clean a wood-burning stove and how to clean a wood-burning stove chimney from the bottom up by reading linked articles.
Nguồn: https://spasifikmag.com
Danh mục: Stoves