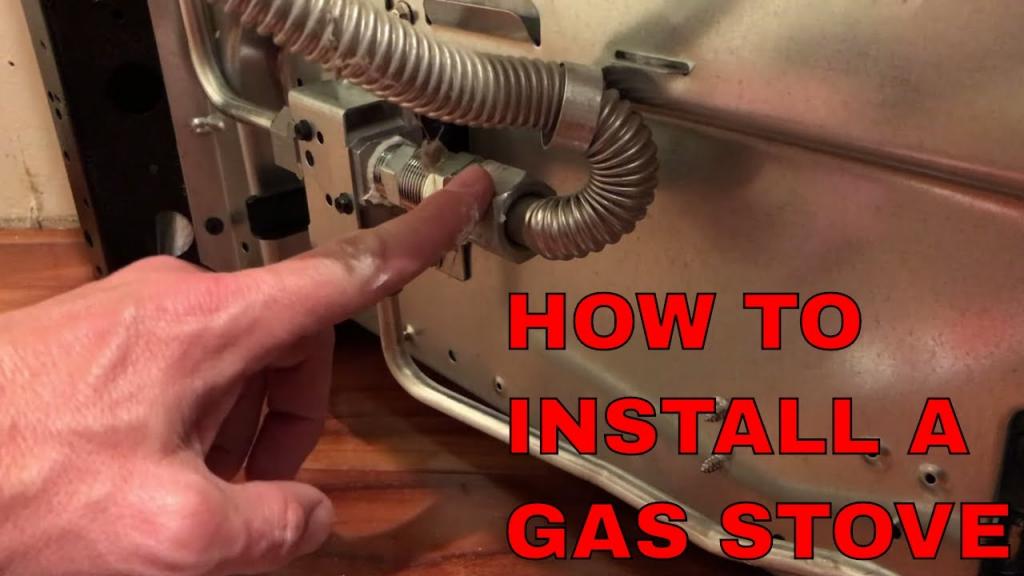
How do you install a wood stove in an enclosed space like an attic or garage? You can do it in six simple stages, and you’ll learn more about them as you read on.
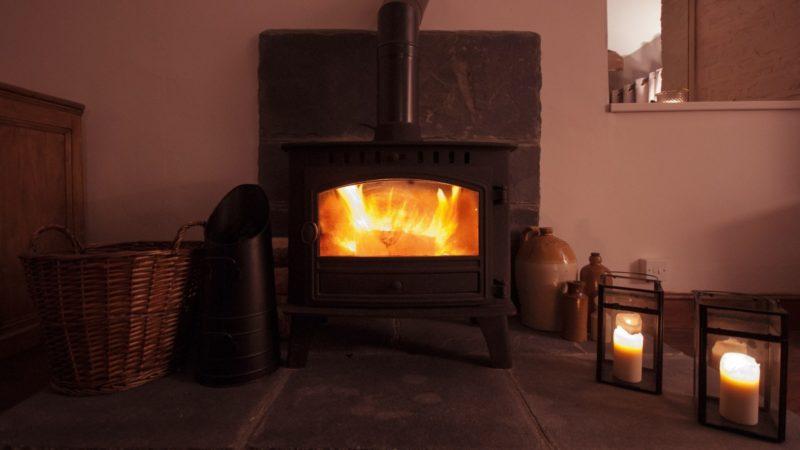
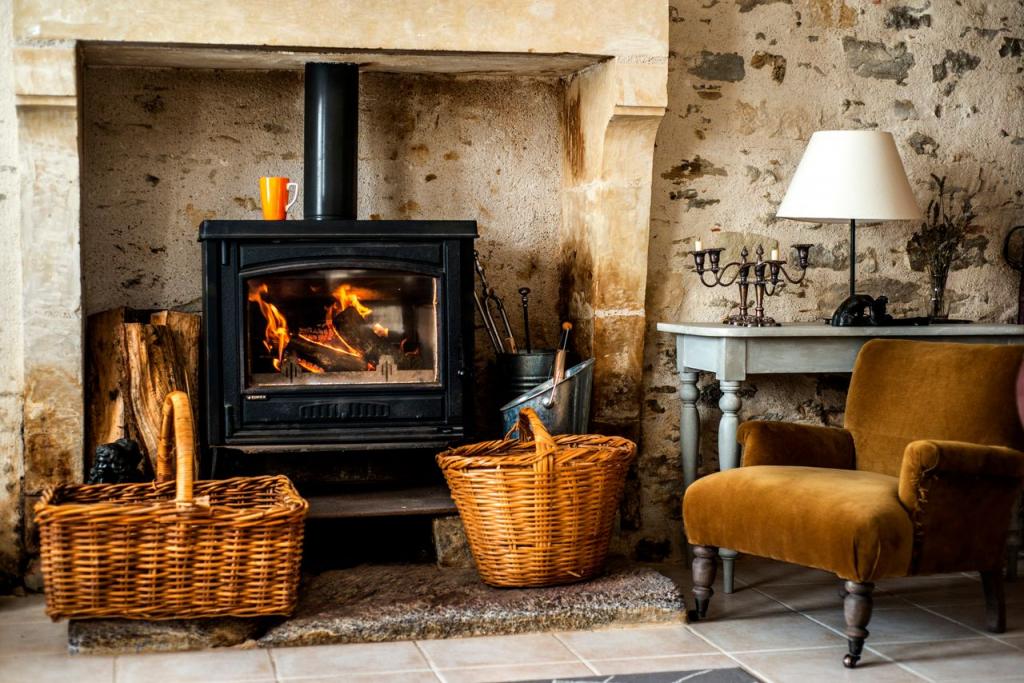
Garages can be used for a variety of purposes, from a workshop for a home improvement project to a play place for children. An ideal wood stove is a fantastic item to have in your garage because garages are frequently unheated.
Bạn đang xem: How To Install A Wood Stove In A Garage? Step by Step Instructions
There are numerous advantages to having a wood burner in your garage. As a first benefit, it provides a sense of security and coziness, especially in frigid climates like winter. Alternatively, if you don’t have any other available space in your living room, it can be used as a warm and inviting fireplace. Your garage will be far more comfortable and cozy if you install a wood stove.
What else should you know about this topic? Just keep reading!
Benefits of Using a Wood Stove in your Garage
There are numerous advantages to installing a wood stove in your garage. It has a number of advantages that not everyone is aware of.
Using a wood stove in your garage has the following advantages:
- Because wood is carbon neutral, wood stoves are better for the environment than gas stoves. As a result, burning it has no negative environmental consequences. Carbon dioxide is released into the atmosphere when fossil fuels like gas and oil are burned. It’s carbon that’s causing the most damage to the climate. In the words of MyChimney, “
- Woodstoves can be installed in any room of the house – even in the basement. It doesn’t matter where the electricity is in a room if you have a wood stove. To determine the location of a wood stove, you merely have to keep in mind that you’ll have to use it.
- They are the best source of heat in the world — no other source can match it. The heat generated by an electric fan can be directed to specific areas of the room in order to heat it up. With a wood stove, the heat from the fire will radiate out into the room, engulfing it.
- With kerosene costs fluctuating like ordinary gas, wood is a more cost-effective option for heating than oil or gas. In terms of cost, wood is an excellent option. You can save even more money if you have acreage where you can cut down trees and harvest your own wood.
- No electricity is required for wood stoves, so they may operate around the clock. A wood stove is the best option for heating if you frequently have power outages. It’s impossible to heat the garage with an electric heater if the electricity goes out. With a stove, all you have to do is add some kindling, and before you know it, the garage and you are both toasty warm.
- In some cases, you can cook on top of wood stoves, as some of them have a huge cooking surface. During a power outage, or even while you’re at work, the top level can be heated to the point that you can cook dinner in a skillet or frying pan. As a result, if the stove isn’t designed for cooking, it’ll get stained and suffer other harm.
- Your garage will be the envy of the neighborhood if you install a potbelly stove or a newer wooden stove. Fans and window displays depict the crackling and popping of a fire. It’s possible to make a garage seem terrific with a well-placed fireplace.
Choose the right space for Wood Stove in a Garage
For a wood stove, you’ll need at least 12 inches of clearance on all sides. The best location for a wood stove is in the middle of your garage, where it will get the most airflow.
It’s advisable to keep the Wood Stove away from any potential carbon monoxide sources, such as motors or automobiles, if you’re having problems selecting where it should go in the Garage. Keeping the Wood Stove in the Garage away from other heavy objects is also a good idea.
Place your Wood Stove near an exterior wall if you plan on using it as a heater in your garage this winter so it can suck in more heat from the outside. Garage doors and dehumidifiers should also be kept at least a few feet away from the Wood Stove.
A ventilation shaft can be attached to a Wood Stove in Garage so that it can both heat your space and remove any moisture that forms from the Wood Stove in Garage during the winter months. Your Wood Stove in Garage will then be able to vent hazardous carbon monoxide and other gases directly outside of your garage, as well as discharge Wood Stove’s water vapors into the outside air.
Wood Stove can be placed in the Wood Stove Garage as long as there is sufficient airflow.
Ventilation
In addition to being visually appealing, wood stoves are highly effective in providing home heating. In chilly weather, you may keep your home more pleasant by using a wood stove fan to circulate the warm air throughout the room. Both non-electric (manual) and electric-powered (blower-powered) Wood Stove Fans are available for use. When used with a wood stove outside of a residence, a wood stove fan can help draw fresh air into an area that lacks appropriate ventilation (a garage is perfect).
Wood Stove Fan Non-electric
The blades of a non-electric Wood Stove Fan create wind speeds of up to 30 mph. There are also little wood stove fans that are easy to use and can hang from the ceiling or position on any flat surface (or nails).
Wood Stove Fan Electric Powered
To quickly circulate heated air out of your garage when you need it, electric wood stove fans run on either an AC adaptor connection or batteries. Electric Wood Stove Fans have their own on/off switch, so you don’t have to turn off your stove to operate the fan.
Wood Stove Fan Installation
Screws or nails can be used to attach a wood stove fan to a wall or ceiling, depending on how the fan is to be utilized. Installing a wood stove fan couldn’t be simpler, as all you need are two points of contact (nails and screws) and one electrical cable.
Wood Stove Fan Cleaning
Wood Stove Fans are simple to clean, requiring only a damp cloth or a can of window cleaner on occasion. Place a Wood Stove Fan in an area away from anything that could catch fire.
Wood Stove Fan Noise Level
The majority of the time, the fans on wood stoves run quietly and without any major concerns. However, electric wood stove fan noise is typically no louder than 60 decibels (dB). Using a wood stove fan is a simple and effective way to regulate the temperature in your garage.
Wood Stove Fan Benefits
Creates wind speeds up to 30 MPH by blasting out hot air and circulating it around any room or region. Wood stove fans can also be used to swiftly clear smoky environments. If you need to heat your garage but don’t have access to an electrical outlet, you can use a wood stove fan.
Wood Stove Fan Costs
Depending on the model and the power source, wood stove fans might be rather economical (electric vs non-electric). Wood stove fan prices range from $20 to $50, but electric fan prices are higher. Wood Stove Fans are an excellent addition for anyone using a Wood Stove who wants to adjust the temperature in a particular region or room without turning the stove off.
Wood Stove Fan Availability
Wood stove fans are readily available in hardware and home improvement stores and can be purchased online. It’s possible to find a wood stove fan at a garage sale or secondhand shop during the winter months, when they are in high demand. With all the necessary installation equipment included, Wood Stove Fans may help you create a comfortable environment in any room.
Before You Install a Wood Stove in your Garage
If you use your garage for other purposes like woodworking or running a side business, adding a wood fire will help keep you warm. The furnace will keep the storage space warm and safe for your equipment.
Xem thêm : How To Use A Coal Stove? Step-by-step Instructions
To begin any home improvement project, the first step is to:
- Determine if you need a permit first.
- Make sure you have the right equipment on hand.
- Organize the space.
- Make sure you have the proper personal protective gear.
Steps To Install A Wood Stove In A Garage
There is no need to spend a lot of time or money installing a wood stove in your garage. There are only a few steps involved in installing a wood stove in a garage, so here are the instructions:
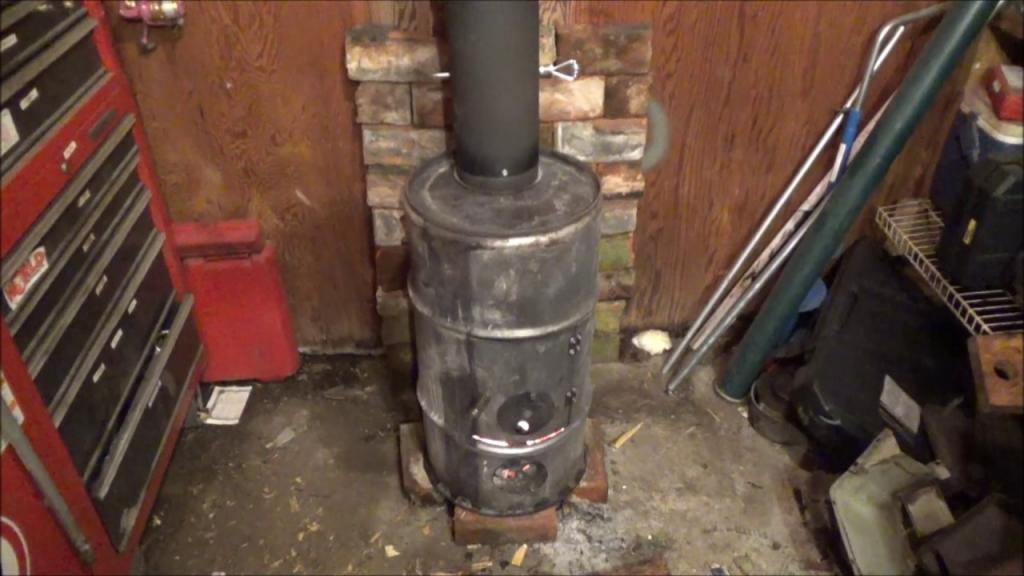
Step #1. Pick out a suitable area
The first step in installing a woodstove in your garage is to plan and choose a location for the appliance. If you choose the correct location for your woodstove, it will make the next stages much easier and more effective.
It’s also important to think about the type of pipe that you’ll need to use for your stove. Stovepipes come in a variety of configurations, including single-wall, clearance, and double-wall models. Depending on the sort of woodstove you have and the size of your garage, you’ll need to select the appropriate stovepipe. It’s not the same as connecting stovepipes to a variety of chimneys. As a result, you must also determine the type of chimney you will require.
Step #2. Prepare the woodstove and chimney for the installation process
Put everything in the garage and start arranging things haphazardly to figure out how much room the wood stove and chimney would take up, so that you can get the proper measurements. It will also be helpful in collecting the item’s size and specifications.
When creating a hole in a ceiling to install a chimney, make sure to collect the correct measurements of its diameter.
Step #3. Locate a suitable area where you could drill a hole
Locate a spot in the ceiling where a chimney pipe vent can be built using the chimney. Using the chimney aperture as a guide, note the locations of the roofs.
Add around four (4) inches to the circle marks on the chimney vent dimensions to ensure that the chimneys have a minimum clearance from any combustible resources on your roof. ” The locations of the chimney pieces that would enter the roof and ceiling can then be marked. Use a compass if you want to get the best grades.
Step #4. Drilling the hole for the chimney pipe
Drill the hole according to the marks once you’ve taken all the essential dimensions for the chimney pipe. A utility knife can be used to cut out the desired shape. For the most essential step of the installation, you may want to engage a professional to help you drill the hole or make the marks. Make a hole in the roof and trim the roof wrapping to suit the metal chimney collar, then install the stove tube. To make the chimney apertures, you can alternatively use a jigsaw.
Step #5. Clean the section around the holes you have drilled
In order to make room for your new pipes and fixtures, you must first remove everything from the area around it. The next step is to clean the areas of the roof where the chimney metal collar and other components will be installed in accordance with the manual’s instructions for cleaning procedures. A professional chimney fitter can assist you if you don’t feel comfortable doing all of the fittings yourself. In any case, learning how to restore water-damaged exposed wood may be the best course of action.
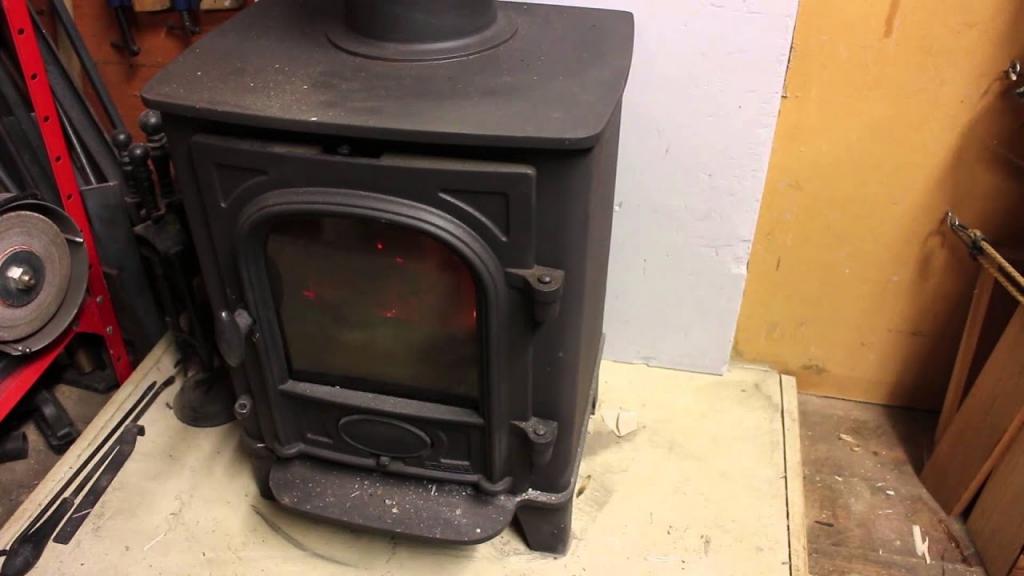
Step #6. Carry out the final fittings
Once the chimney fittings in the roof are complete, connect the wood stove pipe to the chimney pipe. To ensure that the chimney works properly, place the woodstove just below it.
Professional Installation of a Garage Wood-burning Stove
In terms of installation, there aren’t any hard and fast laws. However, there are regulations for heat-producing equipment.
By hiring an experienced installer, you can rest assured that your system will be installed correctly and quickly.
Using a contractor to install a wood-burning stove provides the following advantages.
You’ll Save Money
Many DIY-ers believe that they save money by performing their own work rather than hiring a professional. In reality, we’re more interested in how quickly the contractor and materials are used. People often underestimate the importance of time and experience.
Everything gets easier when a pro is involved. They know where to find the best materials, are well-versed in rules and safety precautions, and can focus on the task at hand without being distracted by the demands of their daily lives. Professionals streamline the procedure, saving you money in the long run.
You’ll Definitely Save Time
Excellent adaptability is provided by a competent installation. Doing the work doesn’t necessitate a weekend commitment. Shopping and making sure you have everything you need is impossible when you’re pressed for time. The only appointment you need to make is to allow the installer entry to your garage.
You’ll Have Peace of Mind
Forget about safety rules and supplies, or the risk that you might have overlooked something when hiring a contractor. Installers have a wide range of specific skills, knowledge, and training. You’ll have more fun in your rooms and get a better night’s sleep knowing everything is secure.
Safety Tips for Wood Stoves
- Do not leave your home without one. For wood fires, ABC, dry chemical kind is excellent. The stove should be pressured and charged beforehand.
- Don’t keep anything flammable within three feet of your stove at all times, even things like drywall and other building materials that you wouldn’t expect to catch fire.
- In unheated areas like a garage, keep the stovepipe from getting too hot to the touch so that it doesn’t burn the hands of anyone who touches it. You can buy heat tape to wrap around your pipe just in case, but the insulation should avoid it from happening.
- The bottom of your stovepipe aperture should be at least an inch or two open, especially if you have no insulation below. The inherent chimney effect of wood stoves can draw air into the appliance, which aids in maintaining a suitable draft (air flow).
- Your stove should never be used to burn wood that has just been cut. If too much of the flammable material creosote is allowed to accumulate, it can cause the pipe to overheat or rupture. Pitch and sap-rich wood can also release harmful levels of fumes, posing a threat to the occupants of your home.
- Don’t put anything in front of the air apertures on the side of your stove that will prevent pure air from passing through, such as bricks, rocks, or other similar objects. It’s imperative that the wood stove can breathe!
Choosing a Wood-burning Stove for a Garage
Listed below are some of the most important characteristics to look for as well as additional considerations to make when selecting the appropriate garage wood stove.
Type of Stove
There are many different styles of wood-burning stoves. Catalytic and non-catalytic combustion stoves are two popular types.
The first is going to be more expensive and of a higher quality than the second. Having a constant temperature and a longer burn time will make it more efficient. The non-catalytic version will be less expensive and will not necessitate the replacement of combustion parts on a regular basis.
Energy Efficiency
Xem thêm : How Far Should Microwaves Be Above Stove? Ultimate Guide
Stoves are designed to burn fuel, but the way they do so differs from one approach to the next. Models that create the same amount of heat can be found, but one uses more fuel than the other in order to do so.
You should do your homework on the stove’s fuel requirements and energy efficiency before buying one.
Size
Large stoves are unnecessary if your garage is cramped. Using a smaller or medium-sized device will reduce fuel consumption, save money, conserve energy, and still maintain a reasonable level of comfort.
In addition to the EPA’s database of approved wood heaters, figuring out the dimensions of your home will make it much easier to locate a wood-burning stove that will work well.
The Best Wood-burning Stoves for the Garage 2021
Let’s take a quick look at some of the top garage wood-burning stoves available right now and the reasons why they stand out in our roundup of wood-burning stoves.
Pleasant Hearth Wood Stove
With its 65,000 BTU per hour rating and capacity of 1,800 square feet, the Plesant Hearth is a solid choice. The ceramic glass window provides a peaceful outlook. Refueling is simple because it uses seasoned cord firewood.
- Certified by the EPA in 2020
- Heats up to 1,800 square feet per hour with up to 65,000 BTUs/hr.
- A stunning view of the fire is provided by a large ceramic glass window.
- Ashes may be quickly and easily removed from the ashtray.
- Powerful yet quiet heat distribution is provided by a variable speed blower (PBAR-2427).
Englander Wood Stove
Get rid of the piggy bank. Solid wood-burning stoves aren’t going to break the bank. An excellent and inexpensive choice is the Englander. This device has heat shields to protect any combustibles in its area. A blower is included free of charge with the stove. An additional 2,000 square feet of heat will be disbursed by the upgrade.
- The long-lasting durability of American-made steel and cast iron structure is unmatched.
- Logs up to 18 inches long can be stored in the spacious 2.45 cubic foot firebox.
- Heating capacity of up to 2,000 square feet when using seasoned cordwood.
- a high-tech firebox ensures a long-lasting, clean burn
- Safer operation and a wider range of placement possibilities thanks to integrated, wrap-around heat shields
Guide Gear Wood Stove
Consider the Guide Gear Wood Stove when looking for the most value for your money. Originally created as a camping wood stove, it may also be used in your garage if you so desire.
- High-temperature finish on a 2mm galvanized steel fire box
- Adjustable vents on a cast iron door
- A chimney with a height of 6.45 feet and five interlocking stove pipes
- A curled handle with a cool feel.
- a firebox measuring 11″w x 17″d x 8″h
Maintaining a Wood Stove in a Garage
If you own a wood stove, you owe it to yourself to become familiar with its upkeep. The stove will run more efficiently if you know how to properly maintain it. In addition, the procedure involves the burning of chemicals that, if ingested in a confined space, can be lethal.
- Take the time to inspect the stove pipe and flue for any buildup of dust or soot, and then clean it thoroughly. There should be no holes or cracks on the pipe’s surface. If the pipes are not properly connected, they will leak. (NASD Online) (Source: NASD)
- To prevent ashes from reigniting, place them in a metal container with a tight-fitting cover made of noncombustible metal. Smoldering ashes pose a major fire hazard and should be disposed of in an area that does not encourage additional blazes.
- Scrub the chimney aperture with a wire brush if soot and ash have accumulated. If this is the case, you should use a wire brush. Stiff bristles will clean the tube’s interior and improve flow.
- Protective pads around your stove should be checked for holes and burns before they are cleaned and reinstalled. You should replace a pad if it has many burn places.
- Creosote is formed when wood that is excessively moist or green is burned, resulting in a toxic chemical. You can avoid the formation of creosote if you burn wood that has been exposed to the elements. The sap has been removed from weathered wood, making it dry and brittle.
What Type of Wood Burns Best in the Stove?
Some people believe that all a fire needs is a space to burn and a fuel source. That’s a close call. To ensure that a fire burns evenly and generates the most heat, the wood must first be weathered.
In terms of wood to use, the finest options are:
- Maple – Maple is a tree that can be found practically anyplace and is relatively simple to take care of after it has established itself. When burned in a wood burner, it produces a wonderful aroma and easily splits.
- An oak fire will burn for a long time because of its dense structure. It’s also a common tree that people use to keep a fire going all night.
- It’s ideal for cooking because it doesn’t smoke as much and maintains a nice bed of red-hot coals, making it an excellent choice.
- Birch – Birch is one of the more difficult woods to work with, but when it works, it emits an incredible aroma that is difficult to forget. However, beneath the bark is a thick skin that can store a significant amount of water if not properly weathered.
- Trees that provide fruit The smell of ripe fruit will permeate your garage if you set fire to a tree branch or two. An applewood shim to an oak fire gives the right winter atmosphere.
You may enhance the aroma of your stove with a variety of products on the market. The best kindling is made from dried fruit or birch wood that has been exposed to the elements. Make a pile of wood indoors and keep it shaded and exposed to the sun. This preserves the wood and improves its ability to burn.
Operating a Wood Stove in a Garage
The garage is a typical location for harmful chemicals and flammables to be kept. As a result, having a naked flame inside your home is extremely dangerous, both to the people within and to your personal goods. It is critical to provide a place free of combustibles and safe for the building’s construction.
When the machine is running, keep an eye on the temperature. Too close to a hot burner will cause items to melt or discolor. The stove should be kept away from anything made of rubber or plastic. It is possible for these materials to ignite if they come into contact with dry material while hot.
When installing a wood-burning stove in a garage, it’s crucial to keep the air moving. Open a window or run a ventilation fan at all times if you have the option. The garage should be equipped with carbon monoxide alarms and meters. It is important to remember that any buildup of creosote can cause significant sickness if it is not cleansed and maintained.
FAQs
How much does Wood Stove Installation cost?
Depending on where you live, a wood stove installation might cost anywhere from $500 to $700, including materials and labor. When energy costs soar in the cold months of the year, you’ll be glad you invested in a wood fire to keep your home toasty and cozy. The installation of a wood stove in a garage covers the labor and materials. Most garages may easily accommodate the installation of a wood stove.
Do I Need a permit for Wood Stove Installation?
If the wood stove is built in the garage and the chimney is already present, you may not need a permit, but you should verify with your local building department. Wood stoves can be installed in garages without a permission as long as they are not more than 15 feet from a side or back wall.
Do I Need a Wood Stove Chimney?
As long as it has been approved by an inspector and fulfills fire rules, you do not need to add a chimney if your garage currently has one. In some cases, if you don’t already have a chimney in your home, you may need to install one in your garage. For the most part, wood stoves come with a standard 1/2-inch flue pipe that eliminates the need for an additional chimney, although you may always add one if you like.
It’s A Wrap!
There are no more steps to take! So these are the complete instructions for installing a wood stove in a garage. The installation of the chimney will be more difficult if you don’t collect precise measurements for its placement.
Call a technician if the process is too difficult for you to handle on your own. Your garage will be a lot more pleasurable and cozier if you have a wood burner in it, so remember that. However, you must first ensure that the installation is done correctly in order to eliminate any potential risks or hazards.
In order to get the most out of your woodstove, make sure to have it serviced on a regular basis and have it checked out by a professional. Installing a wood stove in your garage may be a fun and rewarding experience.
Educate yourself on the subject of how to put out a fireplace fire in the evening so you can read more articles like this.
Nguồn: https://spasifikmag.com
Danh mục: Stoves