After years of using a wood stove, I know all about its inner workings and when its door gasket needs to be replaced. Yet, I find myself curious and eager to find out more.
- What Is Simmering On The Stove? How Simmering Works?
- Why Does My Wood Stove Smoke Up The House? Complete Guide
- How Much Space Between Stove And Cabinet? Perfect Information For You!
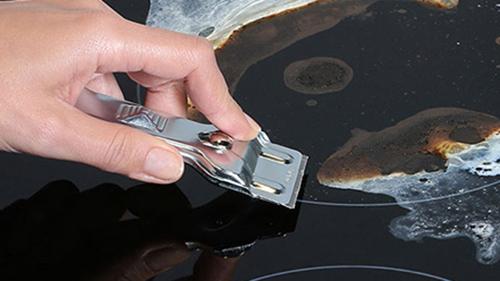
- How To Remove Scratches From Glass Top Stove? Comprehensive Guide
- What Is The Best Stove Top Cleaner? 5 Tips To Choose The Best
For instance, I didn’t know how often I needed repair my door gaskets. Some light investigating revealed intriguing findings. Curious to find out what these things are? For the door gasket to continue sealing properly, it needs to be replaced at least once per season.
Bạn đang xem: When To Replace The Wood Stove Door Gasket? Comprehensive Guide
I recently realized that door seals can be found in a wide range of shapes, colors, and kits.
Put yourself in a position to succeed by being ready for anything. Clearly, you need to educate yourself much further on this topic. If you are interested in knowing more, then read on!
What Is A Wood Stove Gasket?
The inside seal of a wood-burning stove’s door is called a gasket.
Because it looks like rope, the gasket on a wood stove door is frequently misidentified.
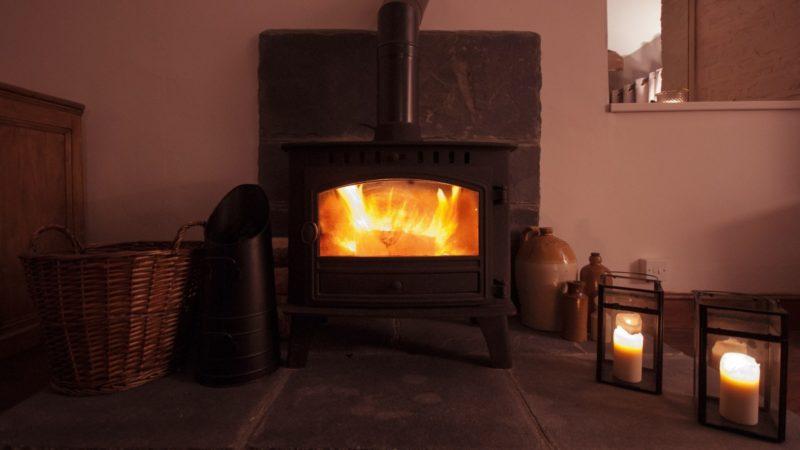
When the door is closed, the gasket on the stove ensures that no air can escape via the cracks where the vents are located. Burning wood efficiently relies heavily on the tightness of the wood stove’s door seal.
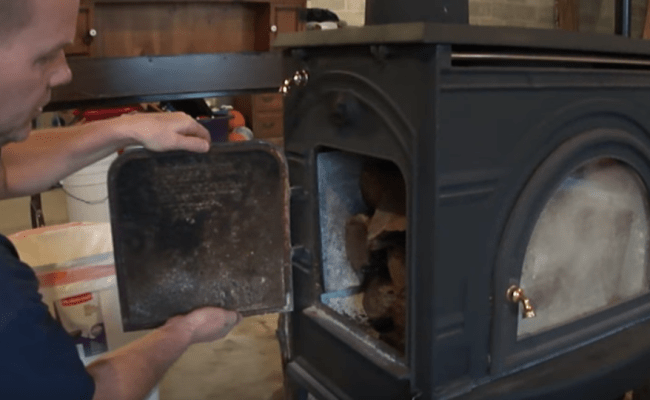
Gaskets surrounding the doors of our stoves are standard.
The two stoves have a tarnished appearance due to their age and the number of times they have been used. If a gasket has changed color, it may not need to be replaced immediately for a variety of reasons.
If the glass panel of a door needs to be changed, then it is likely that the gasket behind the glass will also need to be replaced.
What Is A Wood Stove Gasket Made Of?
A lot of gaskets for wood stove doors are made of fiberglass.
Rope-like fiberglass has been weaved and braided.
A gasket is attached to the inside of a wood stove door using a type of glue.
How door gaskets work
For added insulation, a gasket is glued to the inside of a wood stove door.
Gaskets are typically stored in slots cut into doors or ovens. When the door is closed, the rope is compressed, limiting airflow. Ropes can be used repeatedly before wearing out or breaking.
Typically, a high-temperature silicone caulk or glue is utilized to permanently attach the gasket. Once the adhesive has dried, you can remove the gasket by scraping it off with a putty knife or a screwdriver.
How To Determine Wood Stove Gasket Size
Your wood stove’s gasket size can be determined in one of two ways:
- It is recommended that you refer to the user handbook that came with your wood stove in order to locate the appropriate replacement part number.
- Get in touch with the stove’s maker.
- To determine the approximate size of the gasket required for your stove, you can measure the gasket channel.
- Determine how long the rope is.
In the case of our own wood-burning stove, we have an electronic copy of the instruction manual.
As for our personal wood-burning stove, we have a digital copy of the instructions.
Wood Stove Gasket Sizes
To specify the size of a gasket, either millimeters or inches may be used.
The wood stove manual will tell us where to get a rope gasket of 12 millimeters in diameter, either directly from the manufacturer or from an aftermarket vendor.
A 12mm gasket is roughly the same as a half an inch gasket.
The most typical gasket sizes for wood stoves are 3/16″, 1/4″, 5/16″, 3/8″, 7/16″, 1/2″, 5/8″, 3/4″, 7/8″, and 1″.
Common wood stove gasket sizes are 3 mm to 10 mm in 1 mm increments, 12 mm to 15 mm, and 20 mm to.
How To Measure A Wood Stove Gasket
Measure the gasket channel in which your existing stove gasket lies to determine the correct size wood stove gasket if you do not have access to the stove’s literature or a way to contact the manufacturer.
Gasket dimensions for a wood stove are as follows:
- Getting rid of the old stove gasket and measuring the space it took up can help.
- Figure out how deep the channel is.
- You’ll need to buy a replacement gasket whose size corresponds to this gap, which might be measured in millimeters or inches depending on your location.
- In addition to the gasket’s diameter, the rope’s width can be used to estimate the gasket’s size, albeit this may not be a reliable method if the gasket has warped.
- Find out how long of a rope you’ll need.
Using the greater of the two measures, select a gasket rope size (depth and width of channel).
It’s important that the replacement gasket be a snug fit for your stove.
In addition, a gasket of the proper length should be purchased. It’s possible to get a gasket rope that is the right size by ordering directly from your stove’s maker. As a rule of thumb, when purchasing rope from a third-party source, it’s best to get a longer gasket than is required.
When And Why Replace Wood Stove Door Gasket?
In addition, a gasket of the proper length should be purchased. It’s possible to get a gasket rope that is the right size by ordering directly from your stove’s maker. As a rule of thumb, when purchasing rope from a third-party source, it’s best to get a longer gasket than is required.
Xem thêm : How Far Should Microwaves Be Above Stove? Ultimate Guide
You’ll also want to get a gasket of the right length. If you get a gasket rope directly from your stove’s manufacturer, it’s possible to get one that’s the right size. As a rule of thumb, when obtaining rope from a third-party source, it’s advisable to get a longer gasket than is required.
Also, you’ll need to get a gasket of the right length. To ensure you receive the proper length gasket rope, it is recommended that you contact the stove’s original equipment manufacturer. When buying rope from a supplier other than yourself, it’s often wise to stock up on more than you’ll need.
The door seal will wear out over time regardless of whether or not creosote has been present. Because of the repeated opening and closing, the fiberglass in the doors will eventually wear away and no longer provide a secure seal. Gaskets around doors that have been damaged or stained by creosote should be replaced.
If nothing of them is done, then the gasket should be replaced annually. By doing so, it will be prepared for the following burning season. Now that you know what to look for, you’ll be able to see the difference. Therefore, it is crucial to remember to replace the wood stove gasket at regular intervals.
Wood Stove Door Gasket Replacement
To get your wood stove back to peak performance and ensure no air is escaping inside, you should replace the gasket on the door.
The following items are necessary to replace the gasket on your stove door:
- Changing the gasket is necessary (of right size and length).
- To install the replacement gasket on the stove, you’ll need some sort of adhesive, cement, or glue.
- Removing the old gasket from the stove requires pliers and a flat-head screwdriver.
- Cutting off excess rope requires cutters (sharp scissors, for example) (if necessary).
- Any cement that may still be on the stove from the prior gasket installation can be scraped off with a flat-head screwdriver, for example.
If your stove door can be removed, it will make replacing the gasket much simpler.
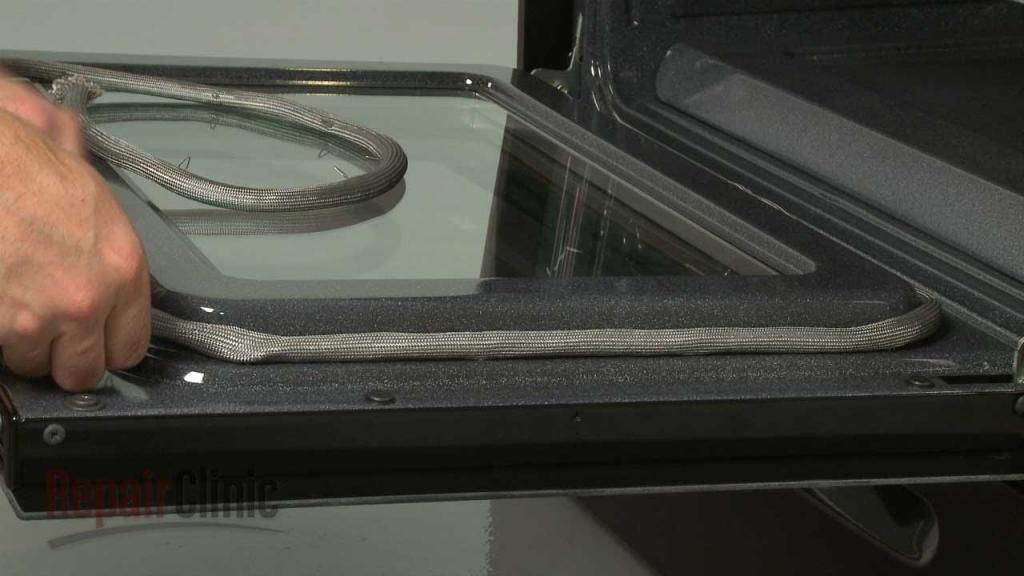
Wood Stove Gasket Removal
The gasket of your wood-burning stove will be glued to the door with cement.
Here’s how to get rid of the old gasket on your wood stove door:
- Take the rope from the stove door with a tool like a flat head screwdriver.
- With your hands or pliers, gently remove the rope from the stove door.
How To Remove Wood Stove Gasket Cement
When the old gasket is taken off, there may still be some cement on the stove.
Use a screwdriver and a knife or hammer to scrape away any remaining adhesive, or use the screwdriver and hammer together for particularly stubborn areas.
Before installing the new gasket on the stove door, the old cement must be scraped away. New glue can be placed to the groove after this.
In order to ensure a smooth surface in the gasket groove, any remaining cement debris should be removed with a wire brush (attached to a drill, if necessary).
How To Cut A Wood Stove Gasket
The new door gasket for your wood-burning stove will need to be trimmed to size before installation.
Since a wood stove gasket is like a rope and can result in a messy, fraying end with strands unraveling when cut, making a clean cut at the end of the gasket helps maintain its tidy appearance and aids in its function of establishing an airtight seal.
Ensure the gasket is the right length before gluing it in.
- Replace the gasket in the stove door’s groove after removing the old one and any cement that may have been used to secure it there.
- The gasket should be installed beginning in the door’s center on the hinge side.
- After installing the gasket, close the stove door (without pulling at it).
- Separate the gasket’s two ends with a clean cut.
- Leaving a short length of rope at the end to be compressed against the slack at the other end will create a watertight seal.
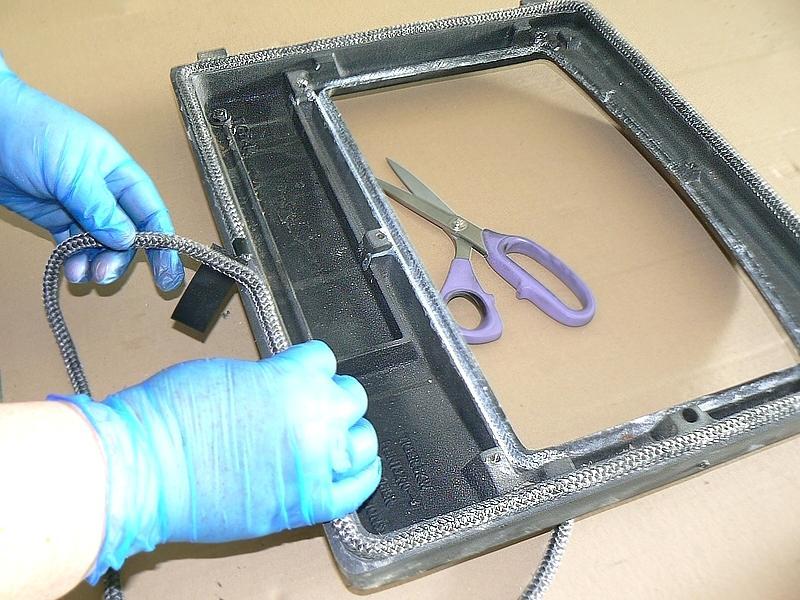
The location of the gasket joints on our particular model of multi-fuel stove
You have the option of providing a straight or an angled cut to your customers.
Customers can choose between a straight and an angled cut.
Everyone is free to use any means they see fit to sever the rope. If the scissors are sharper, you’ll get a cleaner cut.
Tape can be wrapped around the rope at the point of severance to prevent fraying.
How To Glue Gasket In Wood Stove Door
The replacement gasket for your wood stove can’t be installed without the proper adhesive.
It’s best to use the gasket cement that came with the gasket, but if not, you’ll need to have some additional cement on hand.
- Use the gasket cement that was included with the gasket if possible; otherwise, make sure to have some on hand.
- The glue must cover the whole channel, including the sides.
Always refer to the product’s packaging for the most up-to-date information on how to properly apply any gaskets or adhesives before attempting to install them on your stove.
Wood Stove Gasket Installation
After rubbing cement into the gasket channel on the stove door, a new gasket must be installed.
Wood stove gasketing entails:
- Step one is to install the gasket in the center of one door.
- Carefully feed the remaining gasket length into the oven’s groove.
- Make a gentle motion to insert the rope into the door.
- Be careful not to tug or push on the rope if it is left out on the burner.
- Once the end of the gasket has made contact with the beginning of the rope, gently push the two together to create a leak-proof seal.
When you’re done with the gasket, you may keep the ends from unraveling by cementing them in place.
Don’t rush into using the new gasket for the first time right away.
Testing The Replacement Gasket
If you need to check to see if your wood stove gasket replacement is doing its job, you can use a piece of paper to do it.
Put some paper in the door jam to keep out the heat from the stove, and then shut the door. In order to know if the seal is effective, test it by trying to remove the paper from the envelope.
The paper may be escaping the gasket for various causes, including a faulty gasket or an excess of cement below the gasket.
Xem thêm : What Happens If You Use Propane On A Natural Gas Stove? Additional Information You Need To Know
Many stoves allow you to fine-tune the quality of the seal by adjusting the door hinges.
The glue used to replace the gasket in your stove should cure before you light another fire; check the manufacturer’s directions for your gasket and cement to be sure.
What Wood Stove Door Gasket To Use?
Carefully remove the oven door and set it down on a level surface. One option is to simply leave the handle hanging from the edge of the table, rather than attaching it. Next, take off any glass fasteners or frames and check for seals around the glass’s perimeter. You can choose a gasket from the options below.
#1. Rope gasket
Typically, fiberglass is used. Before cutting the fiberglass rope gasket to suit the window channel, be sure you know its exact dimensions. It’s important to measure the diameter of the glass rope gasket on your stove if it has a glass window to ensure it will fit properly. If that’s the case, the gasket needs to be replaced.
Aside using our high-temperature gasket cement, our wood stove door gasket kits provide pre-cut rope door seals in a range of thicknesses and lengths. Solutions such as running feet and bulk rolls should be considered.
#2. Flat gasket seals
Sealing the glass on both the inside and the outside prevents any leaks. Our pre-applied adhesive tape gasket is ideal for this application. If you use too much tape gasket adhesive, the glass won’t stick to the frame and it won’t break.
#3. Tadpole gasket
A high-temperature glue is used to seal a semi-rigid foil-wrapped core gasket on one side of the glass. Bulb and tail seals, contrary to their name, have a thick bulb that permits them to rebound after being compressed.
A softcore gasket, such as the soft core tadpole gasket (5/8 inch), can be used to prevent the window pane from moving about. This species of seal is sometimes referred to as a bulb seal or a tail seal. The thick bulb permits compression rebound, while the flexible tail compensates for terrain variations. Here are five strategies for minimizing or doing away with annoying window rattling.
Where To Buy Wood Stove Door Gaskets
When shopping for a wood stove gasket, it’s better to go with the brand’s own product.
Check your stove’s manual or get in touch with the maker to find out if a replacement gasket is available. The product reference number for a replacement gasket that fits our wood burning stove is listed in the owner’s manual.
You can find wood stove gaskets at many different retailers, including but not limited to the ones listed below:
- Repair gaskets can be purchased from the stove’s maker (if available)
- Amazon
- Different additional outside sellers
How To Clean & Maintain Your Wood Burning Stove
Cleaning Your Wood Burning Stove:
- Make it a habit to clean at regular intervals, such once every two weeks or once a month.
- Make careful to clean the stove more often throughout the winter months because of the increased use.
- It’s not a good idea to burn anything containing plastic or paper, like an empty crisp packet or wood that has been painted or varnished, because these materials have been treated with chemicals.
- Cleaning the outside, inside, flue, and glass door of your wood burner will all call for slightly different methods.
- To protect your floor, you’ll need newspaper, gloves, an ash shovel, a metal container (instead of a bucket), and a spray bottle (more on that later).
Cleaning The Interior Of Your Wood Burning Stove
You should start by cleaning the inside of your wood stove. Don’t risk burns on your hands by emptying the ashes before the burner has cooled down.
Wearing protective gloves, scoop the ashes from the fire into an ash container made of metal or a metal bucket (DO NOT use anything plastic to store the ash). If you don’t want to pollute the environment, take careful not to let any ash escape from its metal container when you’re moving or storing it. Just don’t sneeze no matter what you do!
Remove the ash bucket to a secure outdoor location. No flammable materials or plants (including bushes and trees) should be present in a safe zone.
Ashes should never be stored in the house with the metal bucket. If you keep adding ash without emptying the fireplace, the carbon monoxide will build up and permeate your home. You must, therefore, scatter the ashes in an outdoor location.
Keep the ash off the grass for at least a day if possible. Always exercise caution while disposing of ashes outdoors, especially if the weather forecast calls for gusty winds.
Cleaning The Glass Door On Your Wood Burner
You don’t have to buy pricey chemicals if you make your own at home. Essentially, we have two potential outcomes.
Charcoal is the residue left over after burning wood. In contrast, after a few aging stages in the charcoal stage, it degrades and produces dust, therefore it’s preferable to save some for cleaning the stove door.
Charcoal may need to be taken from the stove while it’s still hot and set aside to cool. Any spots on the inside of the glass can be removed with soap that has been dissolved in water.
Any lingering wetness on the stove glass can be wiped away with a piece of kitchen roll, revealing the blazing fire below.
Cleaning The Exterior Of Your Wood Burning Stove
This is an easy job that can be finished in a few hours using a standard vacuum and a gentle brush attachment. If you can do this often, the exterior of your stove will stay in great shape.
If the vehicle’s exterior needs cleaning, a dry towel can be used, however wet cloths should never be used. It’s possible that this could cause rust if left unchecked.
Cleanig Your Stove Flue/Chimney
If soot has built up in the chimney, the smoke may not be able to escape properly, making this the most challenging task. We thought it would be funny to demonstrate some of the more modern approaches to chimney cleaning, despite the urban legend that one of the older methods involved sending a goose down the chimney attached to a rope.
You should start by burning your stove for at least 30 minutes every day during the winter. Chimney cleaning is essential, but soot removal from the flue is also crucial.
To help you locate a certified chimney sweep in your region, the Guild of Master Chimney Sweeps has provided the following search tool:
DIY-ers need not feel left out, since the option exists for them, too. Some individuals use a drain rod with a brush on the end to clean the chimney. It won’t work if your flue has any sharp turns, such as a 45-degree bend, because drain rods aren’t very flexible. Consequently, you’ll need to perform maintenance on your roof; nevertheless, do so with caution.
It’s A Wrap!
Maintaining a wood stove’s functionality is essential. The mechanism will malfunction if air is allowed to enter through the oven door. Therefore, it is crucial to understand how often you should change the gasket on your wood stove’s door. You may save time and money by switching out your stove every season.
If you can reduce creosote buildup and wood loss during the season, it will have been time well spent. Door gasket material and brand names are widely available for easy internet stockpiling. If you wish to know more about the causes of the smoke in my house from my wood burner, you might find the following articles helpful:
Keeping Your Wood Stove Clean and Running Smoothly
Replacement Gaskets for Wood Stoves (A Complete Guide Including Replacement)
How Often Should You Replace Your Wood Stove’s Door Gasket? Use These Three Fantastic Resources!
Nguồn: https://spasifikmag.com
Danh mục: Stoves