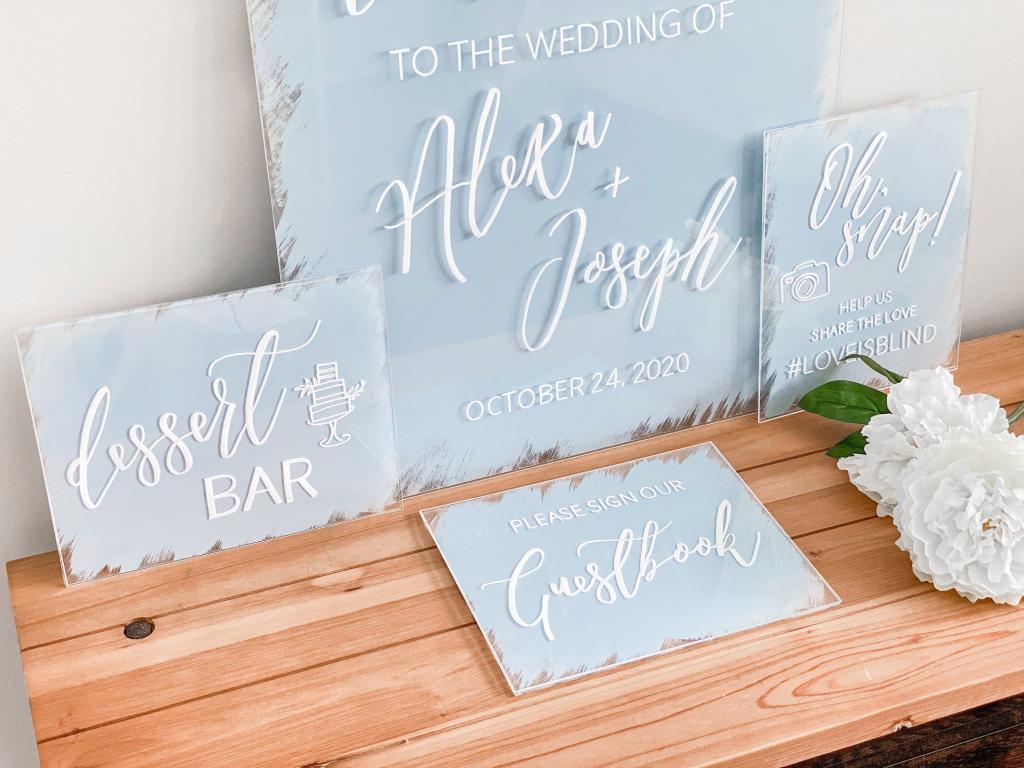
Three simple steps are all you need to learn how to produce acrylic wedding signs. In the first place, we’ll show you how to make absolutely original DIY acrylic wedding signs using only a home printer and a few paint markers.
Are acrylic wedding invitations something you’d be interested in? If you’d want a step-by-step guide to making acrylic wedding invitations, we’ve got one for you.
Bạn đang xem: How To Make Acrylic Wedding Signs? Comprehensive Guide
Acrylic wedding signs and invitations are becoming increasingly popular due of their elegant appearance. In contrast, you don’t necessarily need to rely on a printing firm to create them yourself.
Everything You Need to Know about Wedding Signage
1. Welcome Signs
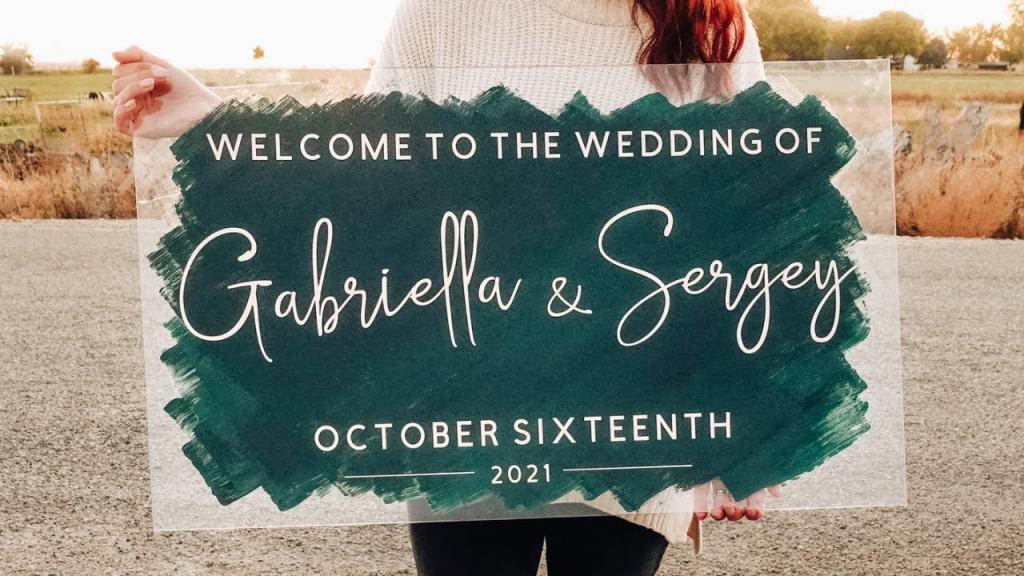
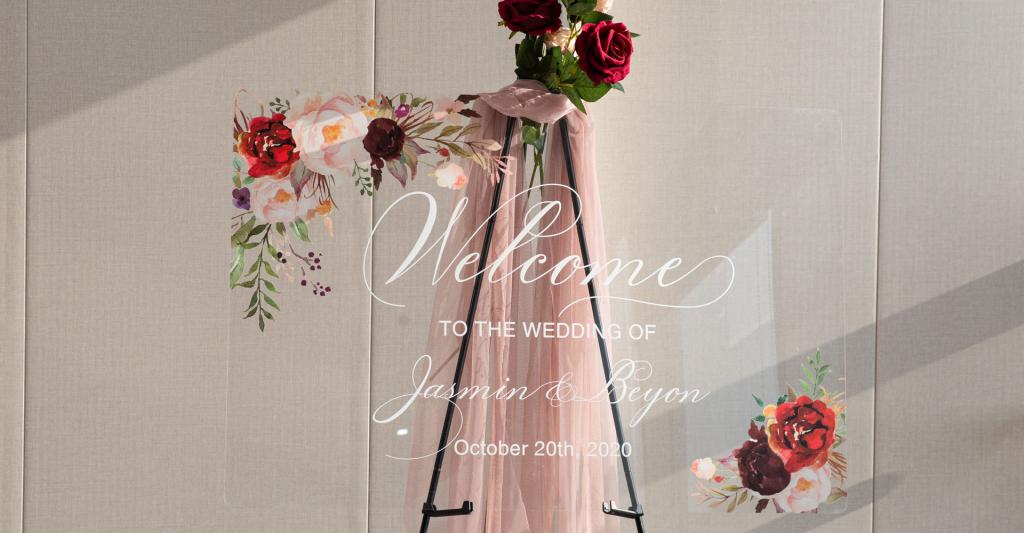
It’s a sweet gesture to greet your guests with a lovely sign when they arrive at the site. There are a variety of styles to choose from, including elegant and rustic, as well as a variety of sizes, for the unique acrylic wedding welcome signs. In addition to landscape and portrait orientations, you can also design personalized wedding signs.
2. Seating Charts
Choose a seating chart in the same style as your welcome sign. Guests will have an easier time finding their seats if there are indications indicating where they should be seated. Seating charts are available in two sizes: 16″ x 24″ and 24″ x 35″
3. Table Numbers Cards
In order for guests to find their seats, your table numbers will be used. Guests must locate their table number on the seating chart after they’ve looked at the seating chart. These table numbers are vital to the smooth operation of the event.
4. Direction Signs
It’s important to let your guests know where they need to go. Directional signage should have very clear instructions to point your guests in the right direction. After all, you want your guests to have an enjoyable experience at your wedding reception. Pointing out where the bar, bathroom or dance floor is will come in very handy!
5. Table Signs
Make sure your guests know exactly where they’re going. Directional signs should be clear and concise so that visitors know exactly where to go. Ultimately, you want your guests to enjoy themselves at your wedding reception. It will be really helpful to point out where the bar, bathroom, or dance floor is!
6. Menu Signs
These placards can be used to inform attendees of the reception’s dining alternatives. If you want your visitors to know what they can anticipate for dinner, we recommend having one or two large menu signs instead of printing individual menus for each one.
Where can you buy acrylic sheets for DIY wedding signs?
Acrylic sheets for your do-it-yourself project can be purchased in a few different ways. Keep in mind that not all acrylic sheets are the same. As a result, the first time you need acrylic sheets, I suggest visiting your local hardware store in person. It’s especially important if you’re creating a large sign.
The Plexiglass section of the hardware shop carries acrylic sheets. Home Depot has a wide range of sizes, and this has been my experience. The sheets are available in a variety of thicknesses. When it comes to thicker acrylic, you should expect to pay more money.
Michaels has a nice online variety for minor tasks like escort cards or table numbers. Make sure to read over the product description and the acrylic thickness. Choose a material that is at least 3 millimeters (1/8 inch) thick. Anything with a thickness less than or equal to three millimeters will be pliable.
1. DIY Acrylic Wedding Sign Using the Trace Method
The tracing method is the initial step in making an acrylic sign. You’ll need the following items for this method:
- A sheet of acrylic
- printer in the house
- a paint marker is used.
- Tape
Step One: Prepare the Acrylic Sheet
Both sides of acrylic sheets have a protective backing. Remove Both sides of acrylic sheets have a protective backing. Remove the acrylic sheet’s backing from one side.
Step Two: Print and Trim the Design
Create the design for your sign on your computer at home. Remove any extra paper from your design by trimming it down.
Step Three: Adhere the Design to the Back of the Acrylic Sheet
Attach the design to the acrylic sheet’s back with tape. Make certain it is properly aligned.
Step Four: Trace the Design with a Paint Marker
Make sure your paint marker is ready before you begin drawing the outline of the artwork. Following the outline of the design, go back and fill in the blanks.
Acrylic and paint markers don’t always get along. There should be some sort of thicker substance to the marker you use. For acrylic signage, Uni POSCA is the best oil-based paint marker I’ve tried so far.
Step Five: Take Away the Acrylic Sheeting from the Backing
Remove the design and the acrylic sheet’s backing after the paint has dry. Your project is now complete. To make the design stand out even more, paint the acrylic sheet’s backside.
For constructing an acrylic wedding sign using the trace method, you don’t need a cutting machine. A home printer is all that is needed to get started.
The drawbacks of the trace method are that it demands a steady hand and a great deal of perseverance.
2. The Stencil Method
Extra vinyl can be used as a stencil, as you may not have realized. Vinyl is a great stencil material since it sticks to the surface you’re painting over. In addition, it’s a simple process to delete. For the most part, I use Mod Podge to keep paint from bleeding through my vinyl stencils when painting with acrylics. Using an acrylic sheet for a sign eliminates the risk of paint bleed on the surface.
Xem thêm : Who Buys The Wedding Bands? Complete Guide
You’ll need the following items for this method:
- A sheet of acrylic
- A cutting tool
- Vinyl
- Use a roll of transfer tape to make copies.
- A tool for scrubbing vinyl
- a device for pulling weeds
- Polyurethane (PU)
- Stencil brush for painting
- Duct tape
The first step is to use an electronic cutting machine to create the design.
Snip the design you just created using your favorite cutting tool (I used my Cricut Maker for this).
As a next step, remove all of the vinyl.
Instead of weeding the surrounding area, weed the letters for this stage. Removed, my design will be left as a stencil after I remove the vinyl letters in my design.
Apply Transfer Tape to the Vinyl in Step Three.
Apply transfer tape to the vinyl stencil’s upper surface with great care. The vinyl scraper tool can be used to fix the transfer tape to the vinyl’s surface. Finally, turn the vinyl design over and begin to scrape the back. Remove the excess transfer tape.
Xem thêm : What Is A Receiving Line At A Wedding? The Pros of Having a Receiving Line
Use a Hinge Method to Apply Vinyl on Acrylic Sheet in Step Four
Apply the stencil on the acrylic sheet using the hinge method. Take off the transfer tape.
What is the hinge method?
With the hinge approach, you can be confident your vinyl will be put correctly and perfectly on every project!
- Apply transfer tape to the vinyl once it has been weeded.
- The vinyl should be placed on your project before you remove the vinyl’s backing.
- Place a vertical strip of masking tape on the vinyl to secure it to the material.
- Remove the vinyl backing by pulling back on one side.
- Starting from the middle, use your vinyl scraper to apply vinyl to the project.
- Remove the masking tape and the rest of the vinyl backing from the area.
- Starting in the middle, use the vinyl scraper to apply the rest of the vinyl to your product.
It’s time to decorate your stencil.
It’s time to have some fun! Paint the acrylic sheet with acrylic paint and a stencil paint brush.
Removing the Stencil from Acrylic Sheet in Step Six
Remove the vinyl stencil from the acrylic sheet when the paint has dried. Remove any little vinyl bits using the weeding tool.
Remove the Acrylic Sheet Backing in Step Seven.
Stencil Approach Advantages: There is no risk of a shaky hand with the stencil method. In addition, the paint seems and feels more refined.
There are certain drawbacks to stenciling, such as a longer process, more tools, and more supplies. Those without access to a cutting machine are unable to use this technique at this time. Because acrylic paint is so easily scratched off, it’s not as durable as wood paint.
3. The Vinyl Method
Vinyl letters are a third option for creating an acrylic wedding sign. You’ll need the following items for this method:
- A sheet of acrylic
- A cutting tool
- Vinyl
- Use a roll of transfer tape to make copies.
- A tool for scrubbing vinyl
- a device for pulling weeds
- Duct tape
The first step is to use an electronic cutting machine to create the design.
Snip the design you just created using your favorite cutting tool (I used my Cricut Maker for this).
As a next step, remove all of the vinyl.
Remove the rest of the vinyl with a weeding tool, leaving behind only your design.
Apply Transfer Tape to the Vinyl in Step Three.
Apply transfer tape to the vinyl stencil’s upper surface with great care. The vinyl scraper tool can be used to fix the transfer tape to the vinyl’s surface. Finally, turn the vinyl design over and begin to scrape the back. Remove the excess transfer tape.
Xem thêm : What Is A Receiving Line At A Wedding? The Pros of Having a Receiving Line
Use a Hinge Method to Apply Vinyl on Acrylic Sheet in Step Four
Apply the stencil on the acrylic sheet using the hinge method. Take off the transfer tape.
Step Five: Take Away the Acrylic Sheeting from the Backing
Using the vinyl approach, there is no risk of mistakes due to an unstable hand. It’s clear that the vinyl lettering give the sign a bright and bold appearance. Acrylic sheets are also very smudge-friendly. The vinyl design makes it simple to clean the acrylic.
The vinyl approach has more processes, tools, and materials than the other methods, making it more time-consuming and expensive. Those without access to a cutting machine are unable to use this technique at this time.
How To Paint Acrylic Wedding Signs
Acrylic sheets can be painted freehand with a paint pen or printed and taped to the back for more elaborate effects. Then, using your preferred paint pens, trace the acrylic artwork.
Once you’ve finished, use acrylic craft paint to highlight the back of the sign. Stroke across and down from the top left corner to the bottom right corner
Acetone, coconut oil, or even Windex can be used to fix or remove paint. A hairdryer held at a safe distance from the painted acrylic sign will work just fine.
Apply polymer adhesive to the paint if necessary to avoid scratches.
What Paint Do You Use On Acrylic Signs?
Acrylic paint is the preferred medium for creating acrylic signage. If you use a high-quality one, it will last longer than other craft paints. Depending on the design you want to put on the acrylic sign, you can then apply it with a paintbrush, sponge, or even a spray.
Make sure your painted areas aren’t too thick so that they can dry fully. When you’re waiting for the next coat, this is critical.
With a hairdryer, you can speed up the drying process if you don’t get the acrylic so hot that you harm the paint or warp the sheet. After painting the acrylic, use a sealant to keep the design from peeling off.
How Do You Do Letters On Acrylic?
A beginner will find it much easier to trace letters on acrylic. First, print the lettering on your computer and then use a paint pen to follow the strokes of each letter.
The process of tracing letters on acrylic is significantly easier for beginners. Use a paint pen to follow the strokes of each letter after printing it out on your computer.
You could have made a mistake, right? If the ink or paint is still wet, you can use soap and water or Windex to remove it.
Calligraphy ink can be cleaned using paper towels, soap, and water, while acrylic paint can be scrubbed with Windex. Oil-based paint pens can’t be removed, therefore use caution when lettering with them because they are permanent.
Which Size of Acrylic Wedding Signs Should Couples Choose?
1. The most recommended size of acrylic wedding sign
Because the wedding acrylic signs can be used for both the ceremony and reception, you’ll want to think about your overall wedding décor plans and your sign budget. It’s great to show large-format acrylic welcome boards and seating charts in 12×18, 16 by 24 or 20 by 30 inches. Take a look at the image on the left.
Please contact us for a quote if you prefer a different size than what we currently have in stock.
2. How big does the seating chart sign need to be (for effectiveness)?
The number of attendees attending your wedding reception will determine the size of your seating chart signs.
Guests will walk up to his name as they enter the reception area, thus the letters don’t need to be enormous. If you have a big list of guests’ numbers, you may want to use many charts to show all the names, or come up with another inventive approach to show them all.
To get an idea of the size and quantity of guests, we’ve included this table:
- 12″ x 18″, up to 4 tables, 40 people
- Tables that measure 16′′x24′′ can accommodate up to 80 people.
- 12 feet by 36 feet, 16 tables, and 160 people
Conclusion
And with that, I bid you farewell! With the help of some printed designs and taped-down acrylic sheets, we’ve figured out how to construct wedding signs out of acrylic.
With acrylic paint, you may draw and paint anything you want.
Did you realize that in addition to signs, your guests can also rely on the ushers? To learn more about what a wedding usher is, check out this article.
Nguồn: https://spasifikmag.com
Danh mục: Wedding