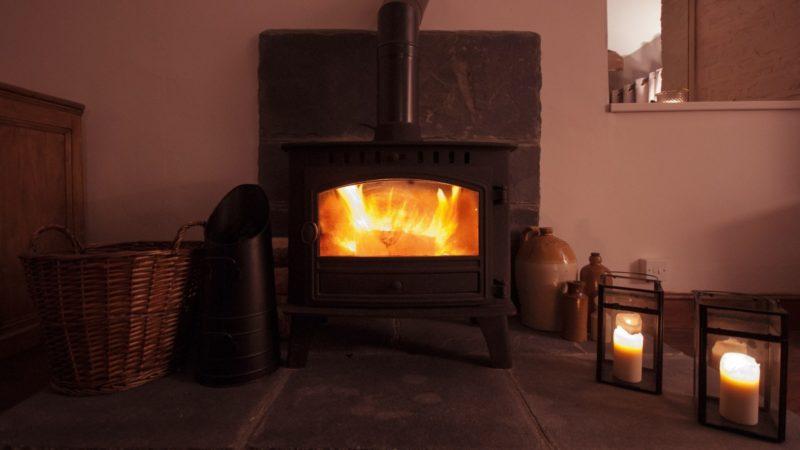
Wood stoves have been increasingly popular in recent years as an alternative to natural gas or electricity for heating homes. Urban dwellers are increasingly turning to wood, a renewable energy source, as a heating source. If you want to heat your house with a wood stove, you must take safety precautions like installing heat shields properly to prevent fires or injuries. There are a number of wood stove models that require heat shields both in front and behind. You’ll feel more secure when you leave the house or go to bed at night knowing that your security system is properly installed and cleared.
Wood Stove Heat Shield Ideas
Clearances
At least three feet of air space must be maintained in front of any flammable material, including wood studs that are buried by drywall. For a wood stove installation, this distance applies to all sides, therefore the open space required can be rather vast. Most commonly, heat shields are installed on wall surfaces near to the wood stove in order to limit clearances.
Bạn đang xem: How To Install Heat Shields Behind A Wood Stove?
Heat Shield Concept
Understanding the fundamentals of a heat shield is essential. There is no heat barrier provided by masonry materials like brick, tile and stone if they are bonded directly to a building wall surface. Masonry takes a long time to heat up, but once it does, it rapidly transfers the heat to the wall. For a heat shield, masonry is not the best foundation because air gap allows heat to permeate into the surrounding environment. When designing a heat shield, it is important to ensure that air can enter from the bottom as well as exit the top of the shield to prevent it from overheating.
Sheet Metal
All areas of the wall less than 36 inches from the wood stove should have a 28-gauge metal heat shield installed. There must be at least one inch of air space between this metal and the wall and the material used as a spacer must be non-combustible. Manufacturers of wood stoves sell packs of ceramic spacers for this purpose.
Masonry
Because metal is a good conductor of heat, a thin metal heat shield can be quite effective. Metal is heated by the wood burner and then dissipates the heat evenly throughout its surface area, allowing circulating air to keep the room comfortably cool. A heat barrier made of brick, stone, or tile works just as well, but in a different way. These dense materials take in a lot of heat, and when the air circulates around them, they gradually release it. A cement board separated from the wall by one-inch ceramic spacers is the most basic masonry heat shield. Adding ordinary floor tiles to the cement board will make it more visually appealing.
Heat shields for Clearance Reduction
Don’t Trust Pictures
Many people have concerns regarding images of stoves that look to have clearances that are considerably closer than what is actually allowed by code. We have no idea how they’re doing it.
The distance between a stove and a wall can be difficult to discern from a photograph. However, some clearances appear closer in a photograph than they actually are.
This happens regularly, and the results are frequently posted publicly. Not all risky actions are safe just because someone else has done them.
Staged stoves are sometimes installed in a manner that prevents them from being fitted. There was no time to construct the flue system before to filming Tiny House Nation S5E15, so the set dressers just placed the stove where they deemed most appealing. If you look closely enough in the episode’s photos, you can see that the stove was not yet linked up.
Pyrolysis – Why Clearances are So Large
When a wood stove is in use, it can get extremely hot. Fires can start if combustible things are too close to a stove that has reached its self-ignition temperature. Heat, fuel, and oxygen are all that is needed to ignite a fire.
Clearance violations don’t always result in a fire right away. A process known as pyrolysis occurs when a substance is repeatedly heated, causing its molecular structure to degrade and lowering its self-ignition temperature. A surface that “hadn’t had a problem yet” can spontaneously combust after months or years of repetitive heating.
Unexposed regions (such as under the hearth, for example) should not be heated above 90o F over ambient temperature, and materials near the stove should never be heated above 117o F. Discoloration of things that could catch fire near a stove is an indicator that pyrolysis is taking place. Nevertheless, you can’t always see it.
What Happens When you Cheat
For this reason, clearance infractions are a particularly hazardous concern. Discoloration or charring on the surface of combustibles can indicate pyrolysis, although pyrolysis can also take place inside a wall, hidden from view. It’s possible to operate your wood stove for months or years without incident until one day, your wall spontaneously takes fire from the inside.
Incorrect materials might also result in cheating clearances. A dangerous clearance violation can occur if you utilize Class A chimney pipe instead of Pellet Pipe to penetrate your roof and follow the manufacturer’s recommended clearance to combustibles. For this reason, clearances are calculated based on pellet pipe having a lower maximum operating temperature than a wood stove would have. The manufacturer’s rated clearances are no longer enough if you connect a wood stove to a pellet pipe.
How to Safely Reduce Wood Stove Clearances
Wood stove clearances can’t be eliminated, but they can be minimized greatly by installing a well designed heat shield. As a general rule, heat shields need to be created appropriately and clearance reductions for the type of shield must be observed.
In terms of wood stove installation, the industry standard NFPA-211 specifies three basic kinds of heat shields. It’s worth noting that the NFPA-302 regulation is for boats, which is a little different from the rules in NFPA-211 and this article. The rules in NFPA-302 are less detailed than NFPA-211, so we suggest following NFPA-211 standards unless you’re installing on a boat.)
How to Construct Air-Cooled Heat Shields
In terms of wood stove installation, the industry standard NFPA-211 specifies three basic kinds of heat shields. It’s worth noting that the NFPA-302 regulation is for boats, which is a little different from the rules in NFPA-211 and this article. The rules in NFPA-302 are less detailed than NFPA-211, so we suggest following NFPA-211 standards unless you’re installing on a boat.)
Two of these heat shields can be found in the industry standard NFPA-211 for wood stove installations. There are some differences between NFPA-211 and this article and NFPA-302, which is the standard for boats. You should stick to NFPA-211 regulations, unless you’re installing aboard a boat, because NFPA-302’s requirements are less complex.)
An effective shield relies on good airflow behind it. Air passing behind the shield cools the shield and the substance behind it as it is heated by convection. Air must be able to enter the shield from the bottom and depart it from the top in order for it to function properly. The following are acceptable methods of airflow:
- Keep the shield open on all four sides.
- Allow air to flow through the shield’s top and bottom by closing off the left and right sides, but leaving the top and bottom open for ventilation.
- A level wall (i.e. not around a corner) allows you to close the shield’s lower half while leaving its sides and top open. At the sides of the bottom, air will enter and depart. The shield cannot be employed if it turns a corner.
It is possible to minimize clearances by up to two-thirds when using an air-cooled heat shield as a wall or ceiling protection.
How to Calculate Clearances with a Heat Shield
Calculations of clearances are made from the source of heat to the combustible material. It would therefore require at least 5 inches of space between the shield and heat source in order for the clearance to be reduced from 18 inches to 6 inches.
How Big Should Heat Shields Be?
A straight line is used to compute clearances in all directions. If you want to know what surfaces a shield should protect, cut a dowel to the rated clearance you are testing.
The rated clearance to combustibles, for example, is 18 inches from the rear of the Dwarf stove. Make a mark on the wall at every spot you can reach with the dowel’s long end while the other end is resting against the back of the stove. The heat shield must cover each and every one of these hot spots.
Do the same with the stovepipe and the stove’s side clearances.
There are a few things to take note of in this activity. To begin with, the heat shields will typically be much wider in diameter than the stove or stovepipe itself. A heat shield must be smaller the further the stove or stovepipe is from the combustible substance.
Attaching Shields Directly to the Stove or Stovepipe
Wall and ceiling shields are not covered by NFPA-211 requirements for connecting shields directly to the stove or pipe, however connected shields can typically be used in some cases to reduce clearances.
Dwarf stove heat shields can be attached directly to the stove body using our factory heat shield kit, which reduces clearances from the sides and back by half. We can also make a double wall pipe by installing air cooled heat shields to our single-wall pipe, which requires 9′′ of clearance to combustibles instead of the typical 18′′.
Single-wall stovepipe is the simplest material to tear apart and use as an air-cooled heat shield for stovepipe. Screw the shield to the pipe using 1-1/4′′ heat-proof screws and 1′′ ceramic or metal heat shield spacers.
Shields fitted directly to the stove and the pipe minimize clearances while having minimum cosmetic impact. Check out Nick’s 5er installation video.
Attaching a homemade heat shield to the stove or stovepipe may not be allowed if your stove is made by a different manufacturer, and factory heat shields may not be available. Make careful to check with the manufacturer before using it.
Insulated Shields, Masonry Shields, and Other Shield Types
NFPA-211 describes two different forms of shields, but they’re rarely employed in small-scale residential situations. These two shield types are less effective and more difficult to create than air-cooled shields.
Similar to air cooling shields, insulated shields use fireproof insulation like rockwool or ceramic fiber instead of 1′′ of air gap behind the barrier. This type of shield can cut wall and ceiling clearances in half.
With a 3-1/2′′ thick masonry block and no air space, the masonry shield is a typical brick wall. Up to one-third of the distance between the shield and the wall is reduced by this sort of shield.
Any other type of shield than those listed in NFPA-211 should not be utilized unless it has been tested for clearance reduction. In theory, additional air space or insulation, or a double-layer of sheet metal, could provide some help, but the amount of safe clearance decrease they would provide is not known.
Shields That Are Not Shields
A heat shield is not created by tiling that is adhered directly to the wall with no air space or insulation. The flammable material directly behind the tile will be heated by the tile’s conductivity. In order to reduce clearance, a tile layer must be at least 3-1/2′′ thick.
With no air space between the sheet metal and the wall, it will also transfer heat and give no rated clearance decrease.
Note for Residential Spaces
Clearances in areas that are subject to building codes tend to be strict. The manufacturer’s directions in the manual must be followed while using a stove that is UL approved for residential settings. You may have to adhere to the local building code’s requirements for stoves that are not UL rated, which normally ask for a 36-inch clearance from all combustibles in all directions.
As long as you don’t use a heat shield to lower clearances less than 12 inches in any direction in a building project that is subject to building codes, you won’t be able to get away with it.
Tools To Install Heat Shields Behind A Wood Stove
A wood stove’s heat shields can be installed in a variety of ways. Your wood-burning stove’s entire design relies heavily on the heat shield. The name suggests that it is used to shield your wall from the heat of a freestanding stove. Metal heat shields and ceramic tile heat shields are available. We’ll go over the specifics of how to put in each type of heat shield in this article.
A list of everything you’ll need to get the job done:
- Woodstove
- Protective covering for the body’s internal temperature (metal or ceramic)
- a tool for finding studs
- Tape for masking off surfaces
- Spacers for the walls (metal or ceramic)
- Pencil
- Drill
- Screws
- Screwdriver
- Backer board made of concrete
- Mastic
- Additive to latex
- Trowel with a notch
- Sponge
- Towel
- Spacers between the tiles
- Grout
- trowel for grout
- a grout sealant
Steps To Install Metal Heat Shield Behind Your Wood Stove
Installing a metal heat shield behind a wood stove is as simple as following these steps:
Step #1. Examine the certification information on the wood stove’s back
On the back of the woodstove, you may discover certification documents. The recommended distance between the stove and the wall can be found in this document. Your wall shield’s width and height must be specified on this label in order to meet safety standards.
Step #2. Locate the studs
Locate the studs behind the woodstove with the help of a stud finder. Then, mark their location on the wall with strips of masking tape. You should be able to see the tape both above and below the metal heat shield’s measurements.
Step #3. Drill pilot holes into the wall studs
Use a pencil to mark the locations of the screw holes. Then, insert the metal or ceramic spacers against the wall studs and secure them in place. Use a drill bit with a smaller diameter than the screw to make pilot holes in the wall studs.
Step #4. Drive the screws and mount the heat shield
Xem thêm : How To Keep Mice Out Of Stove? A Few Tips to Remember
Through the spacers, insert the screws into the studs. The screws that came with the metal heat shield can be used to attach the metal heat shield to the spacers. Because the heat shield must allow air to flow around it on all sides, it should not be covered by any other material. Wood stove heat shields are something you may want to learn more about in the future.
Steps In Installing Ceramic Tile Heat Shields
Installing a ceramic heat shield behind your wood stove is as simple as following these steps:
Step #1. Mount the spacers
As you would a metal heat shield, attach the spacers to the wall.
Step#2. Attach the concrete backer board
To the spacers, screw a concrete backer board with a thickness of at least 3/4 inch. You may need more than one piece of concrete backer board to attain the required size for your stove’s heat shield. At the very least, the heat shield should reach 20 inches beyond and 20 inches above the woodstove.
Step #3. Apply mastic mixed with a latex additive on the wall
Apply mastic with a latex additive to the wall with a notched tile trowel. The back of each tile should be coated with mastic before being attached to the wall. Spacers help to keep the tiles at a consistent distance from one another. Give the tiles at least one night to cure before using them.
Step #4. Grout the tiles
Make use of a tile grout trowel to push and remove spacers as you work your way around each tile. Make sure there are no gaps in the grout as you work with it. Wipe the tile surfaces clean of any excess grout with a wet sponge. The grout will deteriorate if you over-moisturize it. Polish the tile with a dry cloth to remove grout haze. Allow the grout to dry for a few hours before moving on to the next step. You might want to check out this article on how to clean a wood burning stove, my friends.
Step #5. Apply the grout sealer
Use a grout sealer to protect the grout and make cleaning easier. Installing heat shields in this manner is exactly how you do it for your wood stove. You’ve undoubtedly also gleaned a slew of useful information on wood stoves at this point. To ensure your safety, make sure you’ve completed the preceding steps first. Then, proceed with the rest of the instructions with extreme caution and attention.
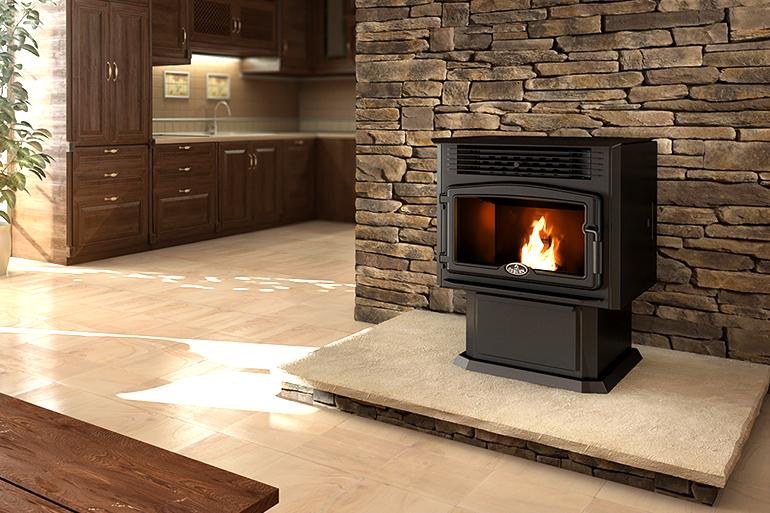
Setting Clearances & Installing Heat Shields for your fireplace
In preparation for the upcoming chilly season, many homeowners are hurrying to get their fireplaces in order. As you know, the fireplace is a great way to keep you and your family warm and cozy throughout the winter months. You can use it to heat your home, whether it’s a wood-burning or a multi-fuel burner.
The heat shield, on the other hand, is an essential component of your wood-burning stove’s overall equation. The term comes from the fact that it is usually positioned behind the stove to protect the wall from being damaged by the heat. Although most wood stoves come with heat shields, you should be aware that others do not.
We’ll focus on wood stove clearances and heat shield installation in this article.
Have adequate clearances
A wood stove’s two most important safety considerations are adequate clearance and the type of material used. The safety of your wood stove can be ensured if it is installed and maintained properly. Insufficient clearances, on the other hand, can be exceedingly hazardous to your residence.
This distance is recommended by the Fire Protection Association (FPA) for standard radiant-type stoves, but some wood burning stove manufacturers will offer their own tested safe distances. These values are critical because your wood stove can get incredibly hot when it is in use. Materials that are too near to the stove, such as curtains, may catch fire. A fire hazard may be created if you violate the clearances on your wood stove.
Reduce wood stove clearances
However, you should be aware that lowering the stove’s clearance will not jeopardize your home’s security. While the clearance cannot be eliminated, it can be greatly reduced. Installing a high-quality heat shield is the best way to go about this.
Heat shields for your wood stove are available in a variety of styles and materials. When it comes to heat shielding needs, be sure to follow the HETAS criteria down to the appliance selection and installation.
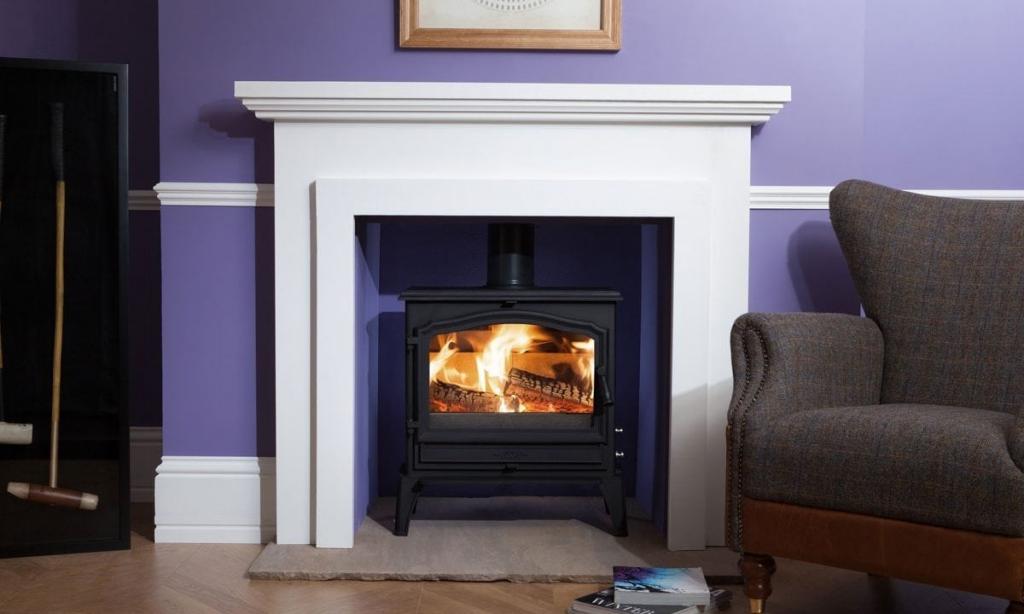
Vitreous Enamel heat shields
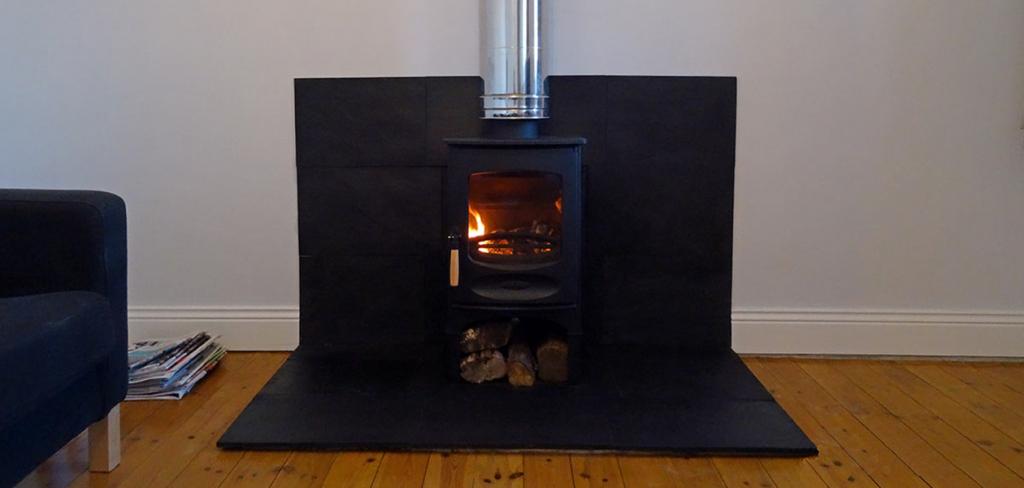
Installing a heat shield on a wood fire is a great method to reduce clearance and increase home security. The vitreous enamel heat shield is a fantastic alternative. ” In order to create a contemporary fireplace, Vlaze Heat Shields protect and embellish the wall behind the wood burning stove. In addition to thermal protection, the vitreous enamel panel offers an excellent convection system that returns heat to the room. Quick and easy to install with our rail mounted method, the heat shield is available in three sizes and over 30 different elegant glazed finishes. A Charnwood stove can have its distance from the panel reduced to 75mm when the shield is installed – a significant improvement over the distance required by HETAS regulations.
A Guide to Wood Burning Stove Heat Shields
What is a wood burning stove heat shield?
Let’s begin by defining exactly what stove heat shields are.
Heat shields, as their name suggests, are panels made of heat-resistant materials like vitreous enamel that are designed to protect and enhance the wall behind a stove.
Materials like vitreous enamel can be used to create heat shields that reflect and redirect heat back into the room.
Why do you need to use heat shields with wood burning stoves?
Now that you’ve learned what a heat shield is, you’re prepared to use one. However, a wood burning stove doesn’t necessitate the usage of a heat shield. We’ve outlined a few of the reasons why below.
Stove and flue temperatures
If you’ve never used a stove before, you may not be aware of just how hot the stove and its flue pipe may get.
Between 150 and 200 degrees Fahrenheit is typical for stove flue pipes. However, if the stove’s fire is especially hot, they have been known to get much hotter.
It is critical that your stove and flue pipe are located far enough away from combustible things because of these high temperatures.
It’s because of this risk of combustion that you may need to add a heat shield.
Consequently, we arrive to our following point:
Pyrolysis
When it comes to stove fittings, pyrolysis is the primary reason for their concern about combustion.
Too close to a heat source, such as a stove, can lead to the degradation of combustible materials by continuous heating and cooling.
The autoignition temperature of a material might lower as a result of this process, known as pyrolysis.
In other words, a material that had been near your stove for months or years may suddenly burst into flames.
Stove safety is at risk because of the potential for pyrolysis, which can occur when combustible objects are located close to the stove.
The problem of pyrolysis is that it is not always obvious.
Discolored or charred things near your stove indicate that they should be shielded from the heat. Pyrolysis can, for example, occur on the inside of a wall, igniting from the inside out.
If you have any combustible goods or surfaces near your stove, you need to take care of them.
Materials that do not meet the A1 fire rating are considered combustible. When placed directly in a fire, a material with an A1 fire rating will not catch fire and will not disintegrate. A1 fire-rated materials include brick and stone.
When there is insufficient clearance between the stove and combustible surfaces/materials
Installing a stove in a small area necessitates the use of a heat barrier as a safety precaution.
A standard radiant-style stove should be at least 900mm (36 inches) away from any combustible surfaces, according to the Fire Protection Association.
Heat shields are needed when you can’t have at least 900mm of separation between your stove and adjacent surfaces. A heat shield placed between the stove and the exposed surface will reduce the distance required for protection.
As a result, what are the possible clearances with a heat shield?
British Standard BS 8303:2018 specifies that ‘distance from rear of appliance to shield outer surface’ is ‘at least 95mm (if near an adjacent wall)’ while ‘distance from shield side to outer surface’ is ‘at least 90mm (if near an adjacent wall)’
Stove safety and installation
At this point, you may be asking about the general safety of cooking stoves. You don’t have to be concerned, though.
Every year, a significant amount of time and effort is devoted to stove safety. As long as you adhere to the rules outlined below, your stove will be just as safe as any other form of home heating device.
HETAS-certified professionals are always recommended if you have any worries about stove installation.
What heat output can a stove heat shield withstand?
To ensure that your stove is safe to use, you should check the CE data plate or the manufacturer’s installation instructions to see if it has a nominal heat output of less than 7kW.
Your stove’s heat output is too high for a heat shield to adequately protect neighboring combustibles and surfaces.
What can be used as a heat shield?
A wide variety of materials are suitable for the production of heat shields. Brick, stone, tile, and vitreous enamel are examples of these materials.
Xem thêm : Where To Buy Stove Burners? Comprehensive Guide
However, it’s vital to keep in mind that the heat shield has an air gap between it and the wall behind it. Even heat-insulating materials like brick, tile, stone, or metal will not work well if there is not enough of an air gap between them.
At Direct Stoves, we believe that vitreous enamel heat shields are the best option available today. Vitreous enamel is a great heat conductor since it is non-combustible and can withstand temperatures of up to 650 degrees Celsius.
By reflecting heat back into your space, a vitreous enamel heat shield not only keeps neighboring things safe from burning, but it also saves you money on your utility bills!
A heat shield made of vitreous enamel can be found in a broad variety of colors, patterns, and textures, making it simple to find one that matches the rest of your home’s interior design.
How high does a heat shield need to be?
The precise height of your heat shield is as vital as using a material that is heat-resistant enough.
Get this incorrectly, and you’ll be breaking UK building regulations and risking the pyrolysis of combustible objects behind your stove.
By BS 8303:2018, Installation of home heating and cooking appliances burning solid minerals, the heat shield must protrude at least 300mm over the stovetop.
How wide does a heat shield need to be?
The edge of the fireplace will be covered with a heat barrier that complies with UK Building Regulations.
As a result, before making your final decision on a heat shield, make sure you’ve measured the width of your stove and your fireplace.
How should heat shields be installed?
As previously stated, the installation of a heat shield is critical.
It will not be able to accomplish its work if the heat shield is not installed appropriately.
The following steps must be followed when installing your stove heat shield in accordance with local building codes:
- The heat shield must have an air gap of at least 25mm between it and the wall, and it must be attached to the wall using non-combustible fastening.
- Cool air must be able to circulate between the heat shield and the wall through openings at the top and bottom of the shield.
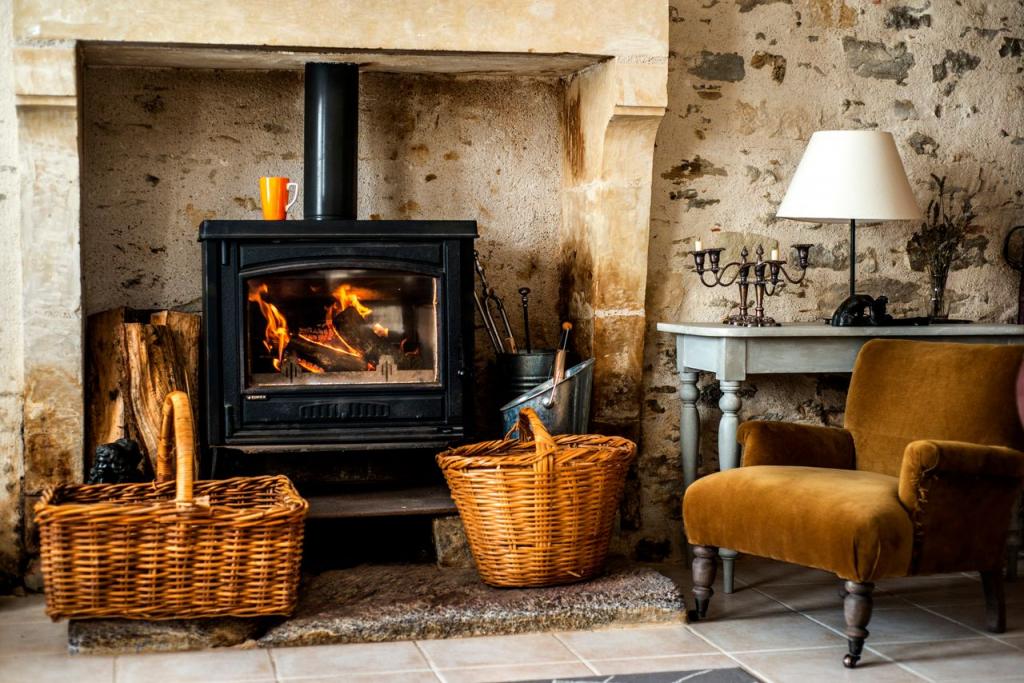
Do I need to use a heat shield if I am installing a stove in a fireplace?
No. You don’t need a heat shield if you’re installing your stove in a fireplace that has a hearth, a chimney cavity, and a firebox.
When installing a stove as a freestanding device without a pre-existing fireplace or comparable structure, heat shields are commonly employed.
The best wood burning stove heat shields
You can now see what heat shield options are available to you after we looked at all of the needs and characteristics of heat shields.
Vlaze heat shields are available from Direct Stoves. Charnwood’s Vlaze stove heat shields are widely regarded as the industry’s best and highest-quality product.
Here are some of our favorite heat shields for Vlaze stoves.
Vlaze Solid Colour Vitreous Enamel Wall Mounted Heat Shield
In addition to providing thermal protection, this vitreous enamel heat shield has an excellent convection system that returns heat to the space.
Installing this heat shield couldn’t be easier thanks to Vlaze’s supplied rail-mounted system, which comes in three sizes:
- 800 x 1200 mm in size.
- An area of 800 by 1800 pixels.
- 1100 x 1800 millimeters
Solid white, solid black, solid basalt, and solid off white are just some of the stunning, solid colors offered for this Vlaze heat shield.
Vlaze Embossed Glaze Vitreous Enamel Wall Mounted Heat Shield
With an embossed gloss, this version of the Vlaze heat shield has a distinct and recognizable appearance.
Dual skin provides great thermal protection and convection system vents heat back into the room, enhancing stove efficiency.
There are a large variety of colors to choose from, including:
- White ink is embossed onto a white background.
- Textured with a black embossed pattern.
- Basalt that has been embossed.
- Off-White with an emboss.
- Oyster embossed onto the leather.
- Indigo-colored embossing.
- Embellished Duck Eggs.
- Ochre embossed.
This Vlaze heat shield comes in a variety of sizes, just like the others.
Vlaze Crackle Glaze Vitreous Enamel Wall Mounted Heat Shield
Invest in a heat shield with a unique finish that will stand out. Make your stove the center of attention in your living room with the Vlaze Crackle Glaze heat shield.
Using a crackle glaze adds a sense of depth and dimension to the panel that is missing from the basic color options.
For thermal protection and heat radiation performance, this model has a dual skin like Vlaze’s other heat shields Vlaze’s easy-to-install rail-mounted system is also included.
The following colors are available:
- Crisp White.
- Black with a crackle finish.
- Rock that looks like it has been gnawed.
- Off-White with a crackle.
- Oysters with a crackle to them.
- Indigo Crackle.
- Duck Egg with a Crack.
- A smoky orange-red.
The heat shield comes in a variety of sizes, so you can find the right fit for your stove.
Direct Stoves: stoves, accessories and more
Let us know what you think of our guide to heat shields. You should definitely get a good heat shield if you plan on installing a stove in your home and want to ensure your family’s safety.
Consequently, if you’re in search of a heat shield or any number of other stove accessories, Direct Stoves is the place to come.
FAQs
How close can a wood stove be to a heat shield?
In most circumstances, the heat shield should have a 1-inch or 7/8-inch air space behind it. A 2′′ air space is required by some standards.
Do I need a heat shield behind a wood stove?
To avoid heat damage to your home, use heat shields under and behind your wood stove. Some wood stoves do not incorporate heat shields in their design, despite the fact that many do. If you have a wood stove, check to see if heat shields are required.
How do you fireproof a wall behind a wood stove?
Placing a cast iron fireback against the back wall as a wood stove heat screen is an age-old option that is simpler, more attractive, and also easier to remove. Cast iron conducts and radiates heat slowly, which is another benefit of using a fireback as a wood stove heat screen.
How much clearance do you need behind a wood stove?
The National Fire Protection Agency recommends a minimum clearance of 36 inches. In other words, the stove’s back should be at least 36 inches away from any combustible material, such as woodwork, unprotected walls or furniture, and even firewood.
How thick should a wood stove heat shield be?
In terms of effectiveness, air-cooled heat shields are by far the best. In order to allow for unrestricted air flow, these shields are made of a sheet of 24-gauge or thicker sheet metal, or a 1/2′′ or thicker cement board.
What is a good heat shield for a wood stove?
Using a brick, stone, or tile heat barrier is just as effective, but in a slightly different way. These dense materials take in a lot of heat, and when the air circulates around them, they gradually release it. A cement board separated from the wall by one-inch ceramic spacers is the most basic masonry heat shield.
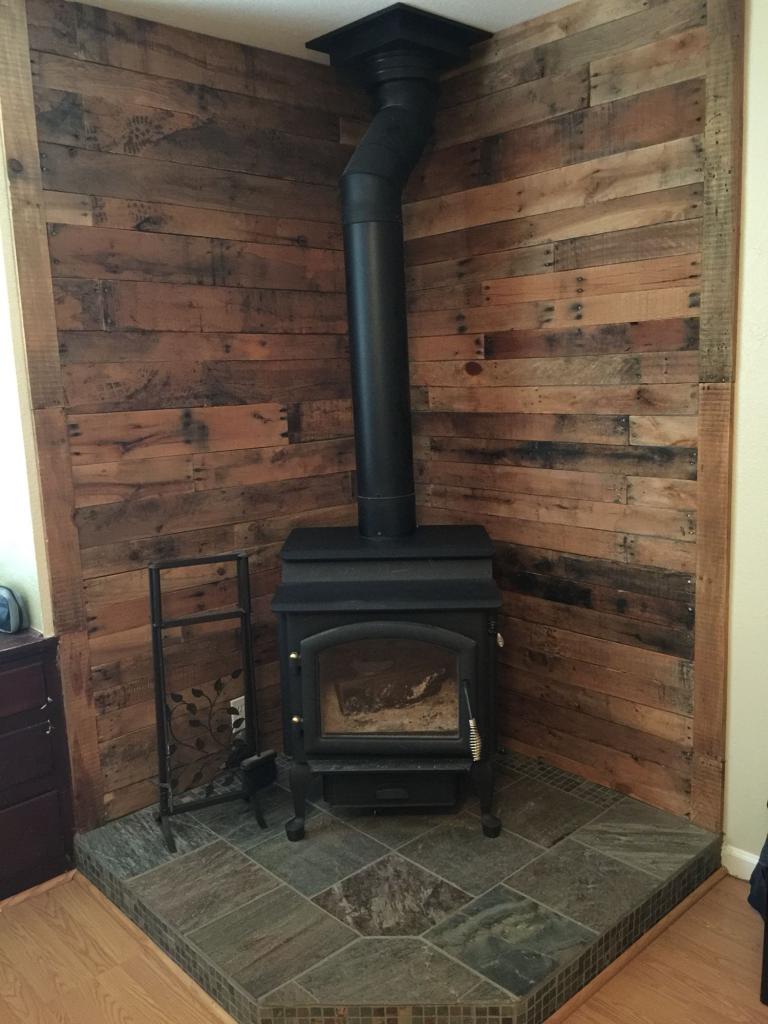
What material do you put behind a wood burning stove?
Backing a wood stove with stone or brick is usual practice. These panels serve as a focal point in a room, making it more visually appealing. What the heck is it? All areas within 36 inches of the stove should be covered, according to the NASD.
What is the best material for a heat shield?
High thermal conductivity materials are ideal for use as a heat shield. Aluminum and copper are the two best metals, whereas steel and bronze are the least desirable.
What is code for installing a wood stove?
The NFPA recommends keeping a stovepipe at least 18 inches away from anything flammable. In some cases, it is permitted to have narrower clearances (Table 1). The removal of obstructions from inside and outside the building. In accordance with the National Fire Protection Association (NFPA), no stovepipe shall be permitted to pass through any floor, ceiling, or fire wall or partition.
How thick does a heat shield need to be?
It should be at least 12mm thick and extend 150mm on each side and 225mm to the front of the appliance. For safety reasons, they should be constructed from a non-flammable substance.
What can I put on the wall behind my stove?
It’s not uncommon to see backsplashes made of granite, stone or other natural or composite materials. It’ll cost more, but you’ll receive a magnificent and long-lasting stove backsplash in return. Another popular material for stove backsplashes is stainless steel.
Conclusion
A wood stove’s heat shields can be installed in a variety of ways. Always ensure that you have enough clearance or utilize heat shields to reduce wood stove clearances, as previously stated. It’s also a good idea to purchase and install a heat shield from a reliable manufacturer while doing so for your wood-burning stove.
In the long run, this will help you to get the most out of your stove while safeguarding your home and keeping you warm during the winter. There is a lot of heat to be had from a wood-burning stove. This could be detrimental if you don’t have a tiled heat barrier. It is our goal that this page has helped you install the heat shields that you so desperately require. Learn how to make your wood stove look like new and discover why your wood stove is spewing smoke into the air.
Nguồn: https://spasifikmag.com
Danh mục: Stoves