Mini-fridges are among the many necessary home appliances that should be kept spotless at all times. Our food and drinks are kept cool and fresh in the mini fridge. They are typically stacked high with a variety of foods.
Thus, these fridges are subjected to a variety of abuses, such as curry stains, spoiled vegetables, spilled milk, and neglected fruits. As a result, a helpful manual on maintaining the cleanliness of household mini-fridges is required. Fortunately, we have compiled a comprehensive, easy-to-follow guide on how to clean a micro fridge into one post.
Bạn đang xem: How To Clean A Mini Fridge? Step-By-Step Guide
Things Needed to Clean a Mini Fridge
- Fresh Towels
- Low Concentration Ammonia
- Packed in Airtight Bags
- Soapy, Boiling Water
- NaHCO3 (Sodium Bicarbonate)
- Optional Use of Water and Bleach
Steps to Clean a Mini Fridge
Step 1 – Unplug Your Mini-Fridge
In order to prevent electrocution, the first step is to unplug the refrigerator. This is a simple and speedy process. It’s also crucial for keeping employees safe on the job.
Step 2 – Empty Your Fridge
The refrigerator should be the first thing you clear out. You can empty the mini-fridge all at once if you like, but I’d rather not have to do it twice. Take everything out of the tiny fridge. Make sure the containers have been taken out of the fridge as well, and not only relocated. Empty the compartments and remove the shelves and drawers.
Step 3 – Throw Away All Moldy or Expired Food
All perishables that have been exposed to mold or have passed their expiration date should be thrown away. Put the spoiled or expired food in a plastic bag and throw it away. However, if the moldy goods were stored in reusable containers, those containers should be washed thoroughly in hot, soapy water before being reused.
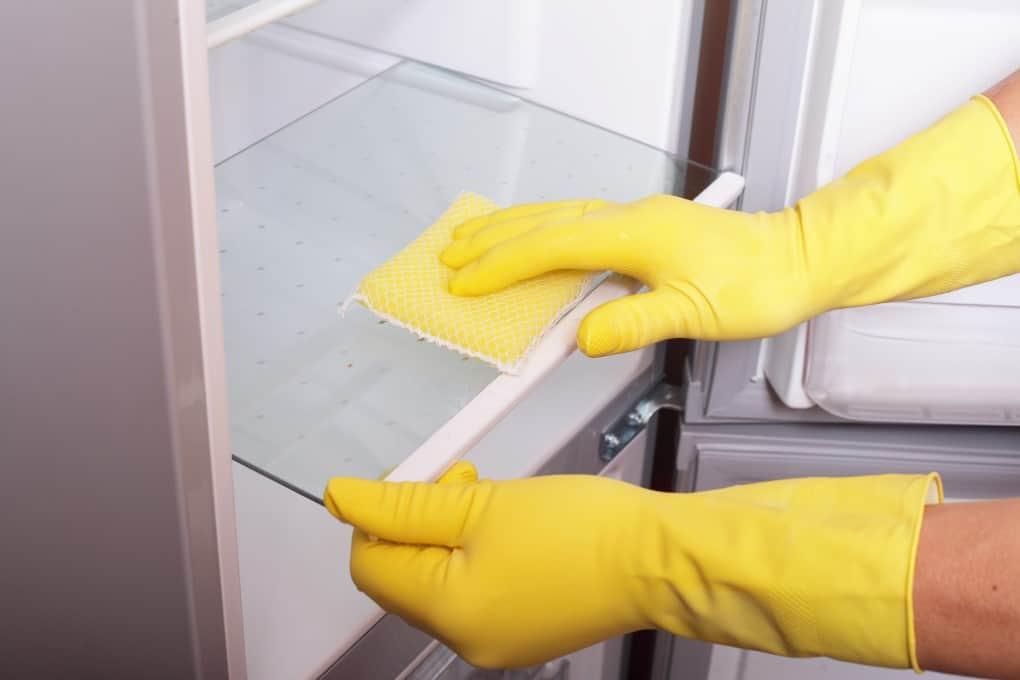
Step 4 – Wash the Removable Parts
Scrub the insides of the mini-drawers, fridge’s shelves, and other detachable parts with a washcloth soaked in hot, soapy water. Glass must be washed carefully and soiled areas must be scrubbed thoroughly. Keep in mind that washing a cold glass with hot water can cause it to shatter. To get rid of the stubborn stains in your cabinets and drawers, try using diluted ammonia. Get a clean, dry towel and use it to dry everything.
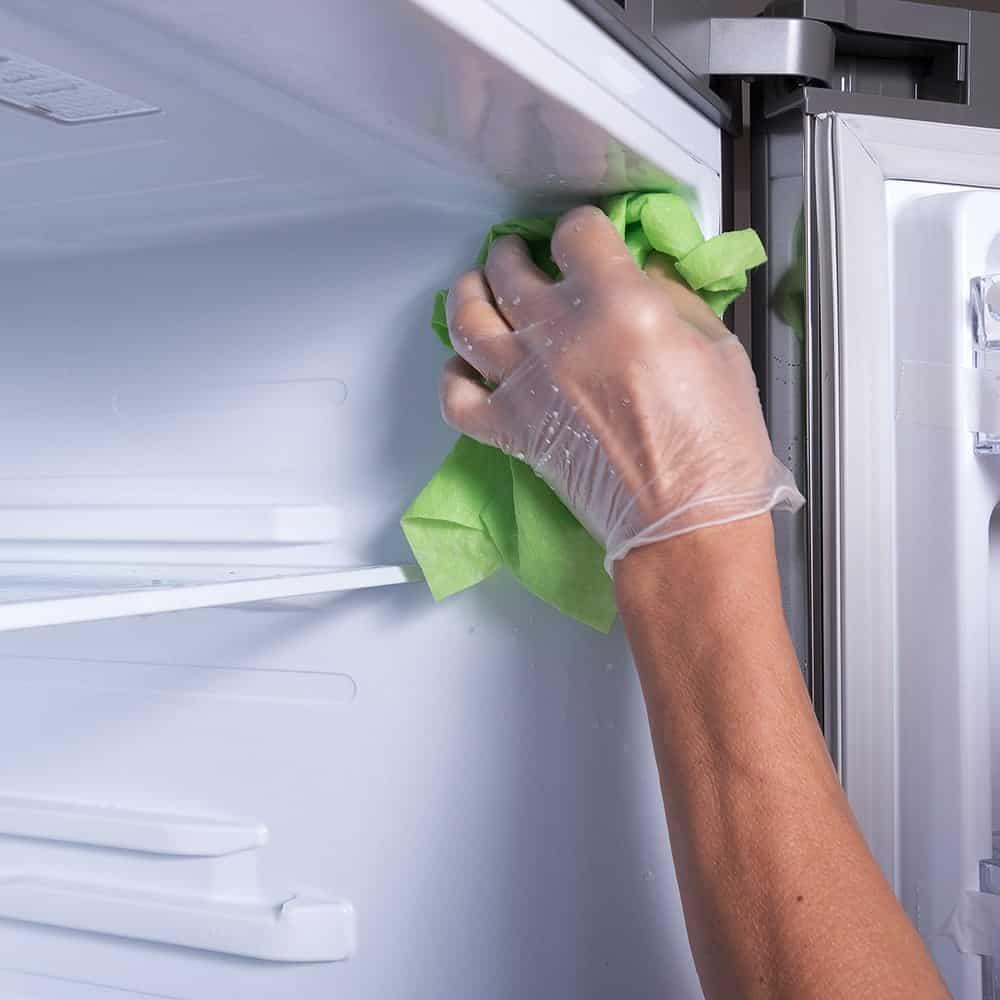
Step 5 – Clean the Interior of Your Mini-Fridge
Get a bucket and fill it with hot, soapy water. Microfiber mitts and rags are ideal for cleaning the inside of the refrigerator because of their extreme absorbency. Mini-fridges can be cleaned of their unpleasant odor with the help of scented liquid soap or soap.
Some of us may need the aid of a basic toothbrush in order to remove stubborn stains or grime from hard-to-reach areas. The bristles of the brush are sturdy yet flexible, making it easier to reach into tight spaces and thoroughly remove all traces of filth. After emptying the contents of your mini-fridge and cleaning the inside, rinse it out with clean water.
Step 6 – Dry All Fridge Parts
Before reinstalling them in the fridge, make sure the drawers and shelves are thoroughly dried. To dry the inside of your mini-fridge, use a clean, dry towel. Just make sure everything dries off completely before putting it back together.
Step 7 – Disinfect Your Mini-Fridge with Sanitizer and Return All Fridge Parts
In time, our refrigerator could become a breeding ground for mold and bacteria. Therefore, it is always crucial to use a sanitizer to disinfect the surfaces. Restack the shelves, drawers, and everything else that was taken out.
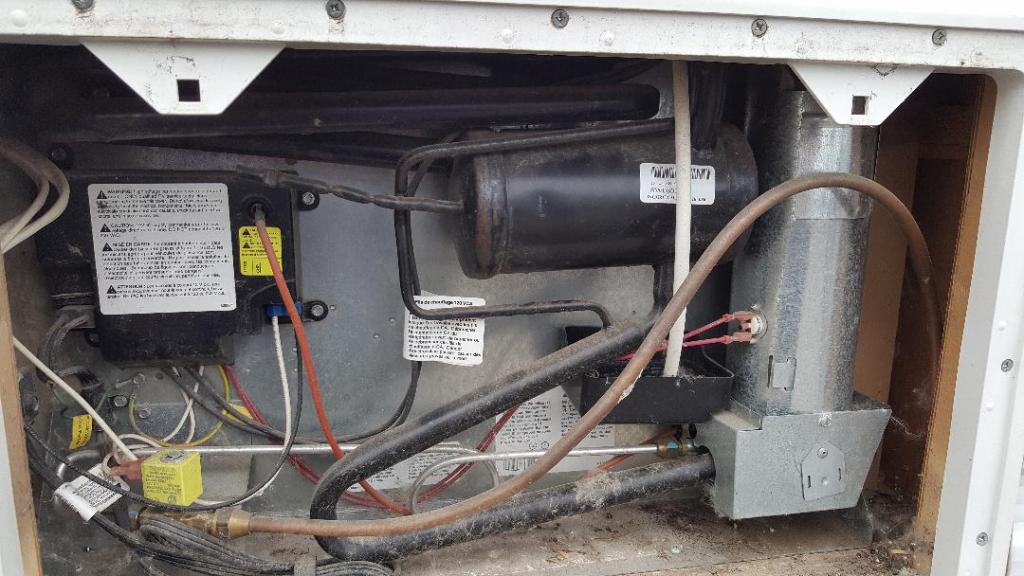
Step 8 – Vacuum the Coils and Condenser
Blocking the air intake of the refrigeration unit’s coils and condenser with debris and dust reduces its efficiency. Our fridge’s coils and condenser have to work harder to maintain a cold temperature.
Simply removing the dust and debris that has accumulated on our little fridge should fix the problem. To begin, take off the unit’s protective grill, which can be found on the base or the top. Dust and debris can be loosened by brushing the fan unit and coils. Then, after using a vacuum to remove the dust and dirt, you can reassemble the grill. When you’re done cleaning, use soap and water to clean your hands. Wipe down the kitchen counter where you kept your food, drink, mini-fridge parts, and cleaning supplies.
Mini-fridge cleaning is simple but necessary; we recommend doing it once every two to three weeks.
We may get a commission on sales made if a reader clicks on one of our links. Our analyses and comparisons are unaffected by this, though. To help you make the right decision, we strive for objectivity and balance.
Should I Need To Clean My Mini-fridge Regularly?
As for your query, the answer is yes; you should keep your unit clean on a consistent basis. Some research suggests that a mini-fridge should be cleaned every six months. Why? Your unit’s health can be preserved by taking this measure.
More than that, it will stop any leaks or mold from taking hold. Mini-fridge performance and aesthetics suffer when regular cleaning is neglected. The fridge may also become so dusty and musty that you avoid using it.
That’s why it’s crucial to give your mini-fridge a thorough cleaning at least twice a year. At least you won’t feel embarrassed to show off your condo to visitors. Also, its performance in its assigned tasks will be enhanced.
How to Get Rid of Funky Refrigerator Smells
The odors that emanate from a stale fridge can take numerous shapes. Maybe they’re coming from the gallon of milk you forgot to throw away before going on vacation, or maybe they’re from the deviled eggs you stashed away. Have you ever emptied your veggie bin and forgotten a potato at the bottom? Even worse than you would have feared. The longer an unpleasant smell stays in the fridge, the harder it is to get rid of, and some smells are more objectionable than others.
Xem thêm : How To Level Fridge Balancing? Step by Step Instructions
However, if you are persistent, you will eventually be able to eliminate the odor. Here is Consumer Reports’ comprehensive how-to.
Step 1: Take Everything Out
If you think you know what’s causing the problem in your fridge or freezer, you should still clean it out completely. Put perishables in a second refrigerator if you have one. To be safe, throw out any food that may have gone bad because of the power loss and any that smells off. According to the USDA’s Food Safety and Inspection Services, if food is stored in a refrigerator and left unopened, it will remain at a safe temperature for around 4 hours.
Step 2: Handwash Bins and Shelves
Remove the ice cube trays, bins, crisper drawers, and shelves to the sink for a good scrub out with hot, soapy water. Refrigerators can be disinfected by wiping down the bins and shelves with a solution of one tablespoon of liquid chlorine bleach to one gallon of water, followed by rinsing and air-drying.
Step 3: Deodorize the Interior
You can now begin cleaning the inside of the refrigerator. Our research indicates that a solution of 1 cup baking soda per gallon of water is effective for this purpose. Use a sponge dipped in the solution to clean the inside. Crusty food can be removed by dunking a moist sponge in baking powder and scrubbing vigorously. Avoid using harsh chemicals or abrasive pads on the inside of your fridge since doing so might cause unsightly scratches.
Step 4: Air it Out
This is where patience comes into play. If you want to get the most out of your refrigerator, unplug it, leave the door open, and let it air out for a day. Refrigerator odors after wiping with baking soda solution and airing for a day? Do it again.
You may provide a pleasant aroma to your fridge and freezer by placing cotton balls soaked in vanilla extract inside and closing them for a few hours before replenishing.
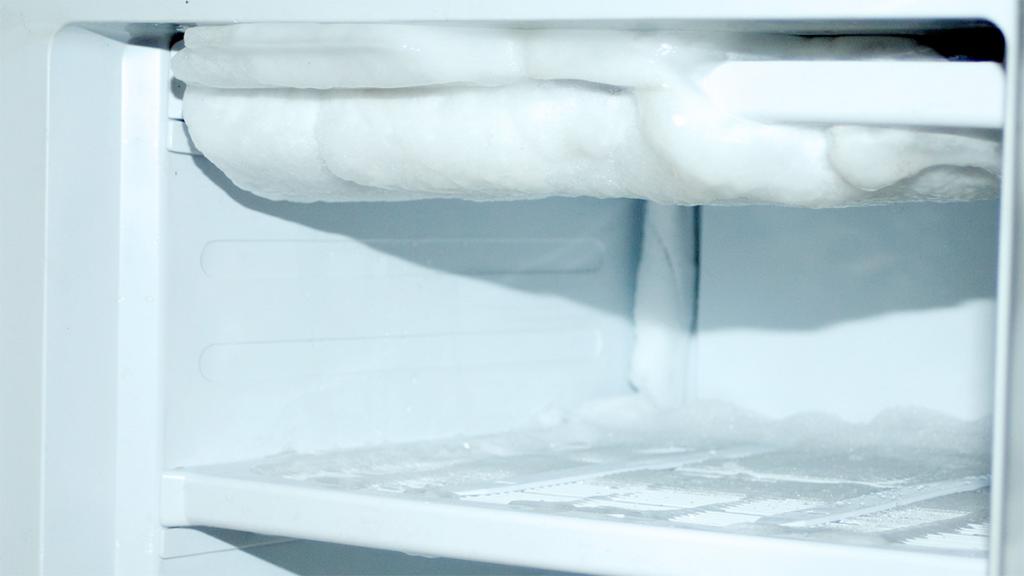
Step 5: Clean the Evaporator
The evaporator coil, which creates cold air for the fridge and freezer, is a likely source of any persistent odors in the appliance. The freezer’s coil and the fan that blows it around are normally installed on the back wall.
The evaporator in a top-freezer refrigerator is accessible for cleaning in the aforementioned video. First, you’ll need to take the panel off its wall by unscrewing its anchors. Next, unplug the electronic controls and icemaker. Take the panel off and clean it up. Apply warm soapy water to the coils using a spray bottle, catching the dirty water runoff with an old rag; rinse using clean water. Remove the panel and let the coil dry off entirely in the air.
As the name implies, a top-freezer provides the most space for this task. But any refrigerator’s evaporator should be accessible for cleaning; consult the owner’s manual for specifics.
Keep in mind that there will be two sets of coils in your refrigerator and freezer if you have a modern model with twin evaporators. If the problem is localized to the fresh food section, however, you need only clean the coil in that area.
Just hope your gross office fridge gets cleaned soon.
Is It Safe To Have A Mini Fridge In The Bedroom?
Yes. Keeping a refrigerator in a bedroom poses no immediate threat.
Some other reasons may cause you to lose sleep or get irritable over time, particularly if you spend a lot of time in your bedroom.
5 Things To Know About Mini Fridges
Rise In Air Temperature
The engine in the fridge provides our first motivating factor. Let’s start with the basics and figure out how a refrigerator generates heat.
Watch this amazing 2-minute video that breaks down the refrigerator’s inner workings in detail.
In essence, the compressor is continuously heating up and dissipating excess heat from the refrigerator. This heat is used as part of the cooling procedure. Any unnecessary heat is dissipated through vents in the floor beneath the fridge.
If you’ve ever stood barefoot close to a fridge, you’ll understand what I mean.
Having a refrigerator in the bedroom will release this heat, which could raise the temperature slightly.
Unwanted Noise
The video demonstrates how a compressor may turn cold air into heat and gas. This refrigerator compressor operates continuously to maintain desired internal temperatures.
If you’ve never heard a compressor in action, it might sound like a motor that clicks on and off (or runs continuously) while the system attempts to maintain a constant temperature. Having visitors, potential new spouses, or anyone else in the house over disrupt their sleep due to an annoying background noise is a bad idea.
Xem thêm : How To Defrost A Mini Fridge? Things You’ll Need
It’s not just daytime activities like work and school that are disrupted by the annoying noise; nighttime activities like sleeping are also affected.
Insomnia From The Noise
Those who value peace and quiet as they sleep. Having a refrigerator in the bedroom could disrupt one’s rest. When the motor is running, it can produce a lot of noise, which might be disruptive to one’s sleep.
Those who sleep with a fan, TV, or other source of ambient noise might not notice it. However, a refrigerator in the bedroom could be annoying if you want complete silence when you sleep.
Unwanted Guests Entering The Room
There’s a chance that you’ll have to deal with a steady stream of uninvited visitors if the fridge is in the bedroom.
Party attendees will be constantly coming and going from the bedroom. The bedroom is a safe place to keep and store valuables if you’re anything like the rest of us. Put it in a drawer or a closet, but it’s usually a spot where no one will ever look.
Having visitors come and go from the bedroom increases the risk of valuables being misplaced or stolen.
If you are a parent, this is another good reason. A child between the ages of five and twelve will invariably be found, early in the morning or late at night, rummaging through the refrigerator in search of breakfast or dinner. The persistent noise of the refrigerator door opening and closing is sure to wake you up early or keep you up late if you have an irregular sleep schedule.
Freon Leak
Last but not least, the possibility of a Freon leak is why you should rethink keeping a refrigerator in your bedroom. We’re warning you about this worst-case scenario, but rest assured that it’s quite unlikely to ever happen to you.
Refrigerators use Freon, a gas/liquid that is continuously heated and chilled, to maintain a cool interior. The Freon inside will be released if one of the coils breaks if there is a leak.
Two tempered glass shelves, which can be adjusted and cleaned easily, are included with every purchase.
If you’re searching for a way to give your refrigerator a little more personality, the RCA tiny fridge is available in seven different colors.
A sample of their blue mini-fridge is displayed here:
The varying designs are perfect for setting the mood in a dorm or complementing the decor of a personal space.
Midea Stainless Steel Mini Fridge
The Midea mini-fridge is excellent for storing both frozen and regular food. The added benefit of the freezer gives space to keep things like pizza, ice cream, or any meals that can eat a later time.

The Midea mini-fridge is perfect for keeping both frozen and ordinary food. The added benefit of the freezer allows space to keep foods like pizza, ice cream, or any meals that can eat a later time.
Galanz Retro Red Mini Fridge
The Midea compact refrigerator is great for keeping fresh and frozen food fresh and cold. An additional perk is having a place to store food for later consumption, such as frozen pizza, ice cream, or other meals.
The mechanical thermostat control, interior light, and stunning premium gloss finish of the Galanz min fridge make it an excellent choice for any kitchen.
Conclusion
I hope I answered your question on how to clean a mini-fridge. Again, you need to do the four easy steps discussed in this article. Cleaning is one of the critical things you must do to take care of your unit. This is why it’s important to commit to memory all the instructions given.
I trust I was able to satisfy your curiosity about defrosting a mini-fridge. Repetition is necessary of the four simple procedures described here. Among the many essential maintenance tasks, cleaning ranks high. As a result, it’s important to keep in mind all the procedures presented.
Nguồn: https://spasifikmag.com
Danh mục: Fridge