Follow these instructions to build a wood burning stove for maximum efficiency and convenience. Stove fires can be caused by poor maintenance and installation.
Keep a safe distance between your stove and any combustibles, and make sure that your chimney and stove are working properly. More than just starting a fire is required to maximize the efficiency of a wood-burning stove.
Bạn đang xem: How To Make A Wood Burning Stove? 23 DIY Wood Stove Ideas
Consider the location of your woodstove, the type of wood you use, and how it is burned when determining the efficiency of your stove.
Tips To Make A Wood Burning Stove More Efficient
So, what are the steps to building a wood stove? Installing a wood-burning stove is more complicated than it appears at first glance. There are, however, a few points to keep in mind. Keeping these suggestions in mind will guarantee that your wood stove runs well.
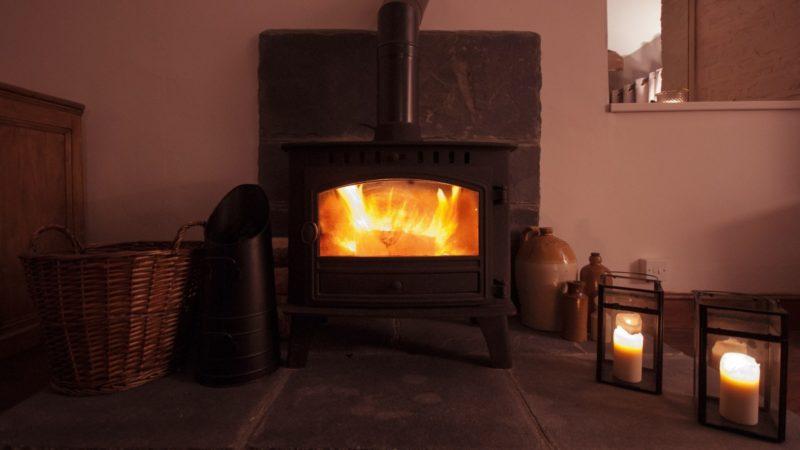
#1. Choose a good location
Wherever you wish to put your woodstove is the best place to put it. Nevertheless, you must remember the chimney. In the absence of a new one installed expressly for your wood stove, this may be an issue. Creosote buildup can be hazardous if there is more than 7 feet of pipe between the stove and the chimney.
Putting a wood-burning stove in the middle of your home makes sense because they are not central heating systems. As a result, the home’s temperature will be more equally distributed. However, some homes cannot be heated totally by a wood stove due to their size or the presence of numerous obstructions within. As a result, the stove should be placed in the room where you spend the most time.
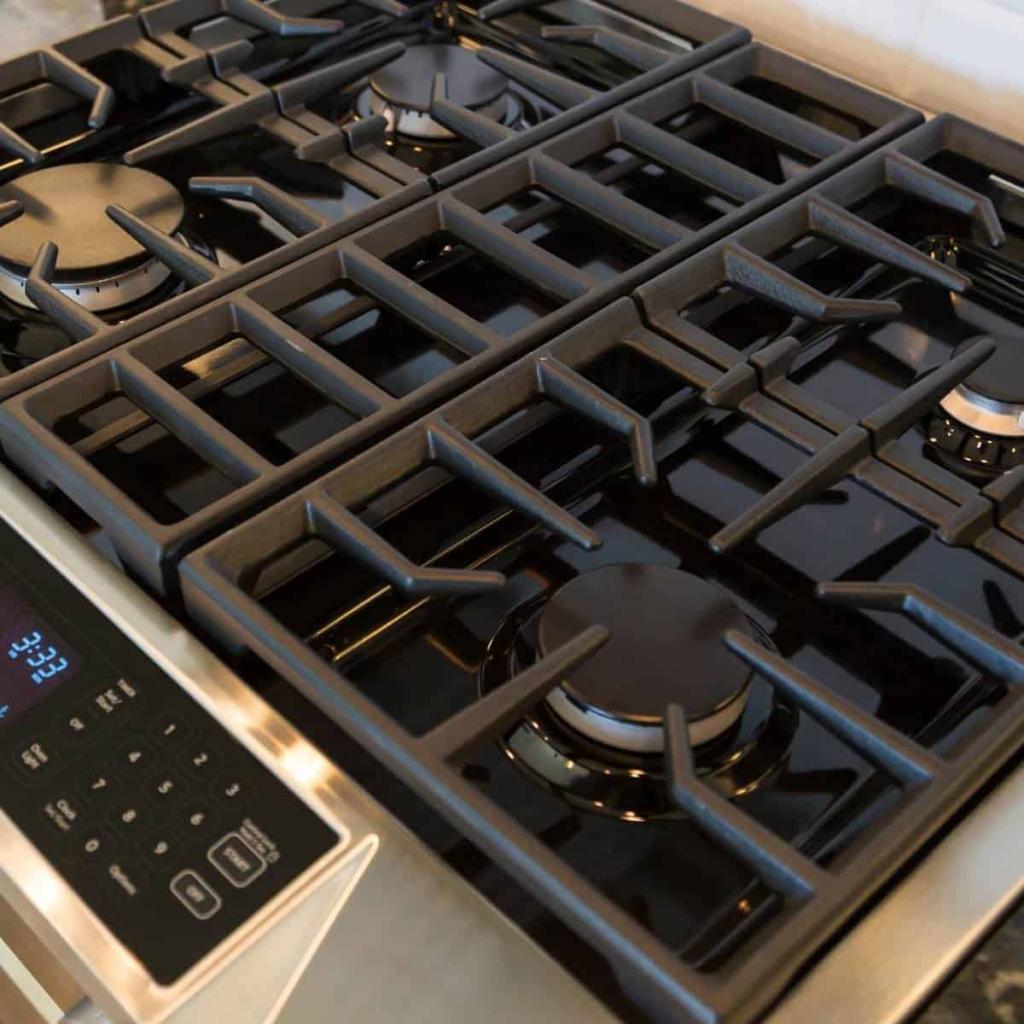
#2. Consider the space
Heating a small area with any type capable of producing a large amount of heat can be done fast. An inexpensive little burner may be the sole option if your living quarters are cramped and nothing else would do. You may be able to get some assistance from your stove’s installation or dealer.
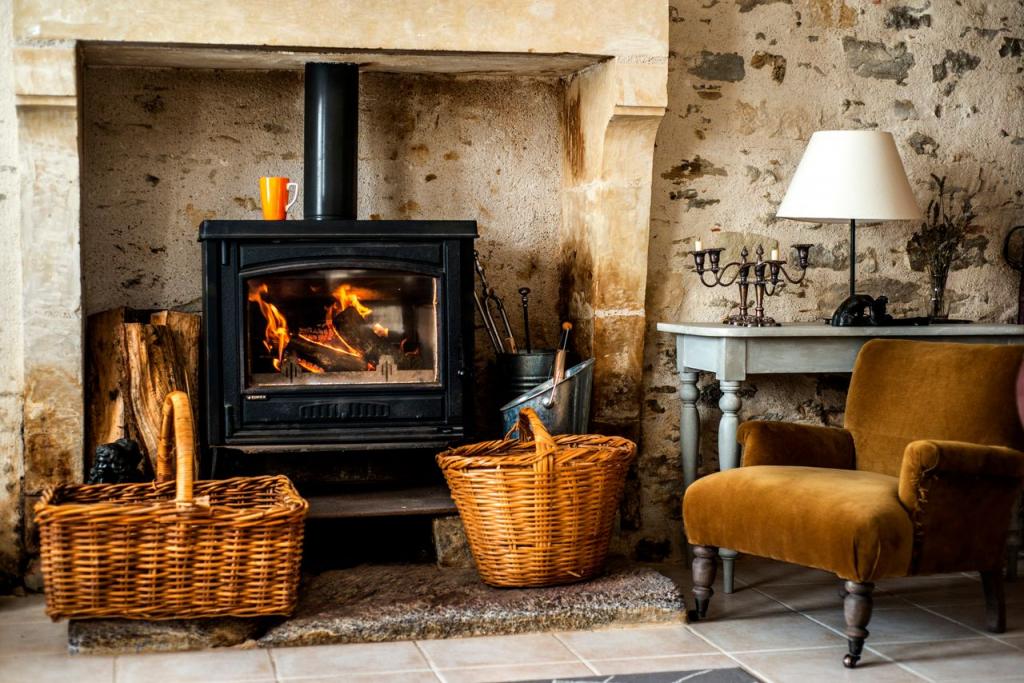
#3. Use quality firewood
It’s important to consider both quantity and quality when purchasing wood. Make sure to find out how potential suppliers estimate the volume of wood they’ll supply you with. It’s best to be suspicious if they say they can fit 128 cubic feet of wood in the back of a truck. If they use a loader, they should expect to get about three-quarters of the cube amount.
Variety and seasoning are the two determinants of quality. Depending on where you live, you might expect a combination of the most common wood species. You must, however, inquire first. Dealers in firewood are only allowed to sell what they currently have on hand. Purchase unseasoned wood before to the season’s onset in order to ensure that it is dry when you need it. There is just a small percentage of “seasoned” wood that is actually seasoned, and it’s priced far higher than virgin wood. This is based on my own personal experiences.
The sole difference between the two is that water is present. Compared to dry wood, greenwood contains 50 percent more water, with a water content of only 15-20 percent. Until the wood is split, cut to a set length, and covered, it retains a lot of moisture. After a tree is cut down, it takes time for the clock to start ticking, and even then, it does so slowly.
To avoid drying out the wood supply, many firewood vendors do not split and cut the wood unless a customer specifically requests it. Determine the stove’s specifications before placing an order for wood. No one should believe, for example, that a 30-inch piece of equipment designed for a 24-inch log can be used. Measure your firebox to get an idea of the amount of wood you’ll need if you don’t already know.
Woodburning Stove From Sheet Steel
Equipment and tools required:
- Mild steel in a sheet. At least 3mm (1/8th) steel and no more than 6mm (1/4th) is recommended unless you have industrial machinery.
My design was based on a piece of 4mm mild steel measuring 1200mm x 625mm that I happened to have lying around, but you can use whatever you choose. Because my stove holds heat well and does not deform when it gets hot, I don’t see why I would want to make it even thinner..
- You’ve got an ally in the Angle Grinder!
Angle grinders are fantastic tools if used properly, and I’ve learned a lot about them while working on this project.
- It’s like putting together a puzzle!
A good jigsaw is an excellent investment because it requires some muscle to cut through steel. Also, invest in nice blades, even if your machine is cheap. Using low-cost blades is a waste of money. It’s a Bosch GST 150 230V jigsaw, and I only use Bosch blades.
- For burr removal, a good quality flat file and a round or half round file are necessary.
- For metal, use fabric-backed Emery paper or Glass paper, which lasts a million times longer.
- Metalwork necessitates a great deal of physical labor, thus perseverance is a must-have skill. In particular, because I’m not cutting my steel with a plasma cutter or any other industrial apparatus. I had no idea how much work it would take and how hefty the finished stove would be when I started making it!
Step 1: Design
Step 2: Grinding/Cutting
Okay, so I’m actually going to get down to business here!
It is necessary to mill a groove on the inside of the sheet steel in order for it to flex evenly.
I cut a strip of 1200mm x 250mm from the sheet that would be the main body and marked it out with a pencil.
Ultimately, it measures 500 millimeters (length x width x height)
You could use a large hacksaw if you want, but I prefer to use an angle grinder for this project because it saves a lot of time and effort in the long run.
A fine 2mm cutting disk was used to cut the groove and subsequently a thicker cutting disk (about 4mm thick) was used to enlarge the slot. To make a decent fold, I hacked off about three-quarters of an inch of steel from the top and bottom.
I used the thin grinder and a jigsaw to cut into the corners of the door opening and finish it up.
Step 3: Folding and Welding
After bending the box, I realized it was far more durable than I had anticipated. I was wary of removing too much of the steel for fear of it splitting. Because I was intending on welding everything from inside anyhow, I wasn’t too concerned about it splitting in one corner.
In the end, I used a blow torch to soften the metal before bending it with brute force and a little elbow grease.
Afterwards, you can simply weld the inside corners of the box – this doesn’t need to be perfect because it isn’t going to be seen, so use it as practice for the more prominent parts. In addition, I welded and flattened the front of the piece from the inside out. Because so much of this joint will be on display, it had to be visually appealing.
This is where the baffle comes in. I cut a piece that would go almost the whole length of the box from the back, leaving only approximately a 30mm gap at the front where hot air can be blown about for the secondary burn.
To make the welds seem good, I cut out the top and welded it into place from the outside. So take your time! In order to avoid catching myself on the corners, I softened them and expanded the top by roughly 50mm all around. Its dimensions are therefore 600mm in length by 300mm in width.
Xem thêm : How To Build A Wood Stove? A Few Tips to Remember
I used a jigsaw to cut out the hole in the stove top after drilling a few holes around the circle. The damper in the flue was then made from this piece.
When the base was attached, I welded a few little tabs inside for the base to attach to, drilled and taped them to accommodate some countersunk allen-keyed bolts that I had on hand. The bottom of the base rests flat against the ground. I didn’t get any pictures of this when it was still in progress, but I plan to do so after it’s finished.
Step 4: Door, Hinges and Air Vents
4mm sheet was used to cut the door. For a good seal with the rope, it is 10mm larger all around. Using Ebay, I purchased a fire rope that came with the necessary glue, and it works great.
To save time and money, I chose to use a huge vent on the front instead of a glass in the entrance. If you want to view the flames, all you have to do is leave the door open, and the fire will continue to burn just fine.
The hinges were made by drilling a hole in a small piece of flat bar and inserting it into the hole. When I was ready to weld the round bar into the bottom hinges, I ran a 6mm threded rod through both hinges and withdrew it. As a result, the door can be lifted off the hinges while the box’s pins are still in place. In the second photo,
Marked out and drilled out the corners of the Bio-Hazard vent form before using a jigsaw to cut it out. It looked fantastic with just a little hammering and filing! Sadly, I was too busy destroying it to take any pictures of the process.
I’ve subsequently installed a thin vent cover that rotates to display the holes and has a wire handle to keep it from overheating.
For the secondary combustion, I also installed a vent on top of the doors. To assemble, I simply laid the flat bar on top and used a drill to align the holes in each piece. Once the small brackets and a ring were in place, I welded them in place.
Step 5: Flue and Legs
For the flue pipe, I purchased a 3m piece of mild steel 4′′ pipe with a 2mm-thick wall. The stove’s body absorbs most of the heat, so it didn’t need to be particularly thick. I paid around £50 for this from a local metal supplier.
I used a 500mm and 1000mm piece of wood and a simple tab mechanism to attach them together with a pin for this stove.
I felt as long as it was above my head, 1.5m above the stove’s top (approximately 2m from the floor), it would be sufficient.
In the shorter length of the flue, I welded a flue damper to a piece of the top that had been cut out and welded to two bolts that had been inserted into the flue. This was a little tricky because I had to solder the bolts into the flue from the interior. The damper is now operable from the outside, thanks to a small lever I welded on.
I made a flue collar out of an old 24′′ steel ruler that was bent and worthless. However, because it’s so snug, I didn’t bother to apply the same pin join. I wrapped it into a circle and then soldered it around the hole in the top to hold it in position.
Using an old school chair’s legs (sample attached), I welded nuts to the stove’s interior and sent a bolt through the side so I can transport it. Legs:
Step 6: Spray and Finish
Plastikote WoodStove Paint from ebay (LINK) is heat resistant and lasts a long time — the stove has been outside for the best part of six months over the winter and it’s still perfect.
The surface should be sanded with some Emery Paper to provide a good “key” for the spray to adhere to before applying the paint.
The spray I used required “cooking” after I returned home, so I set up a small fire and let it burn for many hours. After that, you may heat it to your heart’s content. I’ve got the sides glowing a bright straw yellow and the paint hasn’t fallen off yet!
In the meanwhile, because it bends in the middle and I have to flatten it every time I use the stove, I constructed a crude grate out of some strong wire mesh.
It looks wonderful, and I’ve already received offers for it, as well as at least two real requests from folks who want me to design them a custom version.
In order to cook two medium-sized pans simultaneously, the top has a large enough surface area to accommodate this. This kettle can boil a simple camping kettle in around 5 minutes once it’s warmed up to the right temperature.
Please let me know if you have any questions or comments on my first Instructable, and I’ll do my best to react as soon as possible.
23 DIY Wood Stove
If you’re looking for a way to warm up outside, nothing beats a wood stove. These stoves are not only stylish, but they also perform well in any setting. Wood stoves are a must-have for any room, be it the kitchen, the garden, or the patio. Additionally, these stoves are a great option for those who enjoy repurposing and recycling old items. However, how can you build a little wood stove from scratch?’ Is it even possible to construct these stoves at home? Are there any great do-it-yourself wood stove plans out there? What do you think?
1. Minion Styled Log Burner
Make a DIY wood stove if you have kids at home or if you are a fan of the minions! As the title suggests, this one is all about the flames and the heat. Patios of various shapes and sizes benefit from the wood burner’s durability and custom fit. To make things even better, all you’ll really need is an old gas canister or any other bottle. It’s as simple as following the instructions! Afterwards, you’re left with a gorgeous, hand-crafted wood stove. So, if you’re not scared to flaunt your individuality, this wood stove is a must-have!
2. Get The Rocket
It’s yet another great approach to cook with wood in your regular routine that you should try. The primary purpose of these stoves is to make the wood incredibly hot and smoldering. Just get the fire insulated, and then start directing the heat to where it’s most needed. That’s all there is to it!
3. Barrel Wood Stove
This is yet another clever idea to turn a barrel into a working wood stove. What’s the most important thing to remember? Starting and completing this project is a breeze, and it’s also very budget-friendly. You’ll need a barrel, some high-quality barbeque paint, and a stove kit to get started. Optional extras include barrel plate kits and grates (best made of cast iron).
4. Pot Belly Wooden Stove
This is a wood stove that will keep you warm and toasty during the cold winter months. To put this this stove, all you need are butane tanks, mesh, and cement! Unlike some other homemade wood stoves, this one doesn’t have a dreadful appearance. Contrary to popular belief, it’s small and stylish.
5. Basic Wood Stove
The Basic Wood Stove, as the name implies, is best suited for those searching for a basic wood stove. Only a few simple items are needed to build this steel stove. With the help of this lesson, setting up a stove is a lot easier than you might have expected!
6. Backpacker’s Wooden Stove
Xem thêm : How To Replace Fire Bricks In A Wood Stove? Ultimate Guide
Wooden stoves are a must for backpackers, who spend a lot of time outdoors. Carrying a stove outside, on the other hand, can be difficult due to their weight. However, we have a solution in store for this problem! Yes, a backpacker’s DIY wood burner made from tin cans, can openers, and knives is now within reach. If you’re interested in learning more, check out this guide.
7. Thermal Stoves
These stoves, which are constructed from a thermal mass rocket, are a fantastic choice for aspiring do-it-yourself wood stove builders. You don’t need any special technical skills, and the work is a lot easier than you may expect. The thermal mass-powered architecture ensures substantial heat release and low product development costs.
8. Water Heater Wood Stove
Do not be alarmed if you have old junk in your house! That’s because they can be used as a DIY wood stove. You can build one of these stoves for less than $50 in this guide, which teaches you how. This is a great feature because you can keep it just about anyplace.
9. In-Built DIY Stove
Warmth and coziness can be brought into your home by using this method. This stove is both gorgeous and functional, making it ideal for the holidays. Check out this tutorial for more information on how to make it at home with simple materials.
10. DIY Small Stove
Portable and tiny stoves are an excellent option for folks who are short on space. To get the project started, all you’ll need is a little propane cylinder. It is critical that the valve be snipped out prior to using the cylinder. Putting it all together will only take a few minutes and cost you under $20.
11. DIY Wood Stove in Mobile Home
This stove is ideal for those who prefer to cook on the go or in a contemporary home. If you’ve got a small indoor room that has to be heated, this idea may be worth the effort, as there are multiple videos to follow. The stove isn’t very large, and it also has a very stylish design.
12. Steel Barrel Wood Stove
These stoves are produced by removing the head of a steel barrel, as you might expect. Despite the fact that it necessitates a moderate amount of welding and other technical work, the directions are straightforward. However, because to the large amount of tools required, this stove is only suitable for highly skilled carpenters.
13. Hot Tent DIY Stove
This stove, too, is a great alternative for travelers because it employs inexpensive materials that can be found at most hardware stores. There is no need to buy any additional equipment for this project because everything is included in the video itself. In addition to step-by-step instructions for building a wood burning stove from scratch.
14. Smoke-Free Wood Stove
What if you could create a smoke-free wood stove? You’ve got it now. Learn how to build a smokeless stove by watching the linked video. It may take a little longer and require a few more supplies, but the design is straightforward enough that anyone can build it.
15. Mini Wood Stove
Small tents or rooms that don’t require a lot of heat will benefit from this heater. In addition, they are a cinch to put together. If you’re wondering how the stove generates immediate heat, it warms tealights. This is an excellent guide that takes you step-by-step through the entire procedure using simple word and image directions.
16. Pyramid DIY Wood Stove
If you enjoy spending time in the great outdoors, this DIY wooden stove is for you. If you’re an accomplished metalworker, you’ll need to do this project. In most cases, it will only take you a few hours to complete this task.
17. Piglet Wood Stove
This stove, like the minion stove, can be put together in a matter of minutes. To execute this project, you’ll need a few metalworking equipment and an old metal gas container.
18. Wood Stove for Your Garden
This stove is a good place to start if you want to build a barbecue on your patio. The chimney on this stove is made of sand and cement. Also, a bucket with at least five gallons of water is needed for the mold. Because you’re working with concrete, this design necessitates several phases and a significant amount of time to set. It will be worth your effort, though, to build your own DIY wood stove! In addition, these materials are reasonably priced, yet extremely long-lasting.
19. BBQ DIY Wood Stove
You may construct this BBQ do-it-yourself stove from high-quality metal to make it portable and handy. Only the metal will be able to withstand the ferocious heat produced by burning wood. In addition, this design allows for the rapid generation of hot heat for cooking. It takes about 2.5 minutes to bring 1 liter of cold water to a boil on the stovetop. If you don’t want to be feeding the fire all the time, this design is ideal because it’s tiny enough to heat up quickly and not burn for hours at a time, just enough time to cook with. The device is both efficient and easy to make.
20. Halloween Wood Stove
This easy-to-build wood stove is perfect if you get a little too excited about the approaching holiday season. It’s not only beautiful, but it uses very few resources as well. However, it will take some time, so be patient and follow the directions carefully.
21. Space Shuttle Stove
This is a fantastic stove with a rocket-like construction and the ability to burn wood. If you’re comfortable with working with metal and have the proper equipment, you can easily make this piece. This is a simple design with visual and textual instructions, so it could be a suitable starting point for those who are new to mechanical work.
22. Frontier Stove
A gas bottle is all you need to construct this stove, which is ideal for camping or hiking because of its small size and portability. Even though the directions are straightforward, it is imperative that you observe all safety precautions when constructing this stove. This is a more advanced metalworking design, however each step is described in depth and illustrated. In addition, there is a list of materials and tools needed.
23. Darth Vader Stove
An empty bottle can be used to build this furnace in the style of Darth Vader. To spruce it up, you’ll need some old iron and paint. Doing so can be both risky and subject to legal repercussions. The empty LPG cylinder can be purchased for a reasonable price. If you’ve ever wanted to create something truly unique, you’ll need a lot of skill to pull it out.
FAQs
Can you build a wood burning stove?
Getting a barrel is the first step in making a cheap indoor woodstove. It must be a metal container with no openings. These days, you may be able to find one for a reasonable price in your area. It is time to go on to the following step once you have found a metal barrel.
Can I install my own wood heater?
Attempting to install a wood-burning fireplace on your own is not recommended. It’s best to leave the installation of wood stoves to people who have received the appropriate training and certification. The advantages of having a home wood stove installed by a qualified professional outweigh the hazards.
What is the smallest wood burning stove available?
One of these stoves is the Dickinson Newport. In order to conserve on floor area, it is one of the most compact wood stoves available. It weighs just 15 lbs. and dimensions 7.88′′(w) x 14.7′′(h) x 10′′(d).
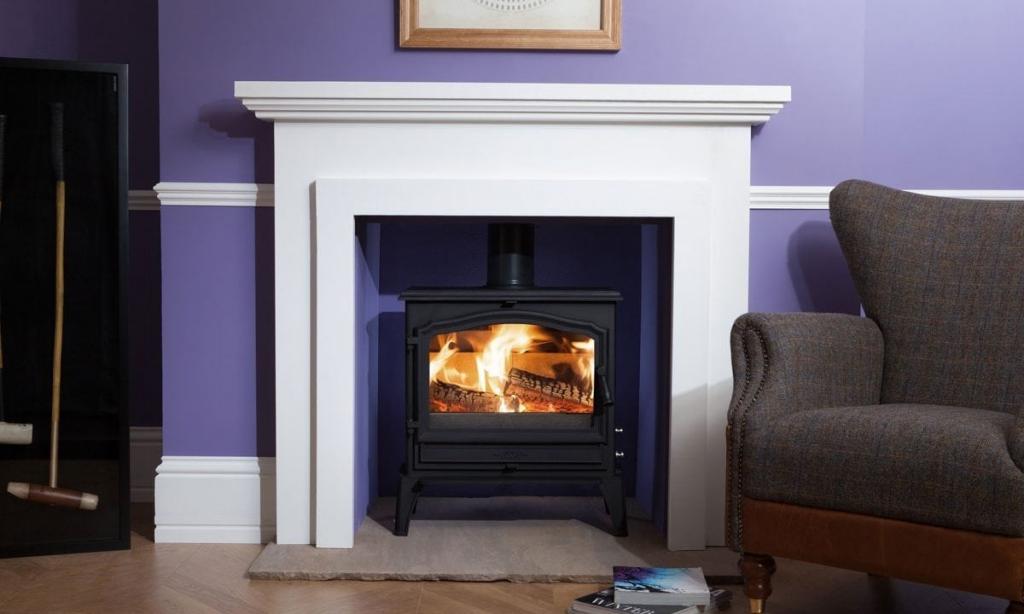
What goes under a wood burning stove?
Stone, particularly slate and granite, is the most popular and ideal material for a wood-burning stove’s hearth. Hearths made out of glass and steel are also available. It’s safe to use these at high temperatures without fear of shattering or creating a risk of fire.
Do you close the damper on a wood stove?
During nocturnal or maintenance fires, such as when you go to the grocery, close the damper nearly shut. Smoldering coals and current smoke can escape through the flue pipe because to the low airflow, but there isn’t enough airflow to support flames or large-scale wood consumption.
Why is there a hole in the bottom of my wood stove?
In order to start a new fire in a clean fireplace, ashes are deposited in the ash pit at the bottom of the fireplace. Ash pits can be large enough to retain a season’s worth of ashes, so they don’t need to be emptied in bad weather.
Which kinds of wood are best suited to being used as fuel?
In addition to being the simplest way, it is also the most efficient. Also, keep in mind that having a wider variety of wood on hand will benefit you in the long term. My hickory stove has kept me warm in the past when the weather was really chilly, but it quickly became overflowing with coals, and even the coals weren’t enough to keep me warm. When combined with less dense timbers, hickory produces stunning results.
Unless you’re using it as kindling, it’s better to avoid burning softwoods. Any other approach may result in a chimney fire destroying your stove, requiring immediate attention to the problem of excessive creosote buildup.
If you’re not sure what kind of wood to burn, go to a professional wood-burner or a state forester about your options. You’ll develop your own preferences and dislikes over time. You might be interested in reading about why my wood stove smokes up the house..
It’s A Wrap!
There are a slew of more ways to improve the efficiency of your wood-burning stove aside from those already listed. When it comes to effective wood-burning stoves, location, appropriateness, and quality of the fuel are the most important factors. We recommend reading up on how to dispose of ashes and how to install a wood-burning stove in your garage. A wood-burning stove can now be built by you!
Nguồn: https://spasifikmag.com
Danh mục: Stoves